
Photo locations, techniques and technology. Highlights of locations we frequent as well as features on how and why we shoot the way we do, including gear reviews specific to nature photographers.
A month in the Kootenays
As it was just the start of winter, it can be a challenge to get places to shoot nature. Most travel from Nelson requires traversing at least one mountain pass which can and most likely will have some significant snow and ice and can also be rather treacherous to drive.

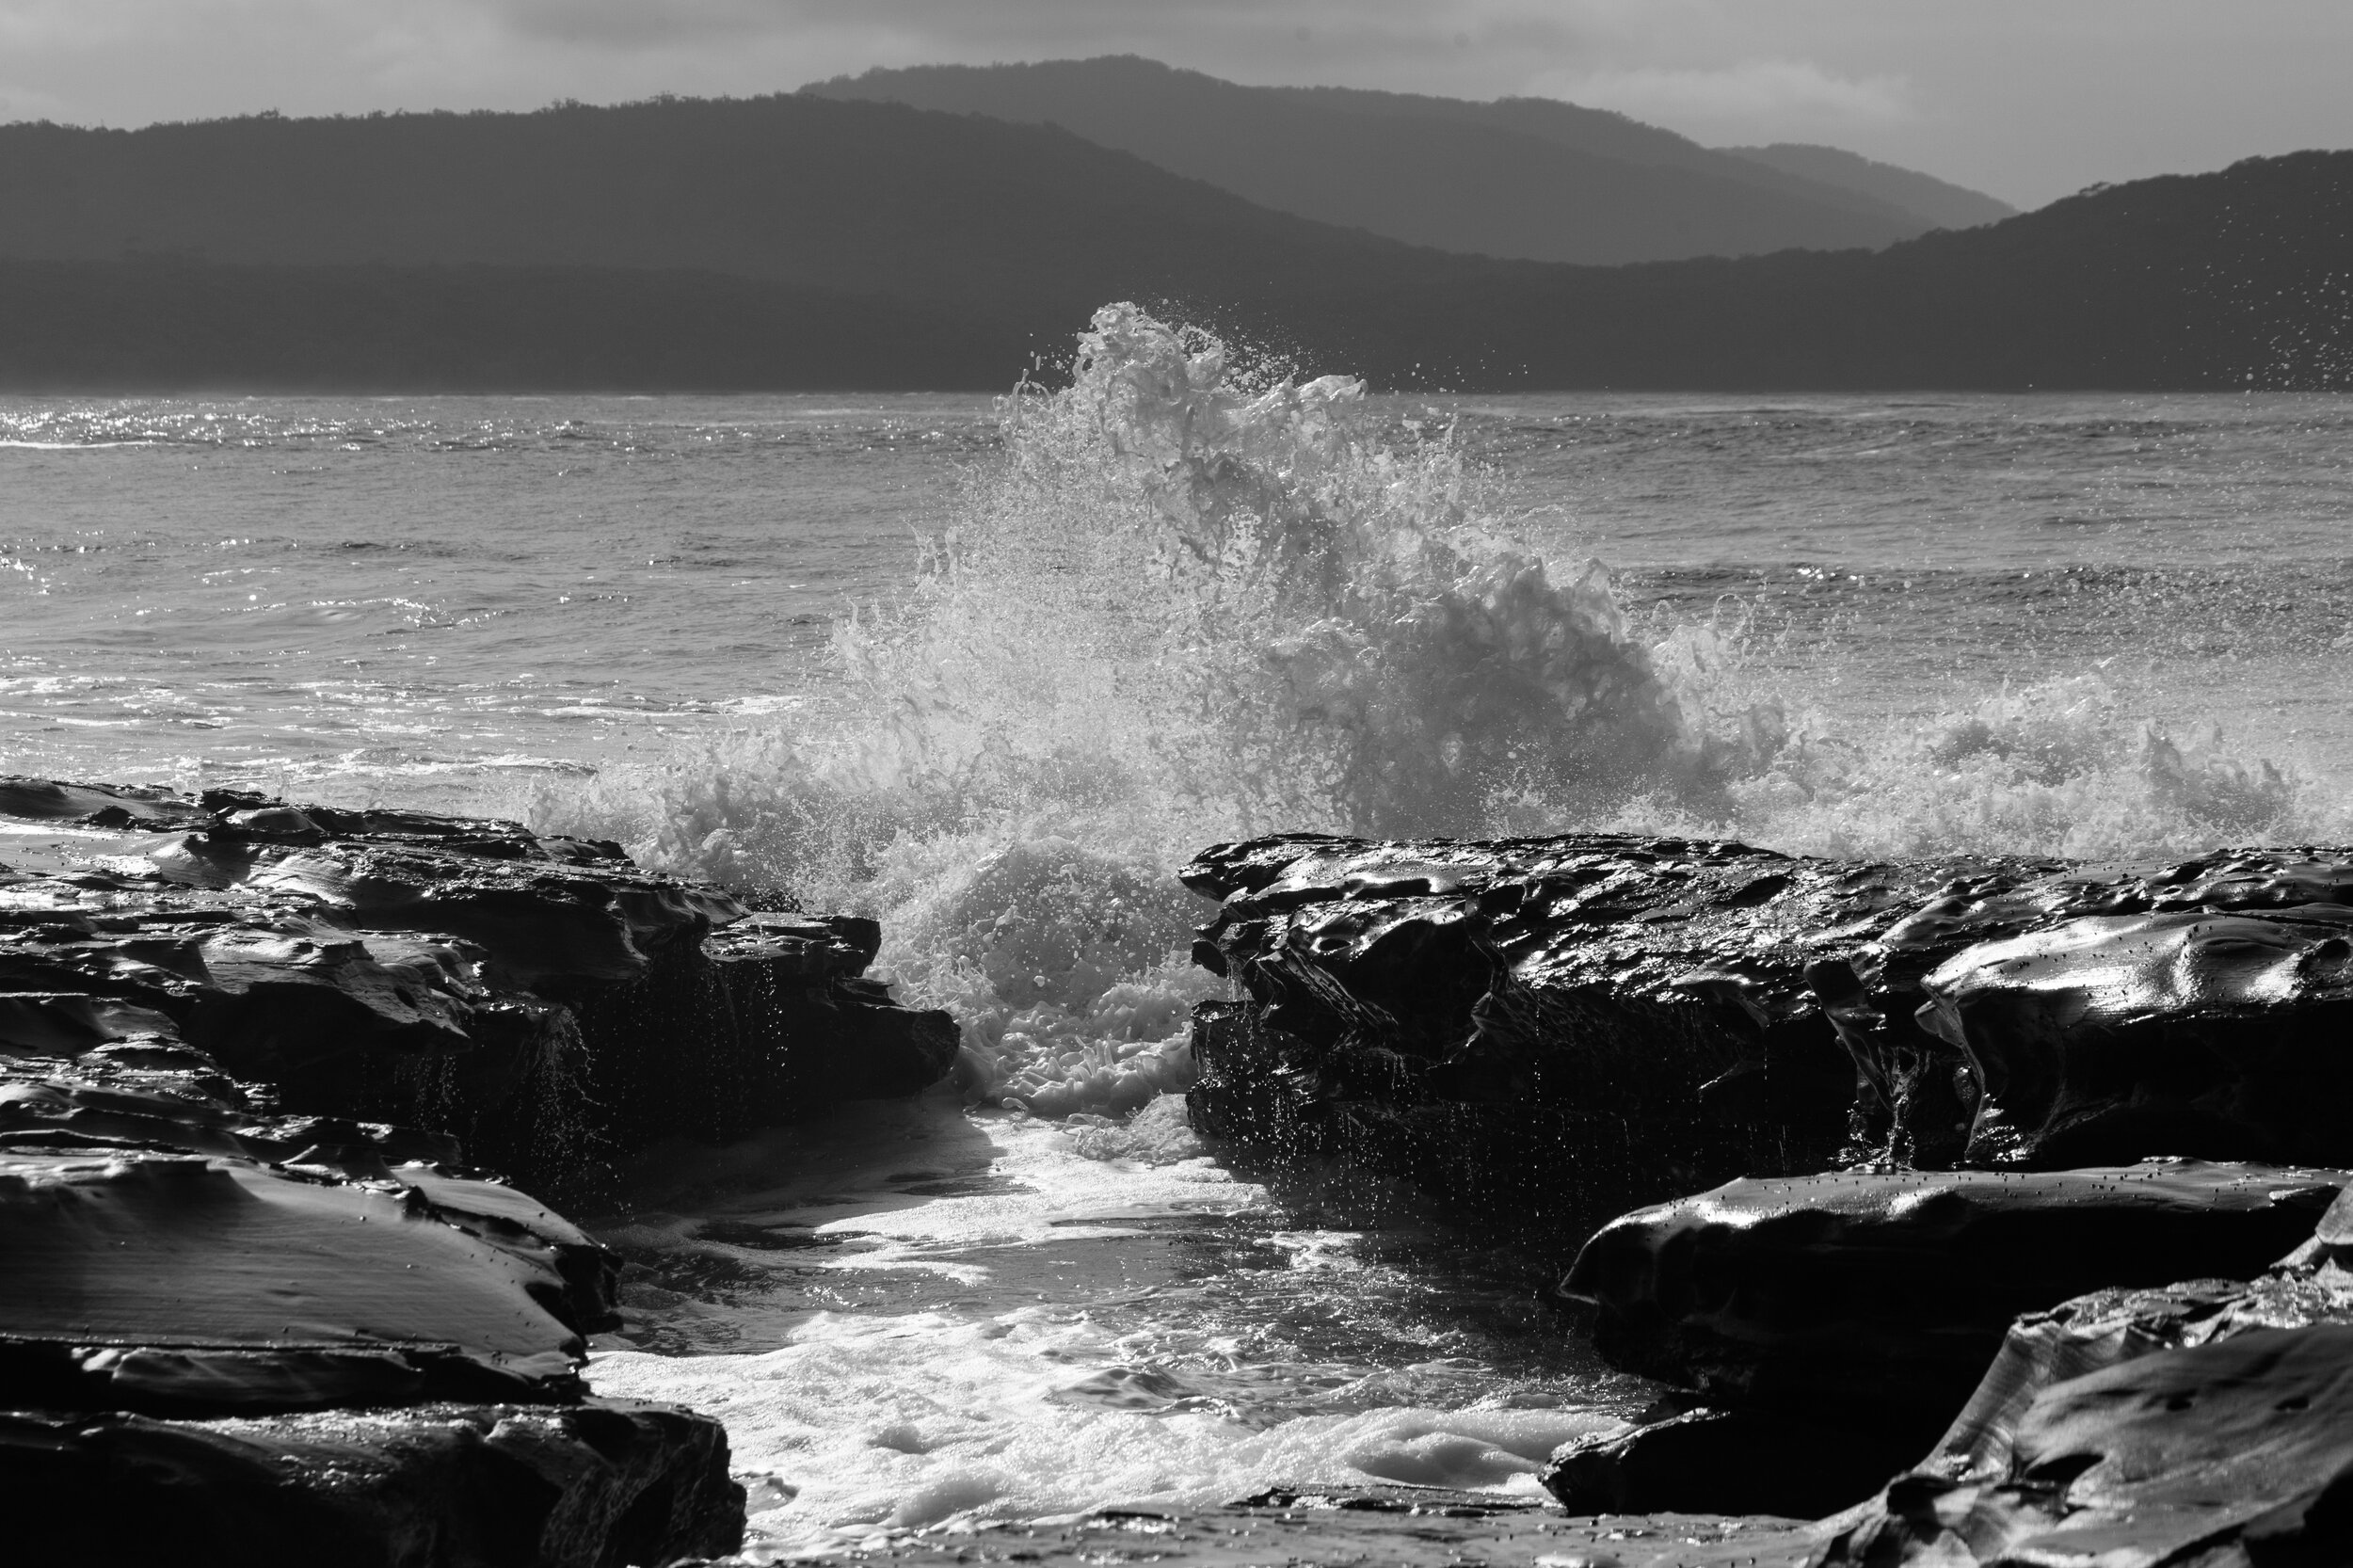
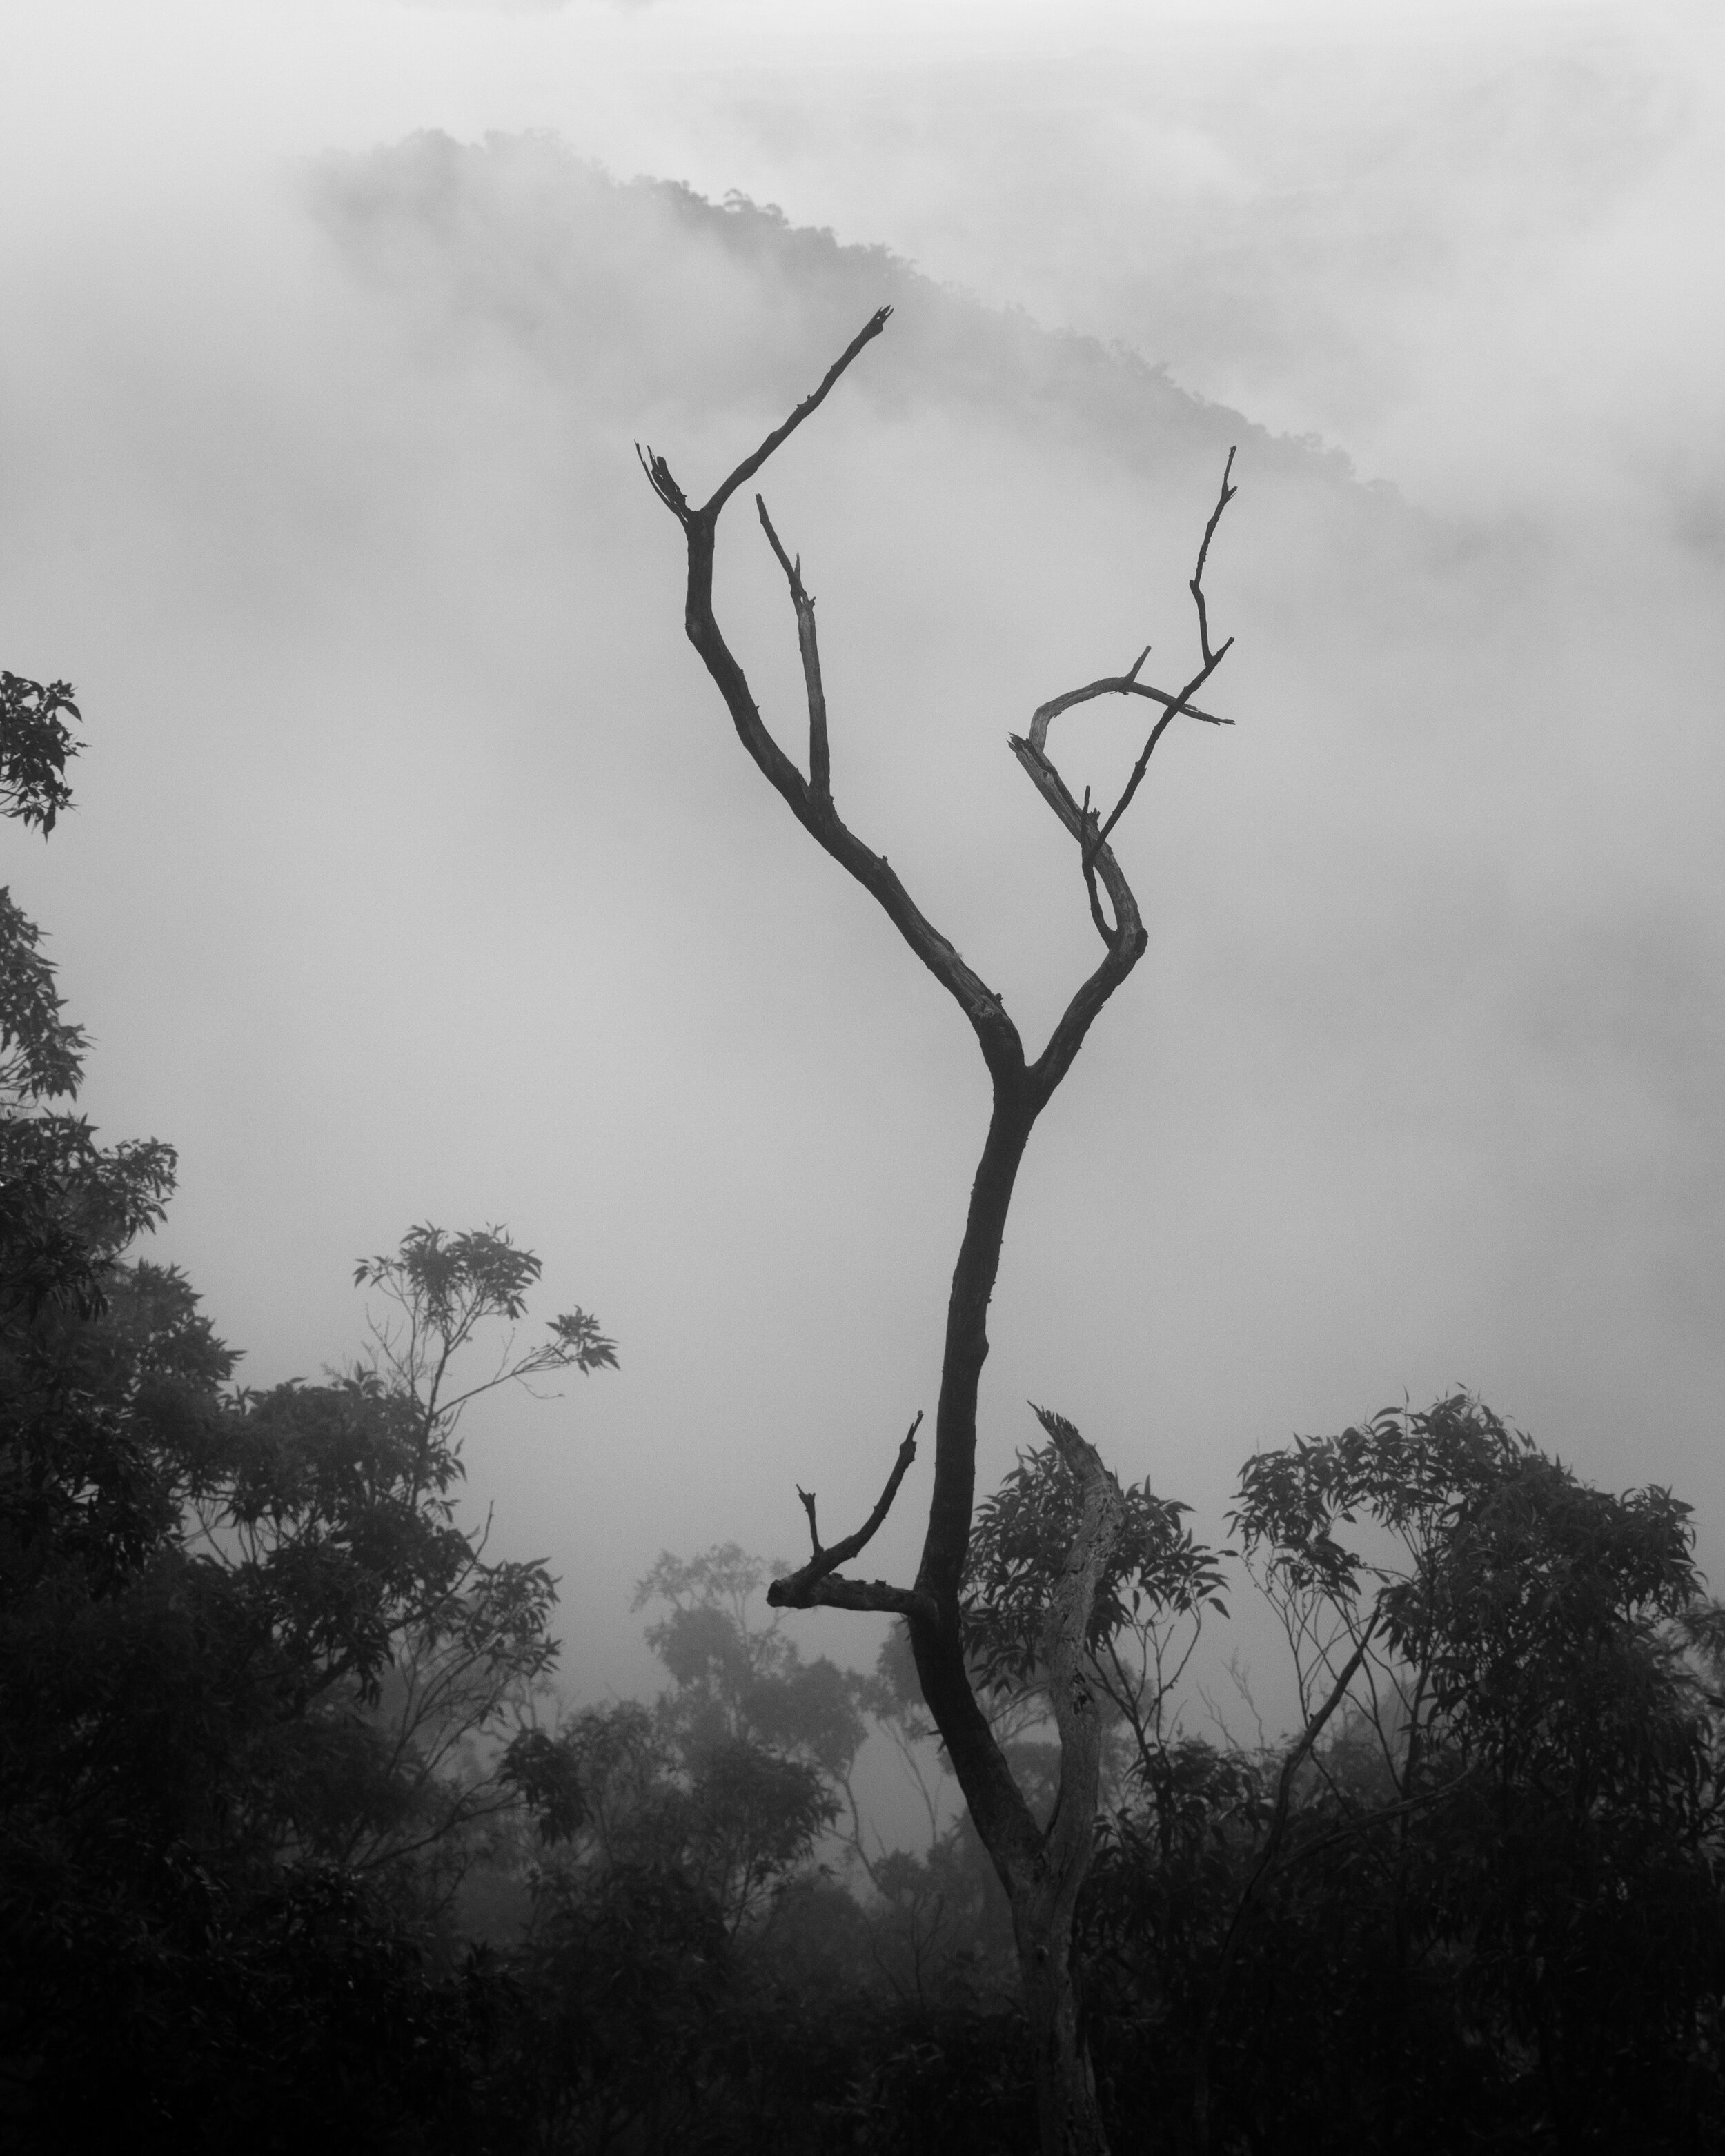
The clouds dropped deep into the Slocan Valley.
As part of our move to the western end of Canada we stayed for a month in Nelson, BC. Nelson is a pretty little town tucked away on the side of a mountain on the shore of the west arm of Kootenay lake.

A view into Nelson and the sort of famous Big Orange Bridge from the rail trail.
As it was just the start of winter, it can be a challenge to get places to shoot nature. Most travel from Nelson requires traversing at least one mountain pass which can and most likely will have some significant snow and ice and can also be rather treacherous to drive. That being said, these times can result in some spectacular locations for shooting landscapes.
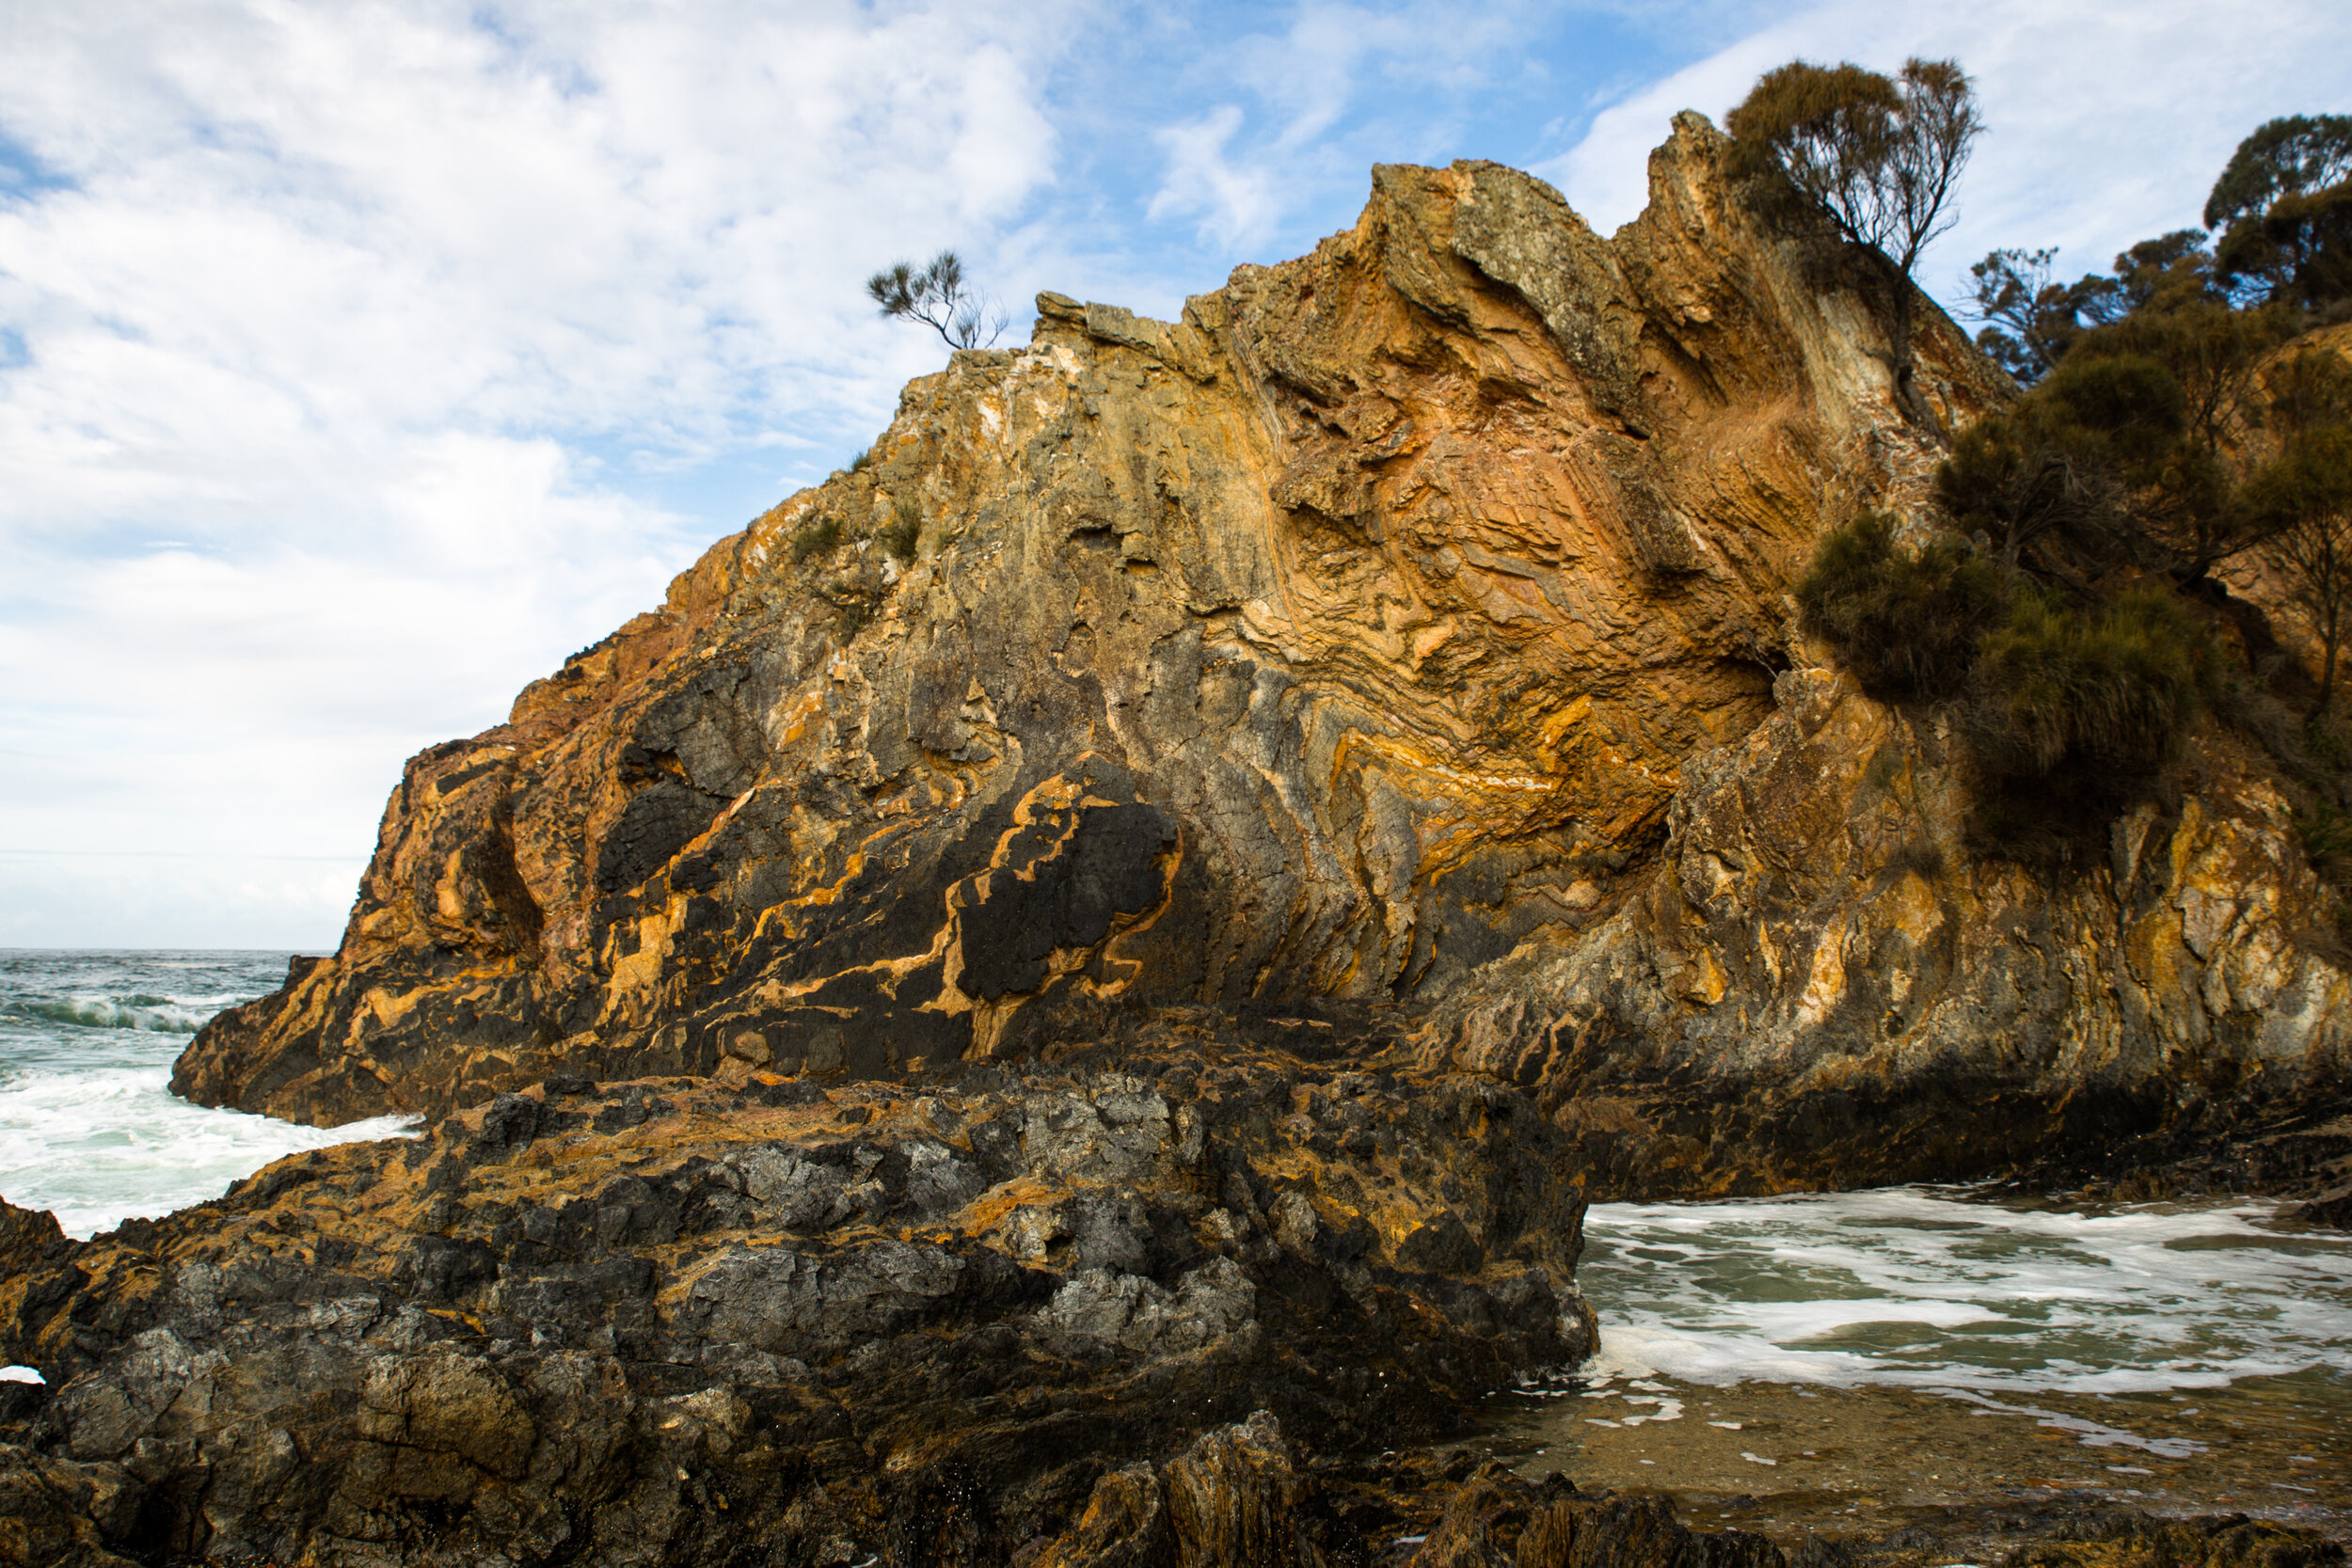
In the East Kootenays there are a number of hot springs that can take the cold out of your bones. One such area in which we managed to get some very pretty shots was at Fairmont Hot Springs in the Eastern Kootenays. This first shot was taken above the old hot springs overlooking the western mountain range as the sun was setting. The steam from the hot springs really seemed to just fit with the clouds both below and above the mountains.

Although this view was pretty amazing, looking behind us showed off some amazing looking mountain peaks. The photo below was taken with some lovely side light hitting the furthest mountain range. I tried to wait for the optimal lower cloud coverage to add in some more depth to the shot but had to temper that with the light disappearing behind the clouds.

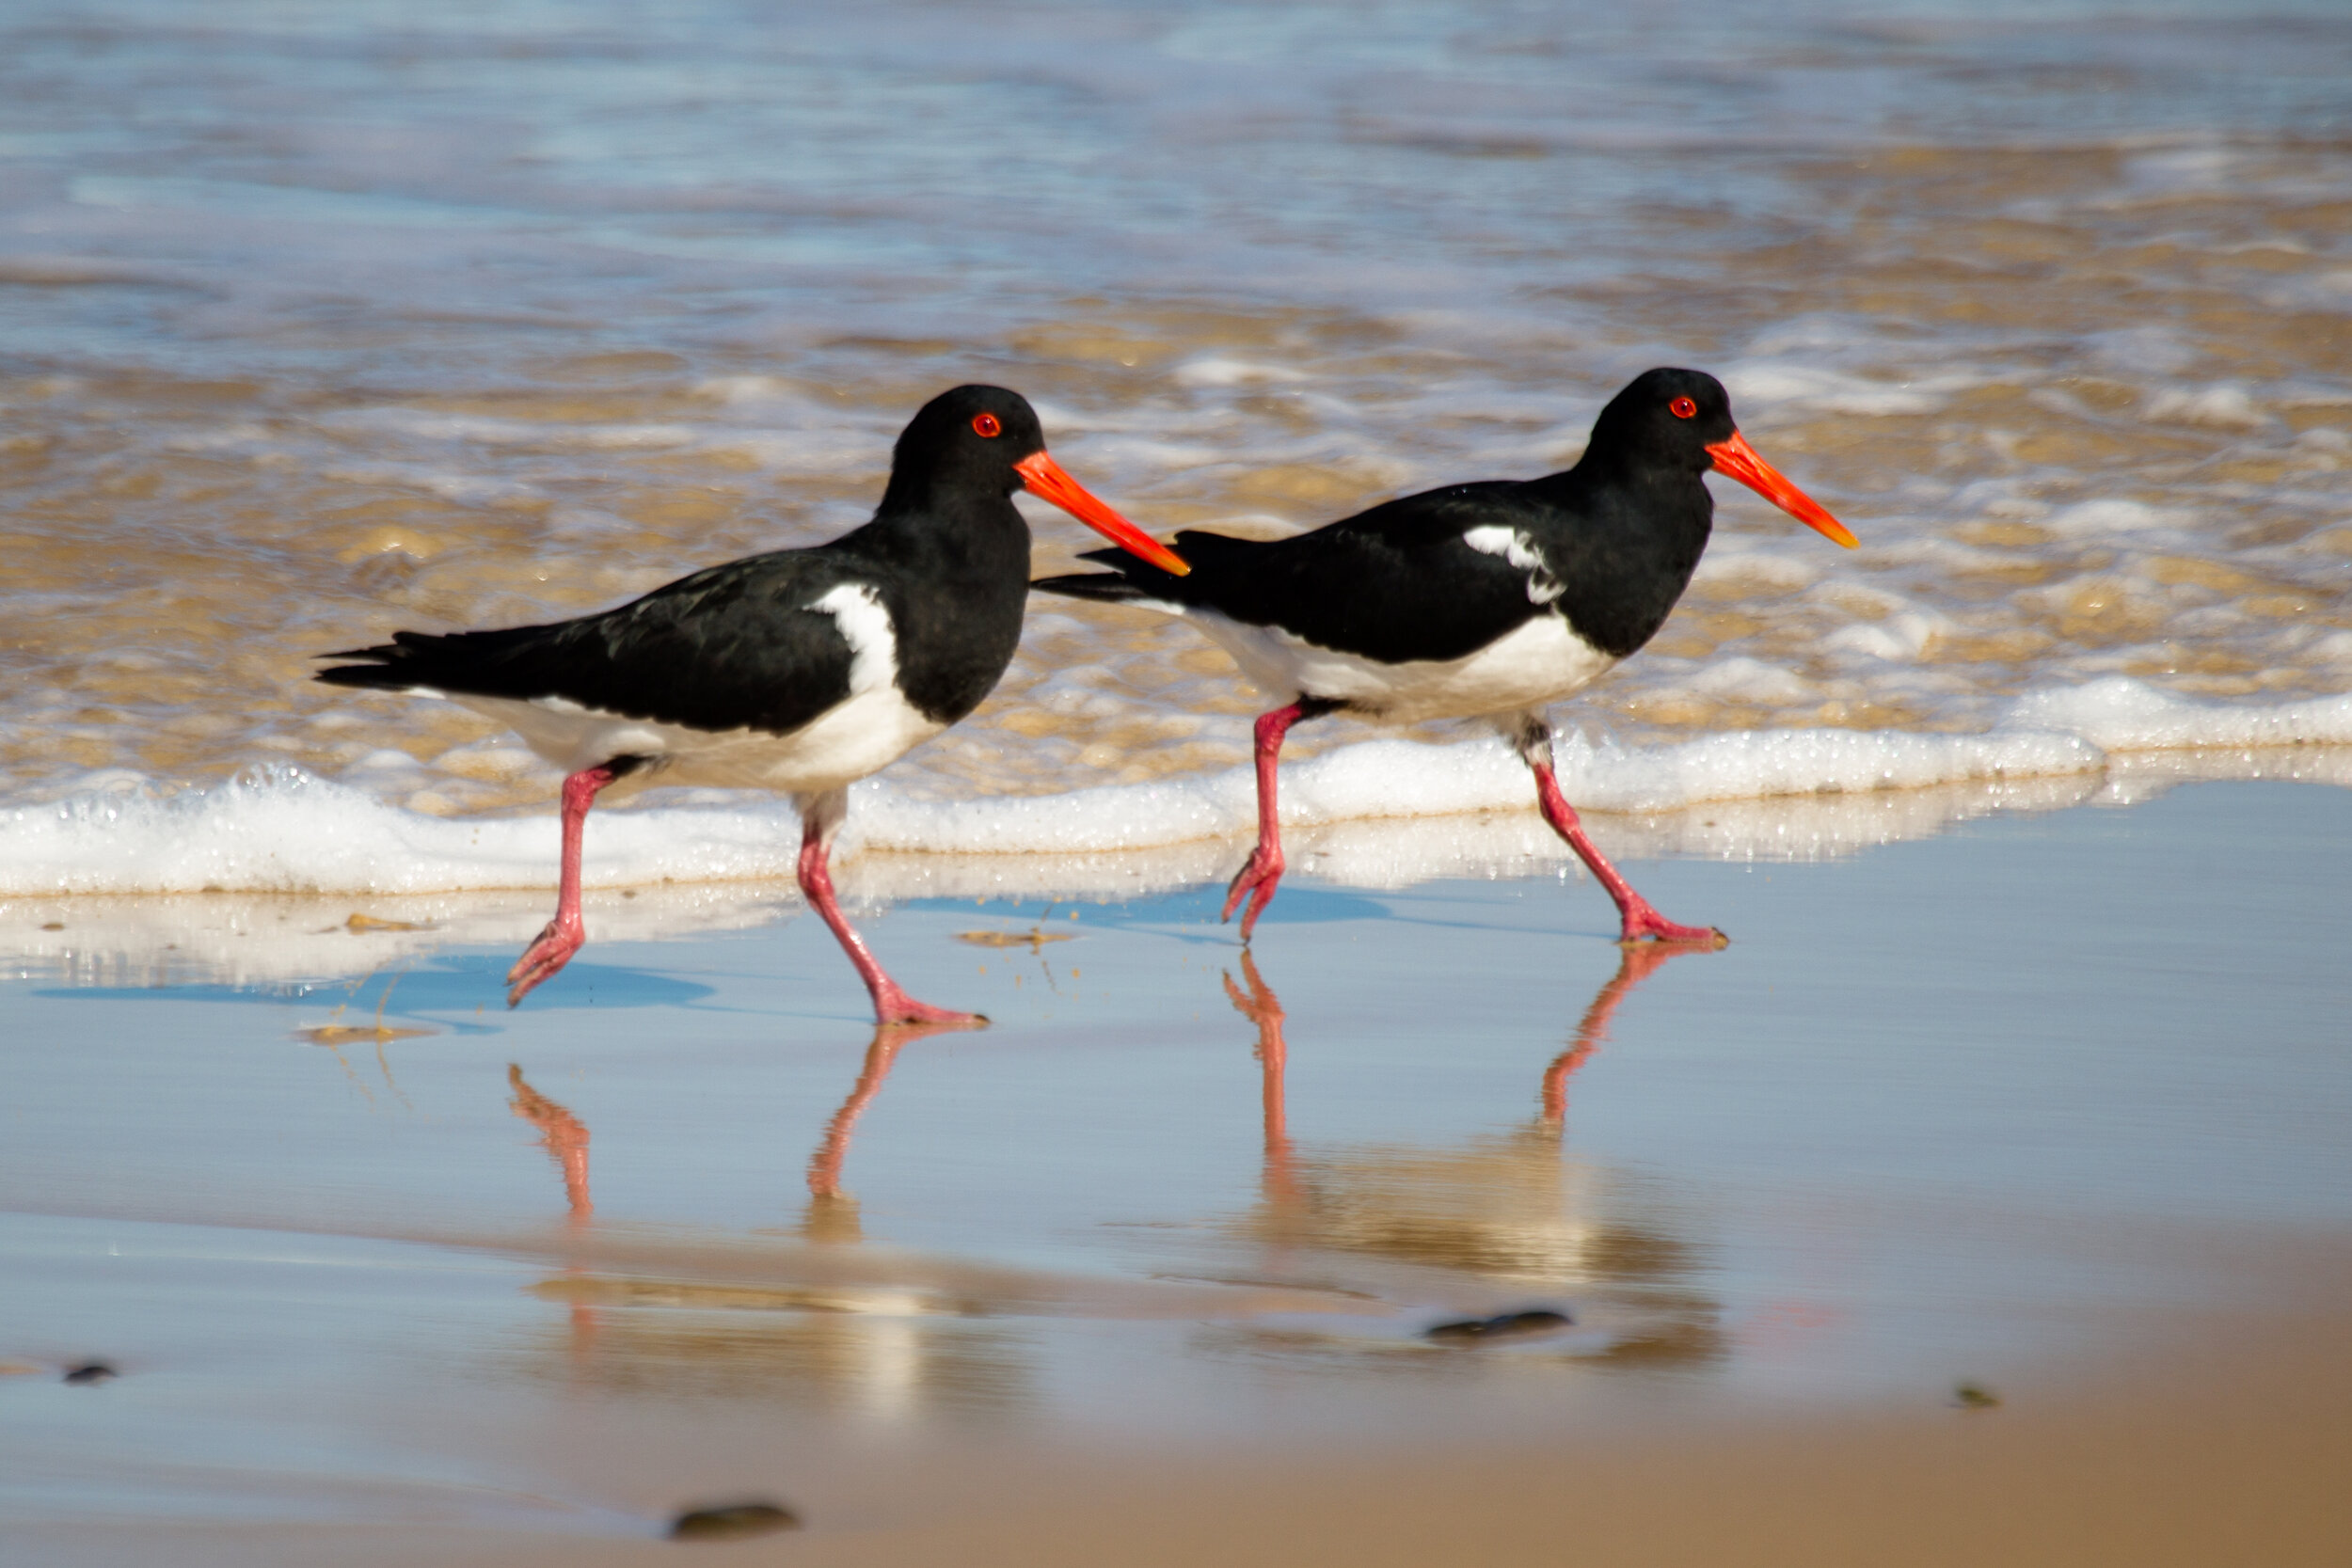
Back in the west Kootenays we travelled up the valleys a number of times and found a few interesting locations to shoot. One in particular seemed to be good for Bald eagles along the river edge. With nearly constant cloud inversions isolating the eagles from the background was not difficult at least in some cases. The difficult part was getting just the right amount so that there was some background and not just another high key bird shot.

Moving up the Slocan Valley we stopped at the small town of New Denver. This town is on the eastern side of Slocan Lake with beautiful views in nearly every direction, this view north was pretty amazing. There are so many places to go from New Denver.

North heads to some larger mountains and pretty little mountain lakes, this shot was taken on the edge of Summit lake. East takes you across a pass again towards Kaslo. This is an area we will go back to explore again both in winter and summer.

The area around Nelson itself is beautiful. In the winter it can be rather warm one day and in a few hours you could be wandering through a foot of snow. Beautiful, but even in town where the streets are all on a slope it can be sketchy driving or even walking sometimes. The rail trail above town has some of the most pleasant walks in the area. Of course the picture below shows what that trail can be like after a little heavy snow.

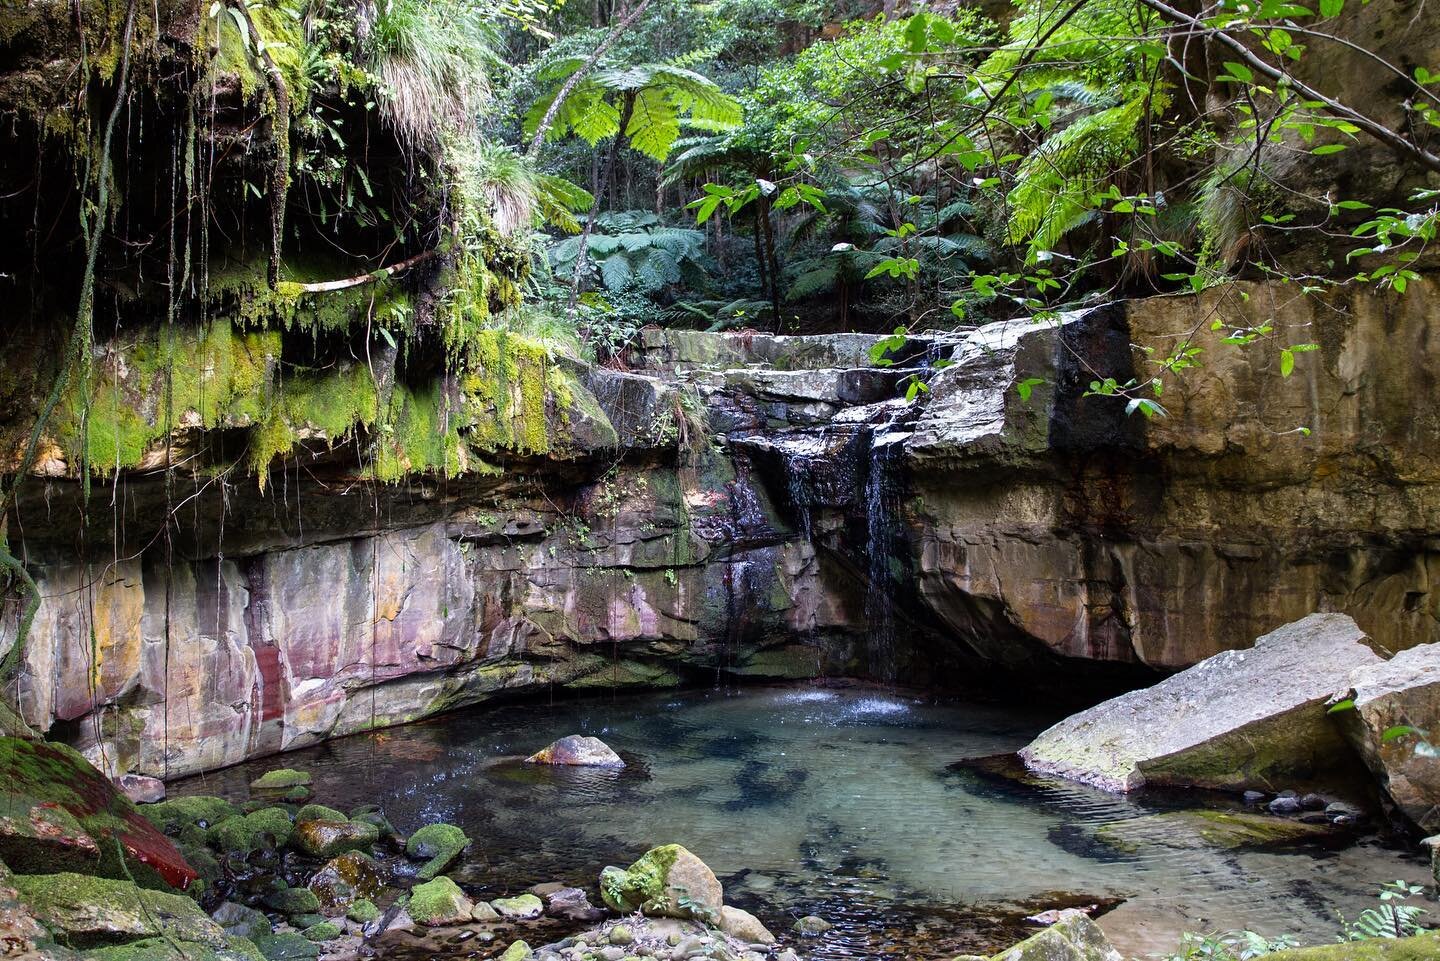
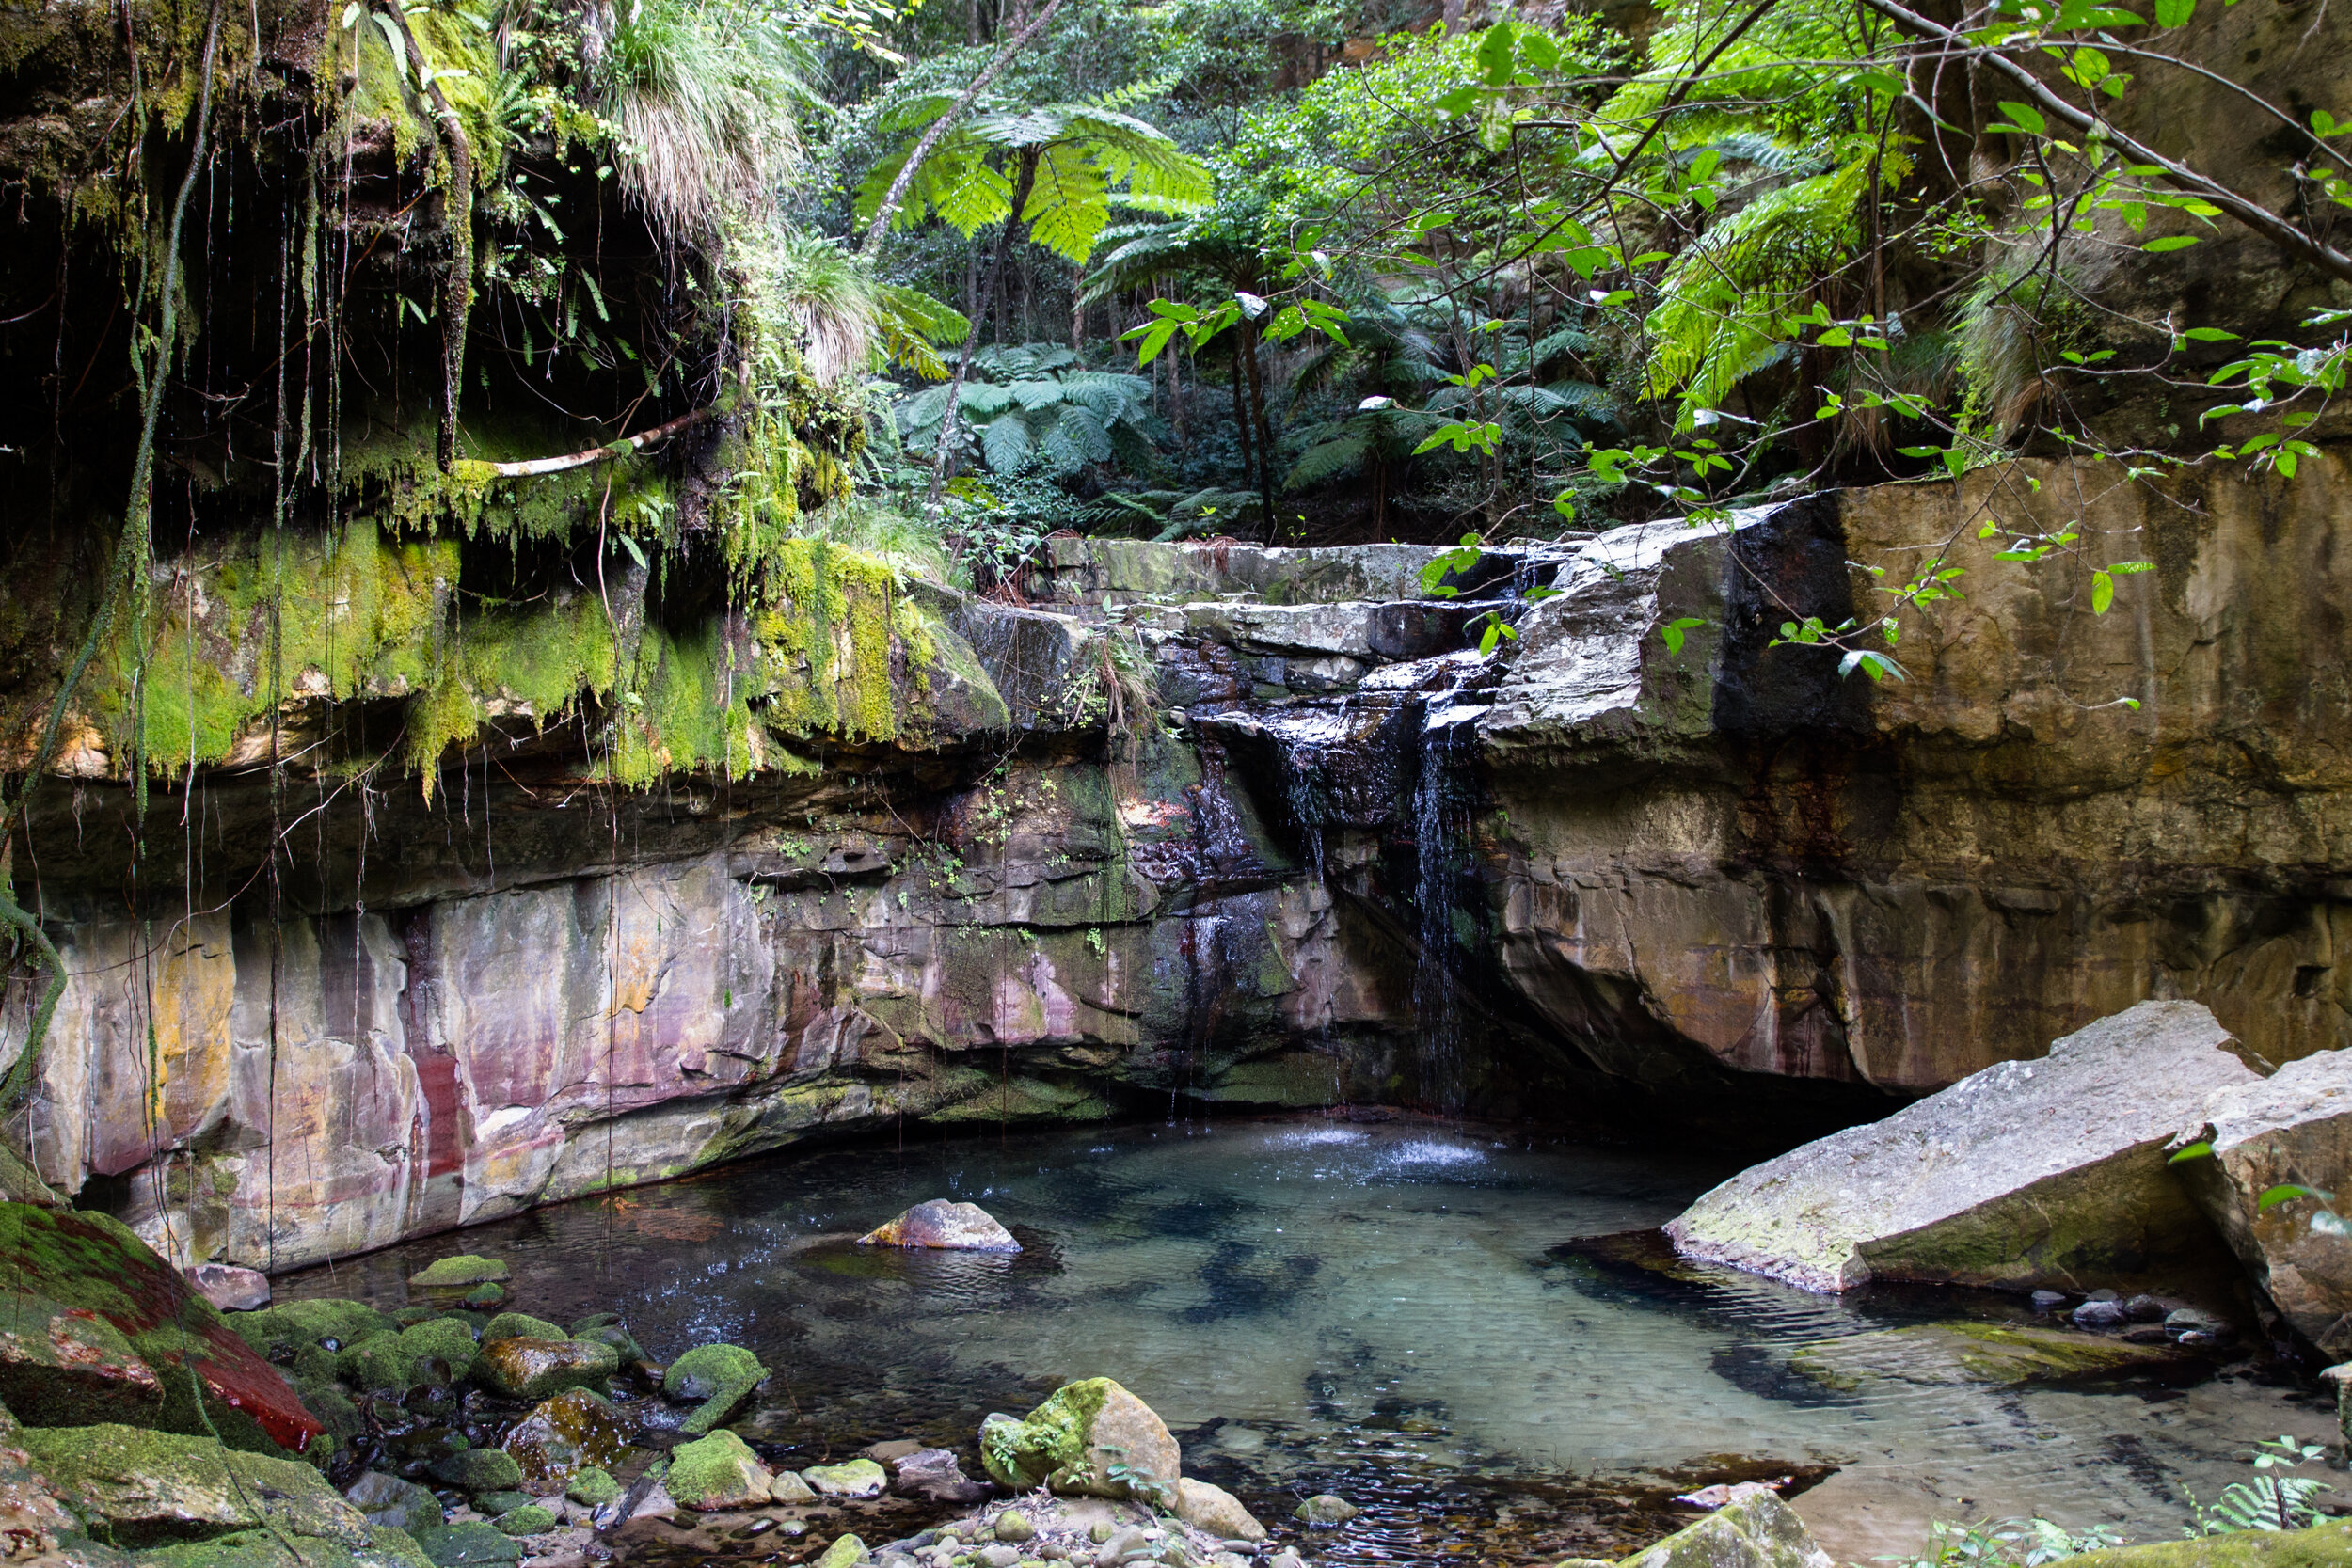
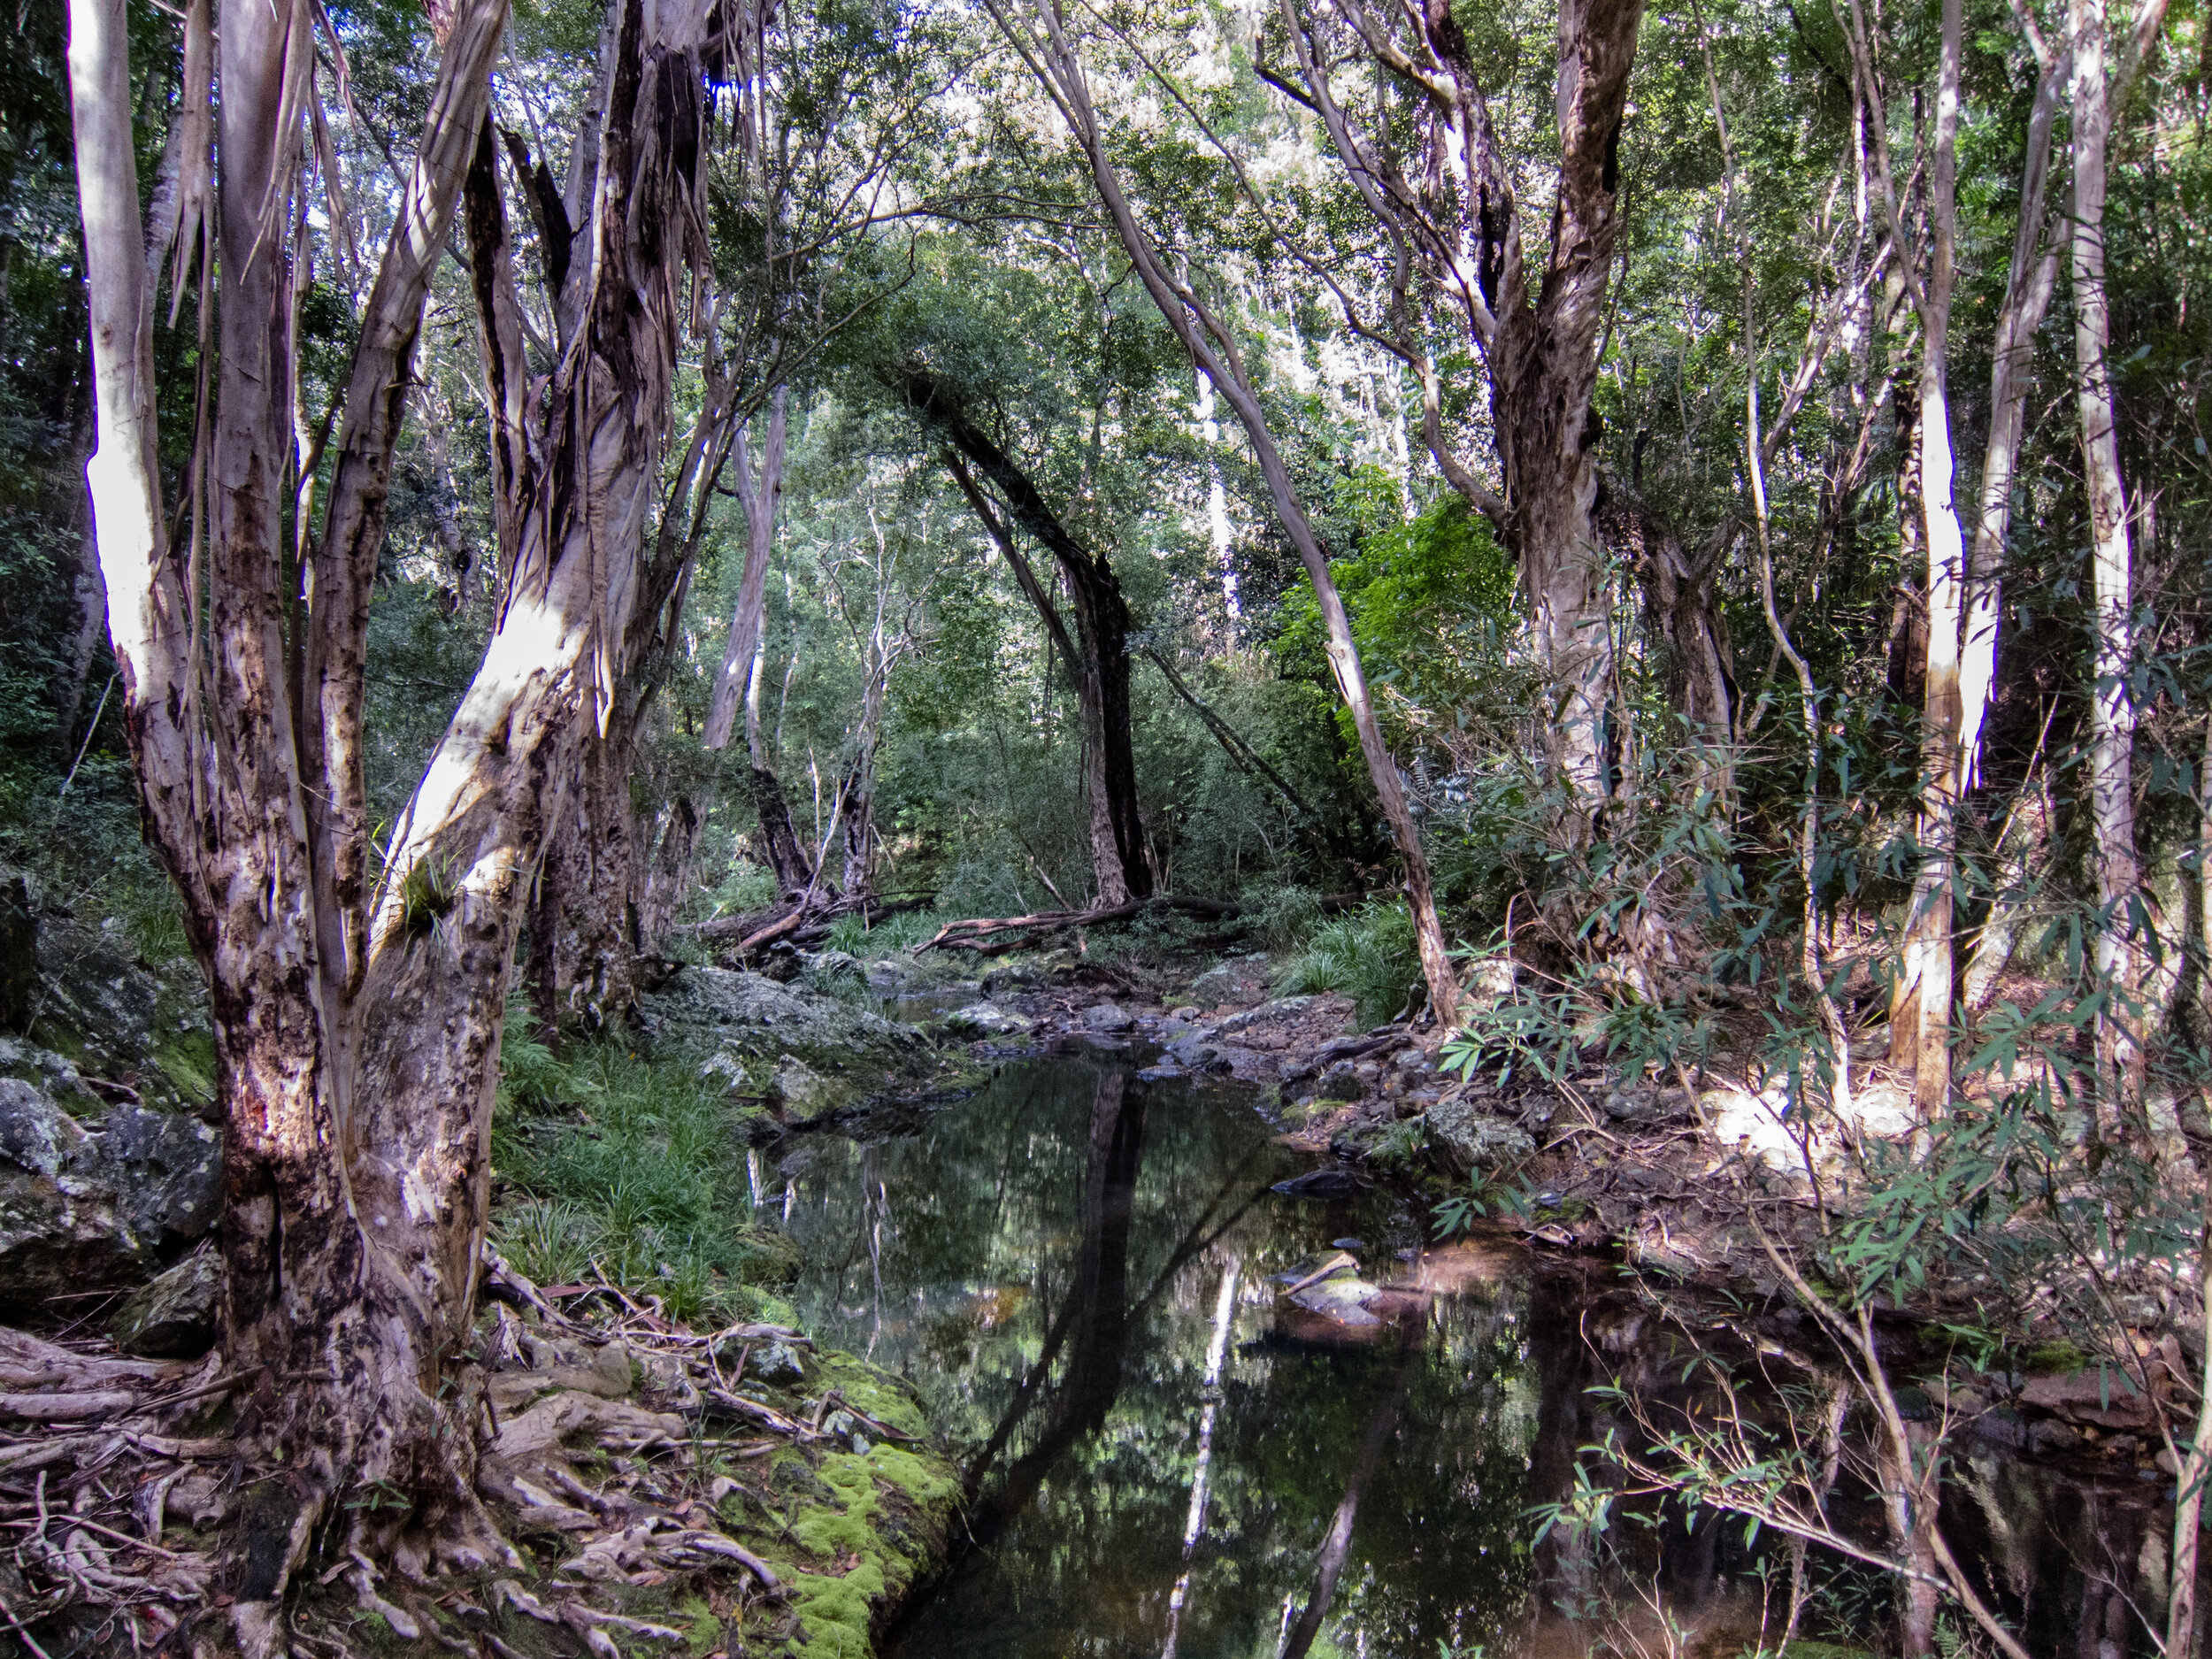
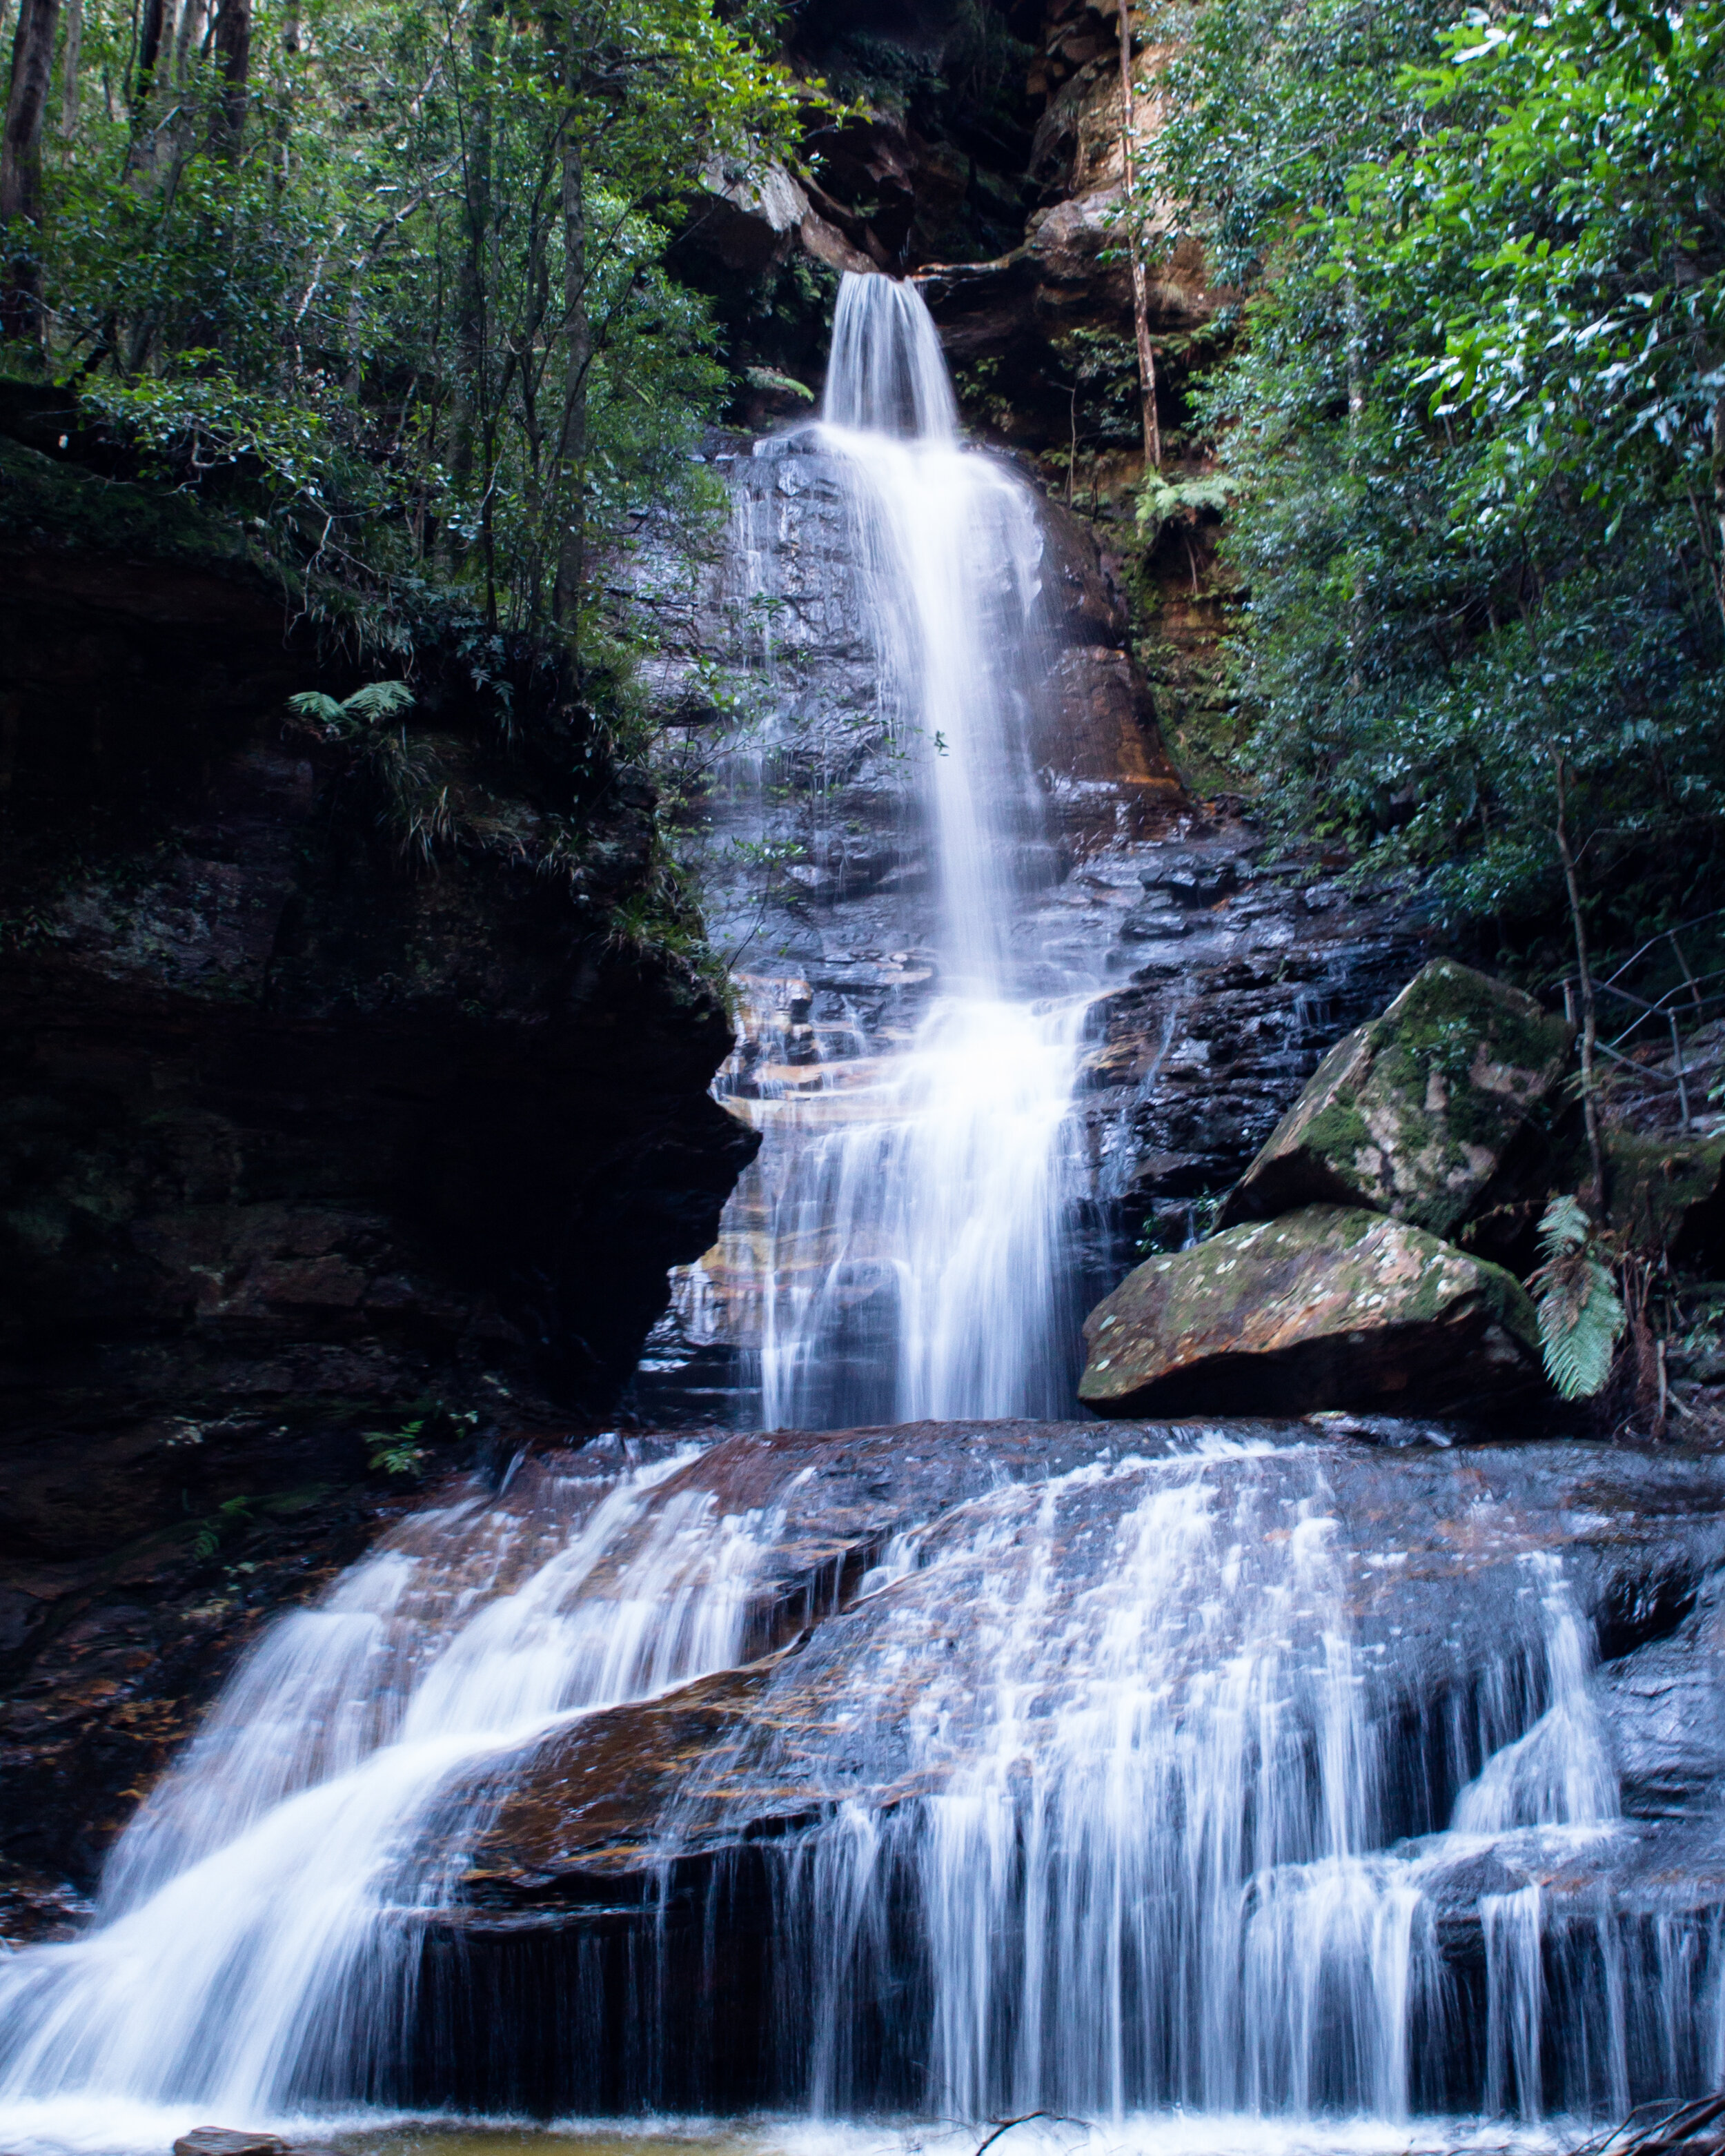
Down closer to the lake we did get to explore Kokanee creek provincial park, at least the lower portion. This pretty park is a good place for hungry bears in spawning season but at this time of year it was just us…at least up at these little falls.

This was a quick view of the Kootenay region from our short time here, my next article will look closer at the wildlife in the area that we were able to see in the area.

12 Best Photos of 2020
Last year will go down as one of the oddest years for most. It definitely wasn’t the best year for nature and landscape photography but I still managed to get out and get some shots for the portfolio.

Last year will go down as one of the oddest years for most. It definitely wasn’t the best year for nature and landscape photography but I still managed to get out and get some shots for the portfolio. From a photography point of view it started pretty well for me, getting chances to get shots of a Northern Hawk owl that decided to stay the winter in a location that was 20 minutes from Salwa’s father, and I got to spend a couple weekends in upstate New York with Short Eared owls before the border shut down.
1
The first shot on the list is of the Northern Hawk Owl taking off.

This was taken on a cold February day with a bunch of other nature photographers taking in the action. This owl stayed in the little marsh in a small town in Ontario for a good portion of the winter. It seems that there was so much to eat that it would keep a bunch of voles stashed in the trees around the marsh. This particular shot was taken with the Sony A7RIV and the 200-600 at 600mm, f/6.3, 1/3200 s, and ISO 800. Cropped to 5x4, I wanted to focus on the look in its eyes as it took off. This was easily worth standing in -20 degree weather for before it decided to take off.
2
Some of my favorite shots this year were of the Short Eared owls, watching them hunting over the fields is amazing. I first went to the place they affectionately call Shortyville with a photographer I met while wandering around a little park in Buffalo. Since he had been before it made it easy to get to the right locations and find some of the best spots that the owls had been seen hunting. This was a well known sight for locals that would return each year with the migrating owls, but there were many farmers fields in which the owls might hunt each night. We got lucky this night as we saw one shorty and a harrier flying over a field just before sunset. It became a 40 minute shoot as a couple of owls and the harrier hunted across the fields continuously. The light wasn’t great most of the time but there were a few moments where the light and the action coincided to get some spectacular in-flight moments.

I picked 2 of my favorite shots from these outings to be on this list. The first, a banking shot as the owl was looking to dive shows off the wing spread and that amazing look of concentration. This was taken near dusk with the A7RIV, the 200-600 with the 1.4 teleconverter and was cropped afterwards to square. It was taken handheld at 840mm, f/9, 1/4000s, ISO 3200 and brightened half a stop in Lightroom.
3
This second shot was taken as the Short Eared owl glided back up towards me over the farmers field.

The grass and twigs in the foreground helped to give a bit of depth to the shot. What I love though is how the colors of the owl match the surroundings so well with the white to match the snow and the browns match many of the shades in the field. This shot was taken with the same setting as above but since I was shooting in aperture mode the shutter speed came down to 1/2000s since the background was a bit darker than the sky in the previous shot.
I probably could have picked another 10 shots of the Short Eared and Northern Hawk owls for this list but these as my favorites. You can see more of these in the following blog posts.
SHORT EARED OWLS IN SHORTYVILLE (OR HOW I LEARNED TO STOP WORRYING AND LOVE MY 200-600)
SONY A7RIV AND FE 200-600…ON TO THE NEXT LEVEL
4
I was able to do a little Astro photography last year, one night in particular as we were trying to get shots of Neowise comet I stayed out to capture some wide angle shots of the Milky Way.
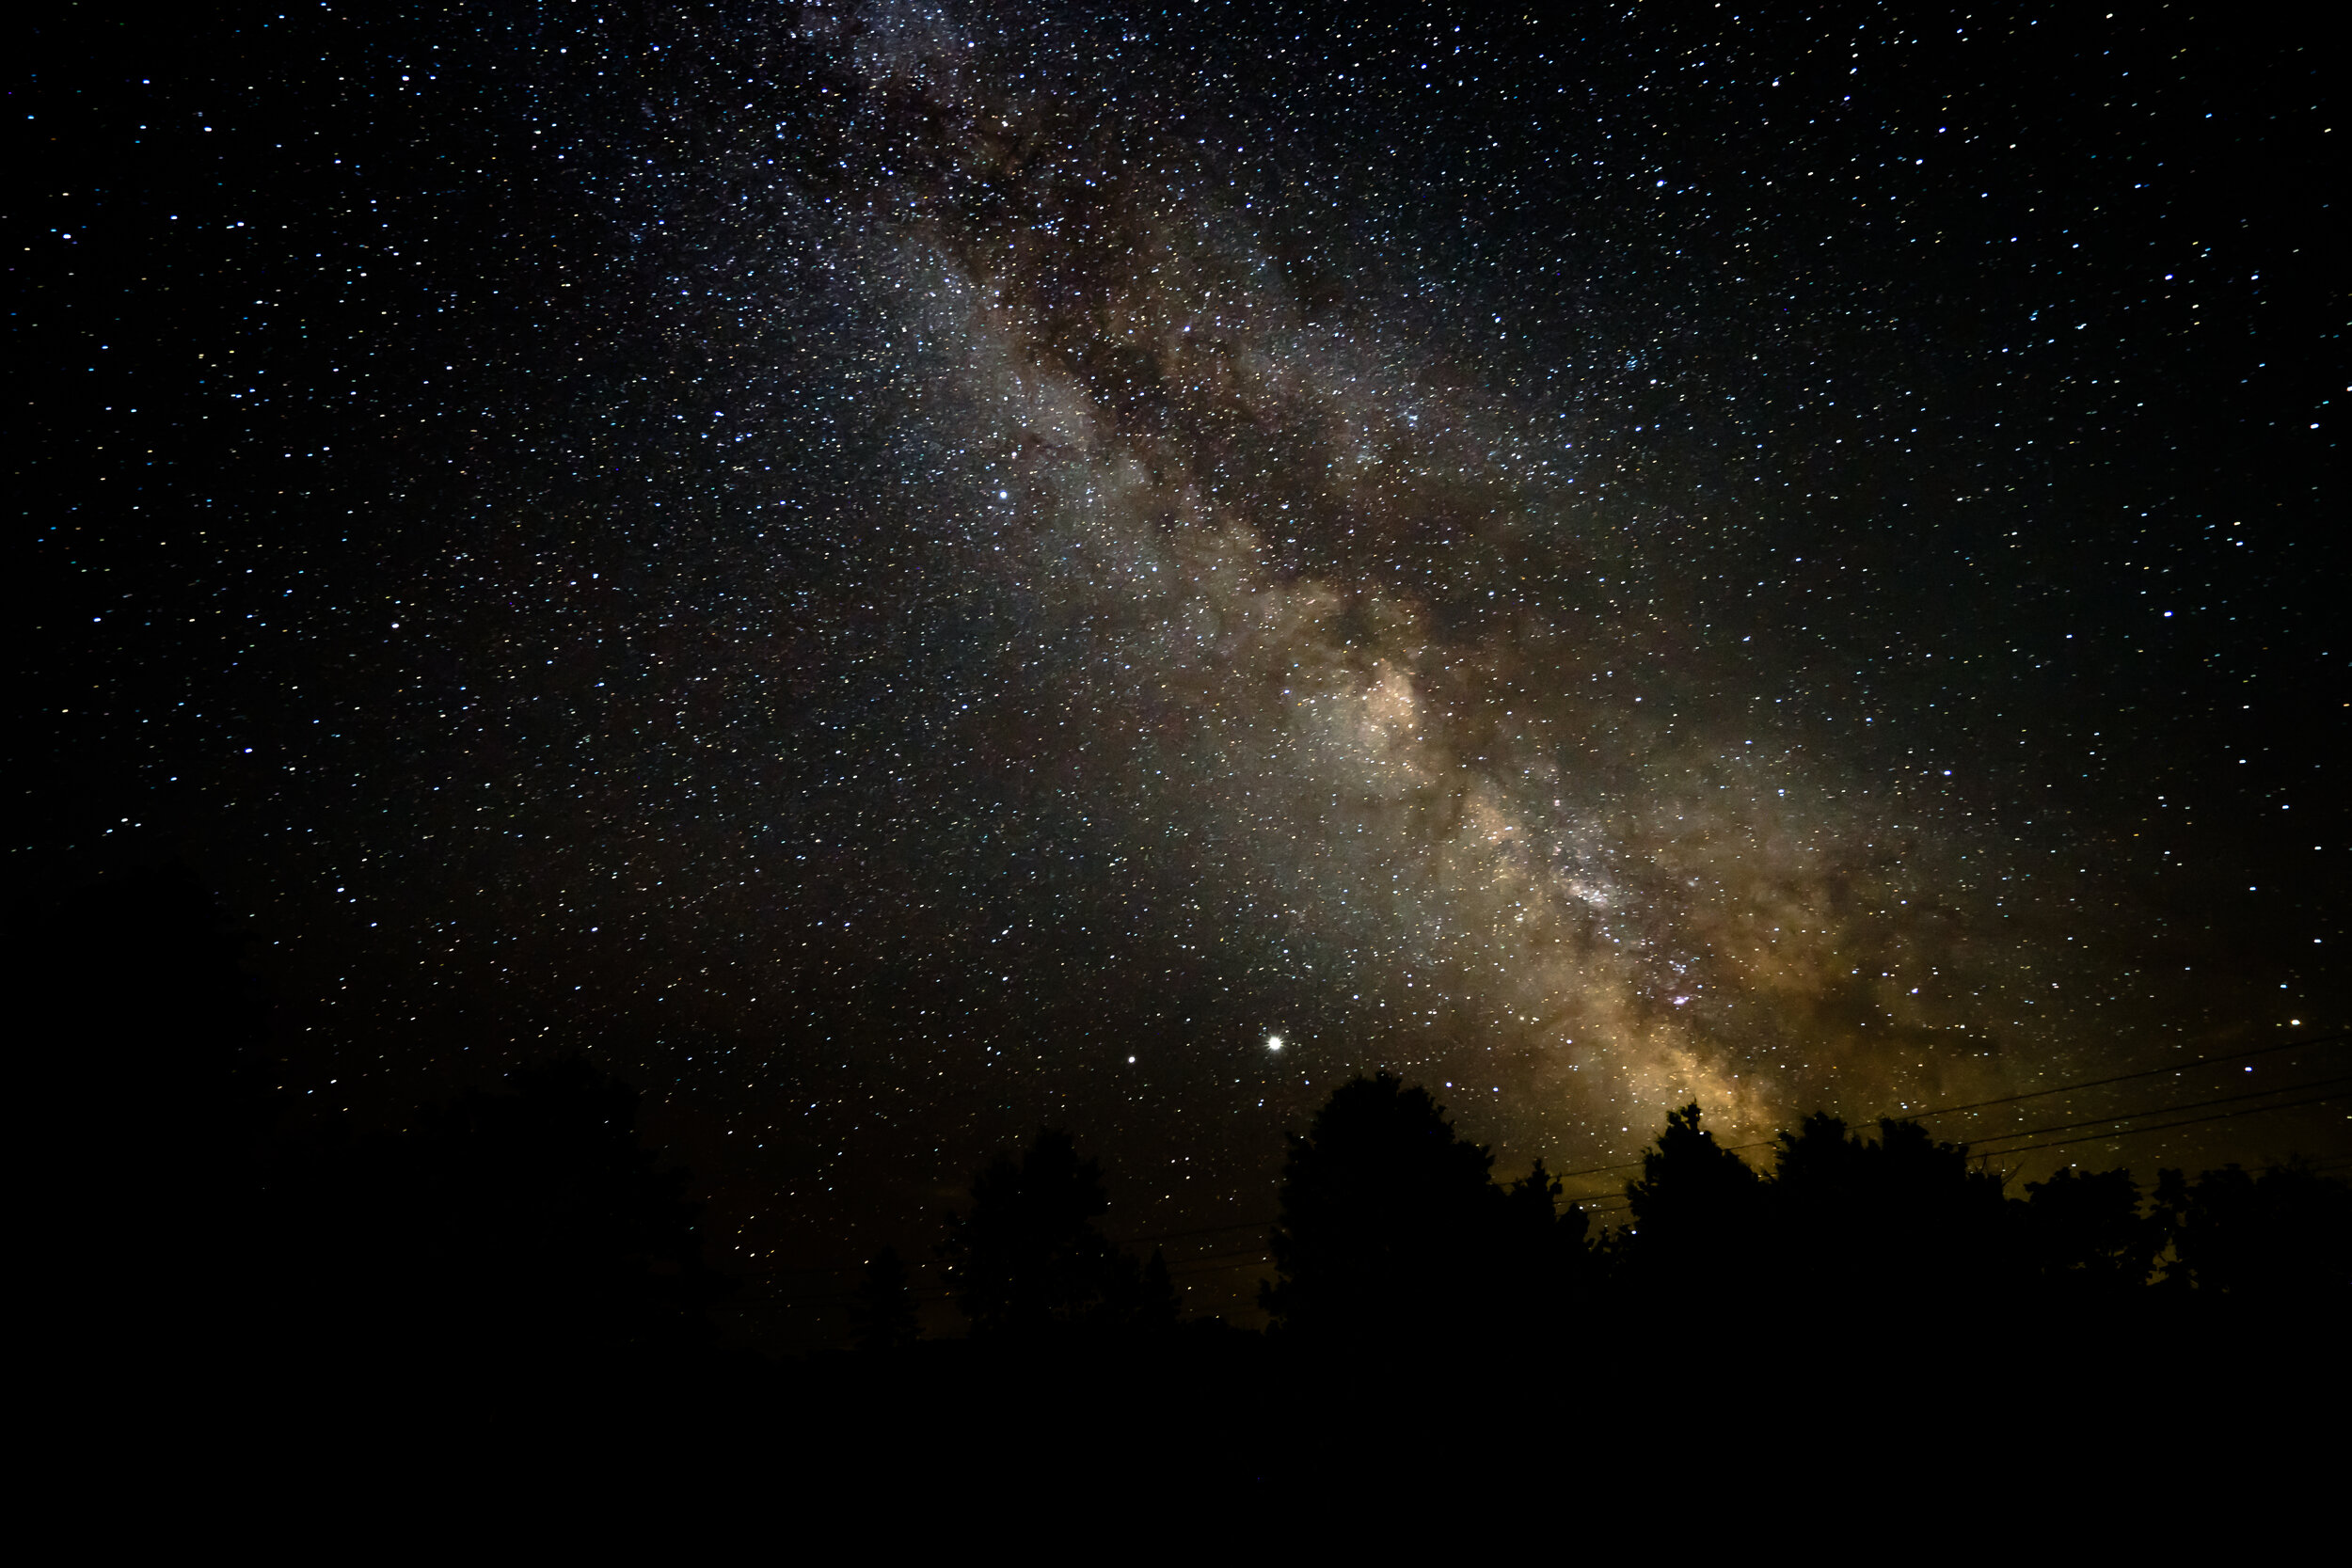
This particular shot was taken at ISO 3200, f/4, at 16mm for 30s on a fixed tripod with the Sony A7III and the 16-35 f/4. The skies are dark enough in Haliburton to pull out some interesting color in a single shot. I always love to have something as a silhouette to give some context to the location and the trees here were perfect.
5
Living along the shore of Lake Erie and the Niagara River gives us plenty of opportunities to shoot Osprey.

This year was not the best for getting to see them fishing but I did manage to get some great shots in-flight and taking off. I really liked the feeling of action in this shot as the osprey’s claws are just releasing from the branch and the wings are just ready to come back down.
Taken at 840mm (200-600 with the 1.4 teleconverter), f/9, 1/2000s and ISO 400.
6
I managed to get back to a location where I used to spend a great deal of time doing photography when I lived near Toronto. Cranberry Marsh near Whitby, ON has more birds and animals than nearly any conservation area that I have been to. I was able to get there this fall as the shore birds were getting ready to migrate south.
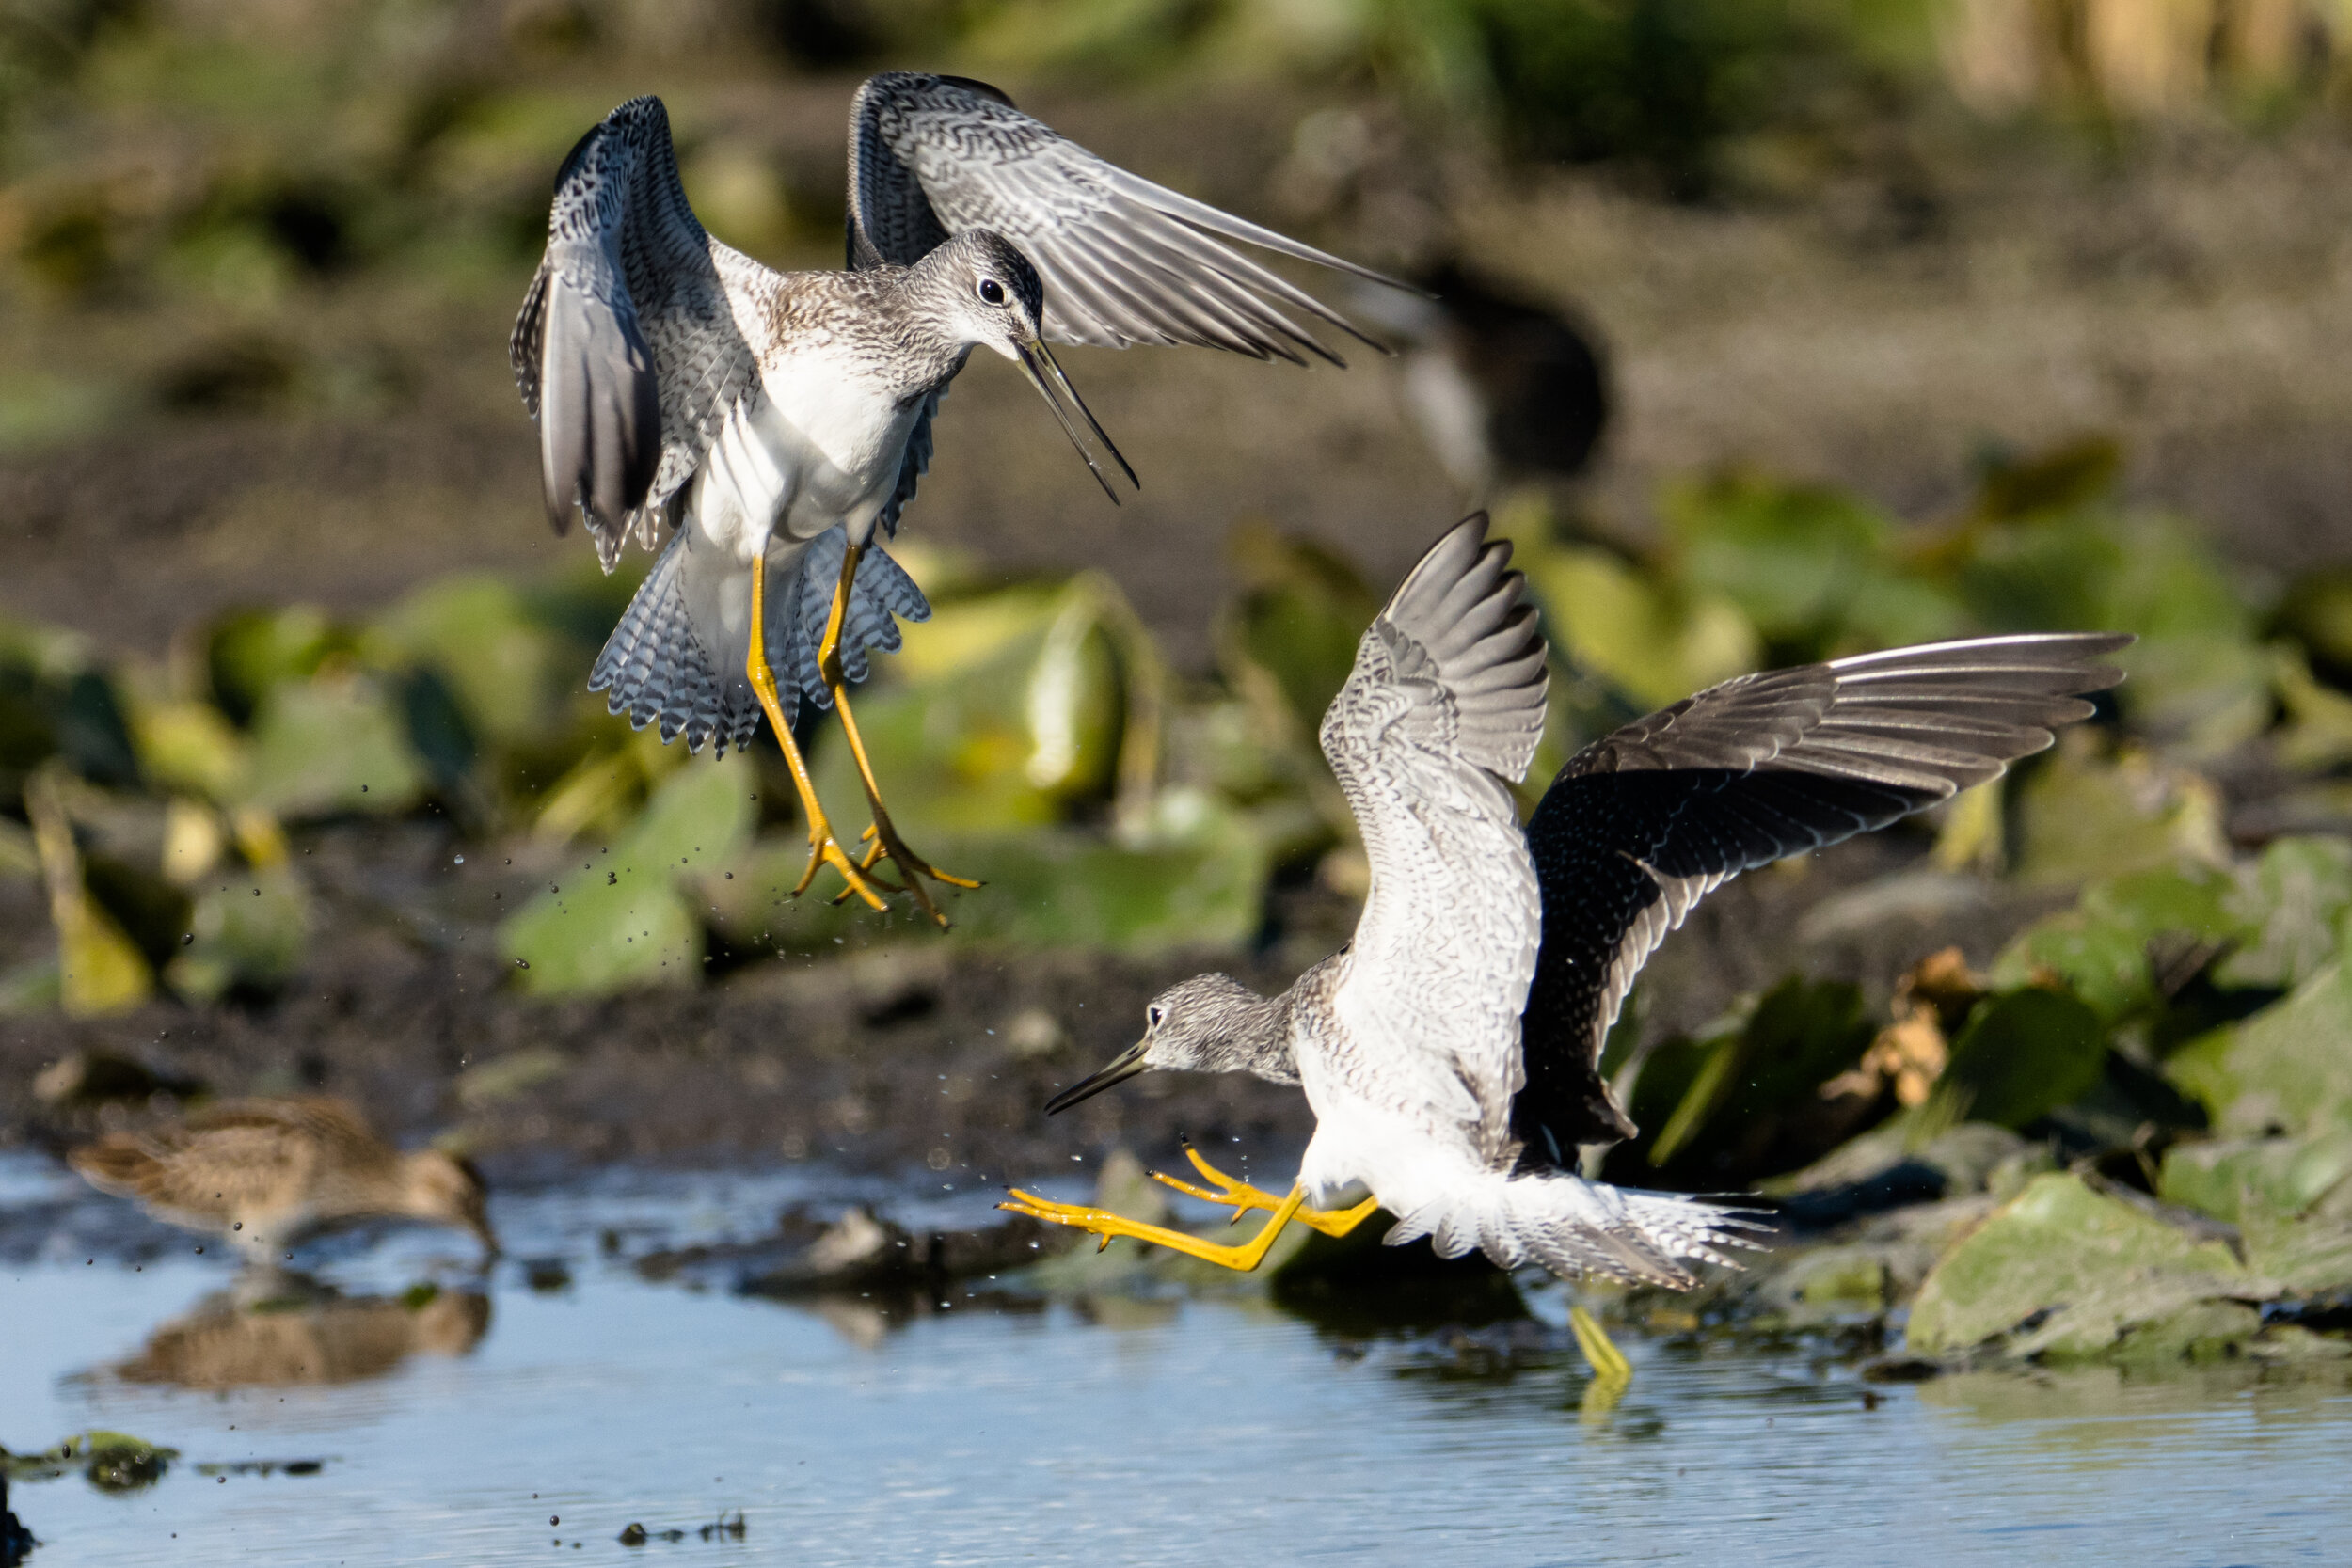
Since the marsh was quickly losing water there was a mess of fish that were unable to get to deeper water and that meant birds hunting, and fighting for their share. I got down on my belly for this shot as I saw these two greater yellowlegs fighting over a spot. I was shooting with the Sony A7RIV and the 200-600 with the 1.4 teleconverter at the time and didn’t have a chance to take off the teleconverter for the closer action. This didn’t really affect the shot that I took at 360mm, f/9, at 1/2000s and ISO1000. I managed to stop the action well and since I was shooting at 10 FPS I was able to pick out what I thought was the best moment from about 30 shots over a couple of bursts. I do have a couple more from this set that I really like but this one stood out for me.
7
There were a great number of herons and egrets also taking advantage of the depleting water. I watched a Great Blue heron try to swallow an eel-like fish that had to be a foot long. It took about 10 tries before it was able to swallow but it was quite the sight. This juvenile Black Crowned Night Heron had such an odd look to it as it came in for a landing that it quickly became one of my favorite shots this year.
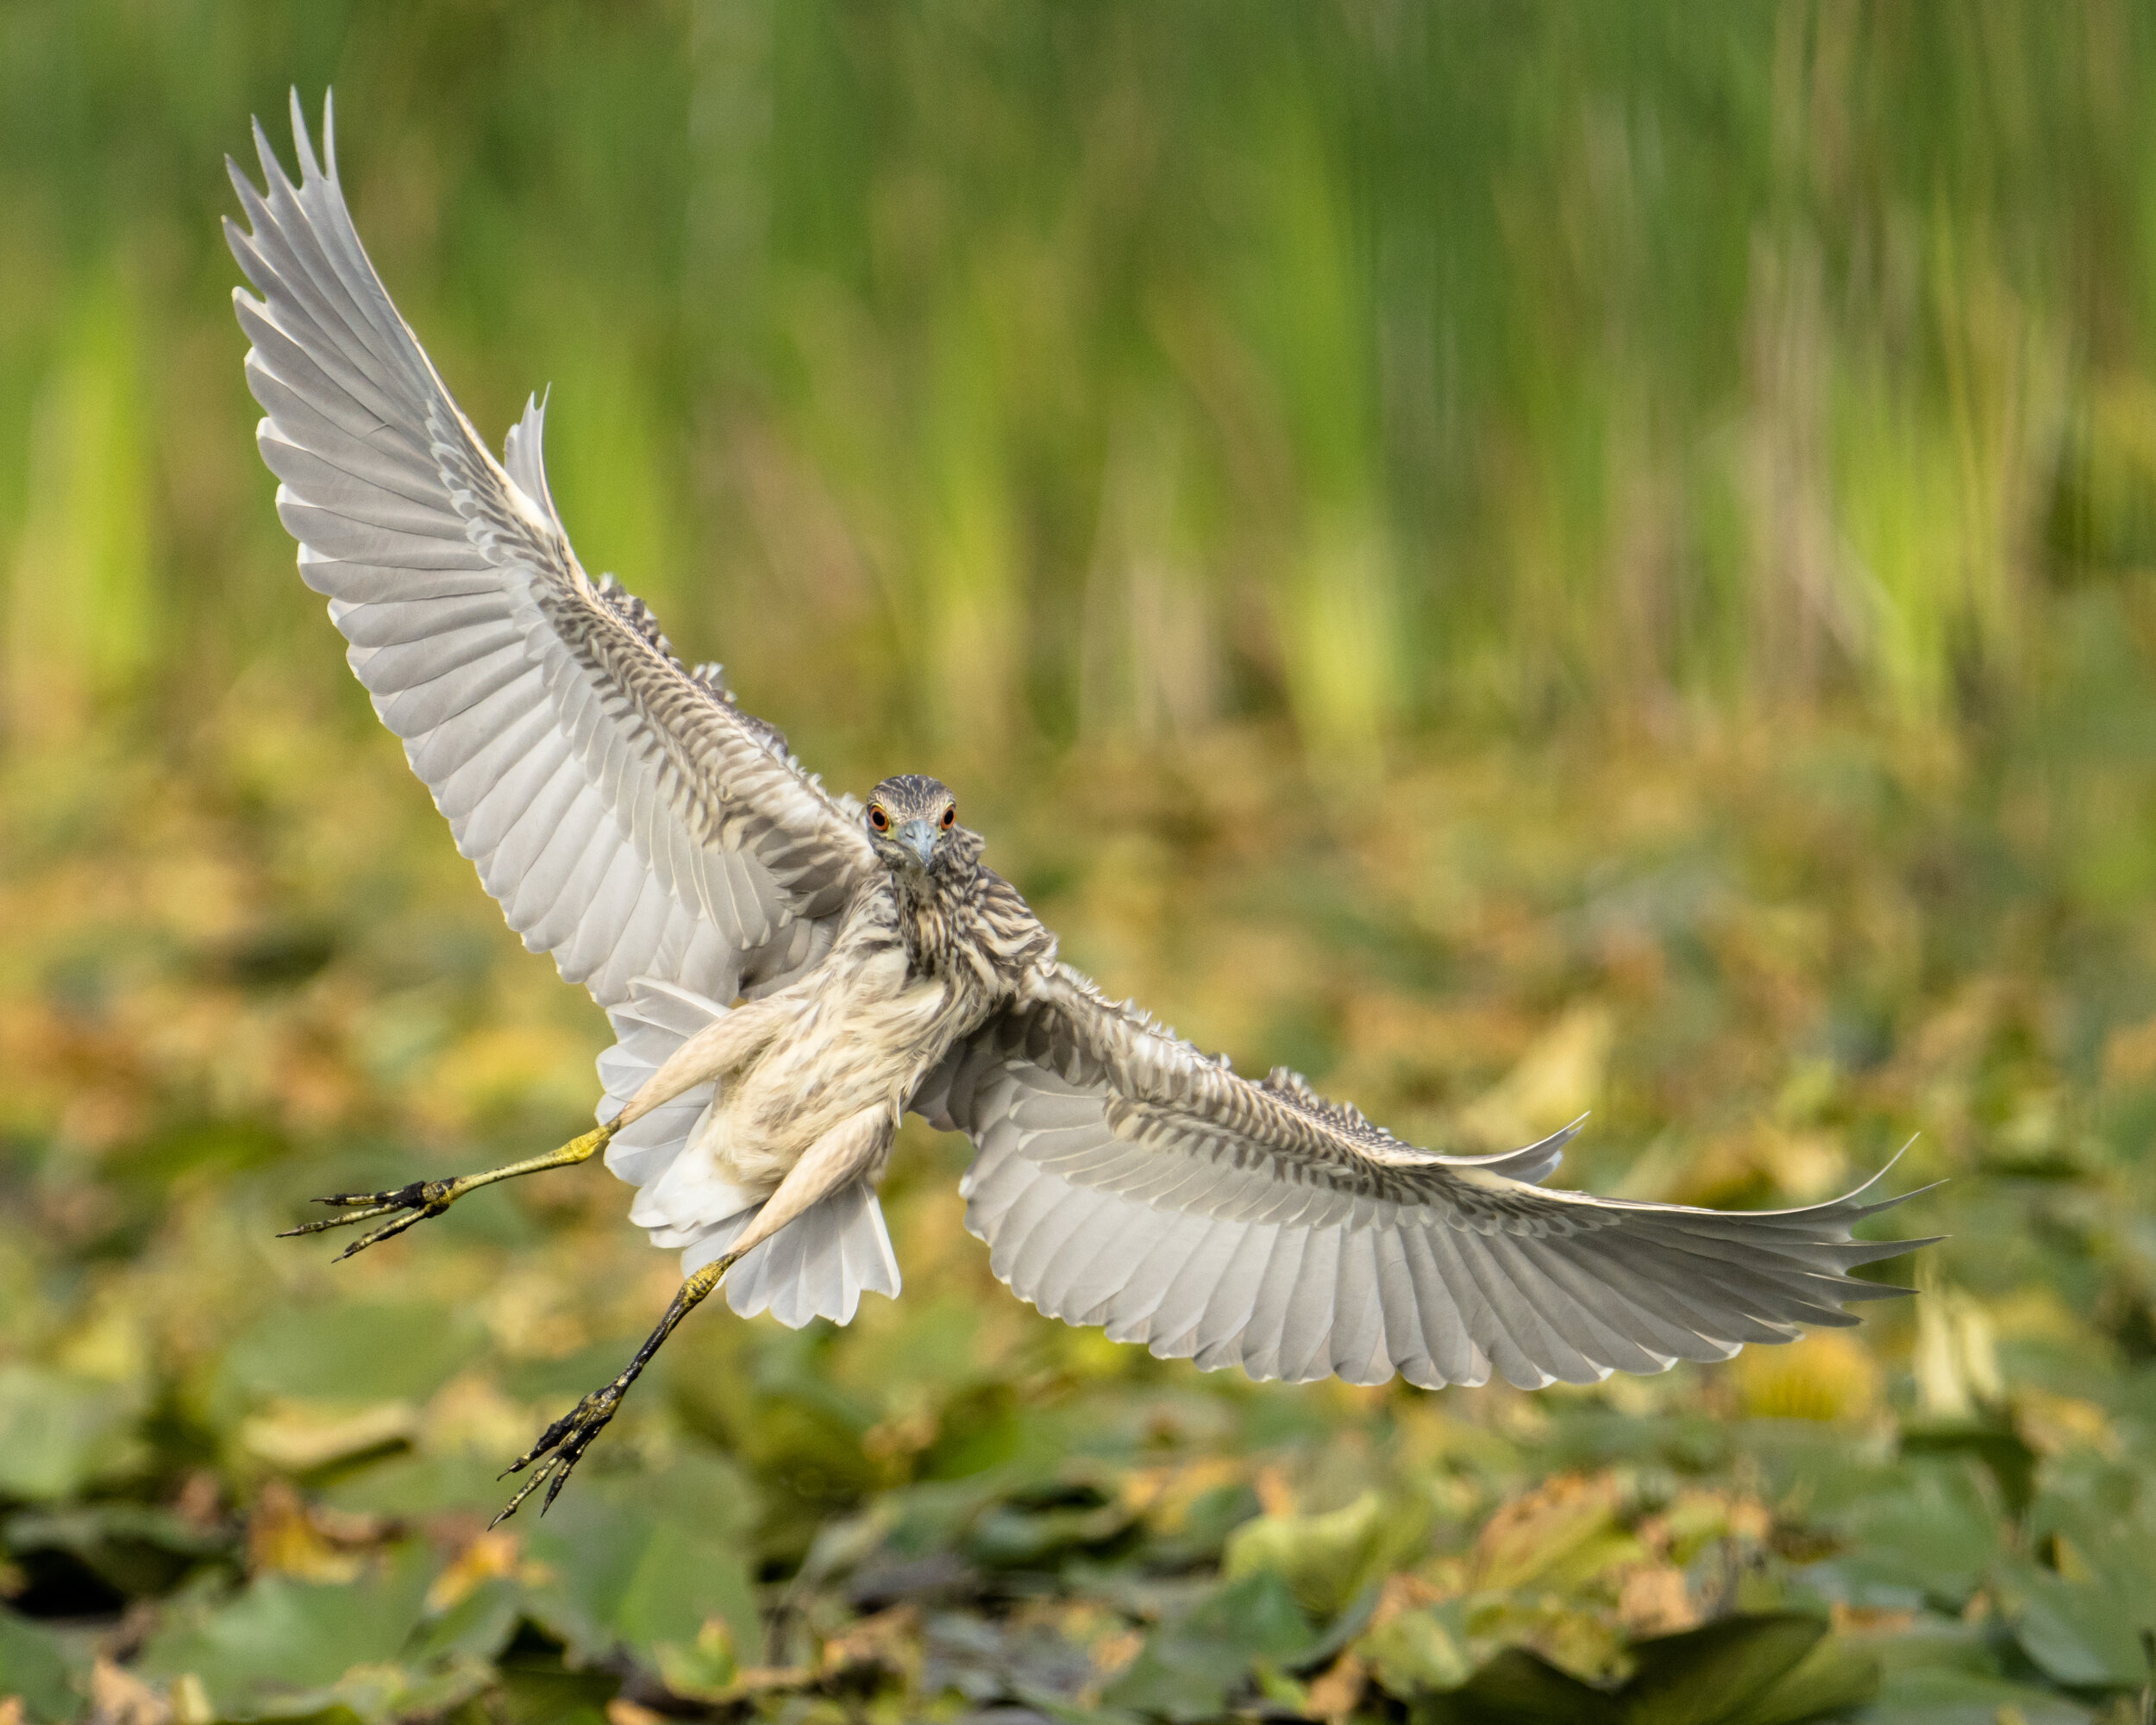
Again I took this shot from a low angle and ended up at eye level as it came in. The shot was taken at 600mm, f/6.3, at 1/2500s and ISO 1000 on the Sony A7RIV with the 200-600mm lens.
8
I came back to this location in October to look for owls and managed to get to watch a Barred Owl hunt along the road side.

This was a successful hunt as you can see the vole in its talons. Barred owls will often hunt during the day and rarely worry about people nearby...as long as they don’t bother the owl or get in the way of the hunt. Over the last 15 years I’ve had the privilege to watch owls hunt many times but it never gets old watching the process. This particular time I could actually hear the vole moving in the grasses and could hear that same sound in many places along the trails. Should be good hunting this winter. The light was not very good on this particular morning but with the new Canon R5 and the 500mm f/4 IS II and 1.4 teleconverter I was able to still get some good shots. This shot was at 700mm, f/5.6, at 1/1000s and ISO 6400. Very high ISO but I’m happy with the detail and the noise levels don’t take away from the shot.
9
As I was getting used to the new Canon R5 I tried to get out to practice with bird in-flight shots as often as possible this fall. The animal and bird eye autofocus has turned out to not be a gimmick.

Where the Sony cameras have been fantastic at grabbing onto moving subjects for some time now, this new camera catches the eye of birds so quickly and gives confidence that I am getting the focus where I want it. It isn’t perfect yet but boy is it good. This shot is from a burst in which every shot was in focus. I just love the simplicity and detail in this one. Nothing but the bird. Shot taken at 700mm, f/5.6, at 1/2000s and ISO200.
10
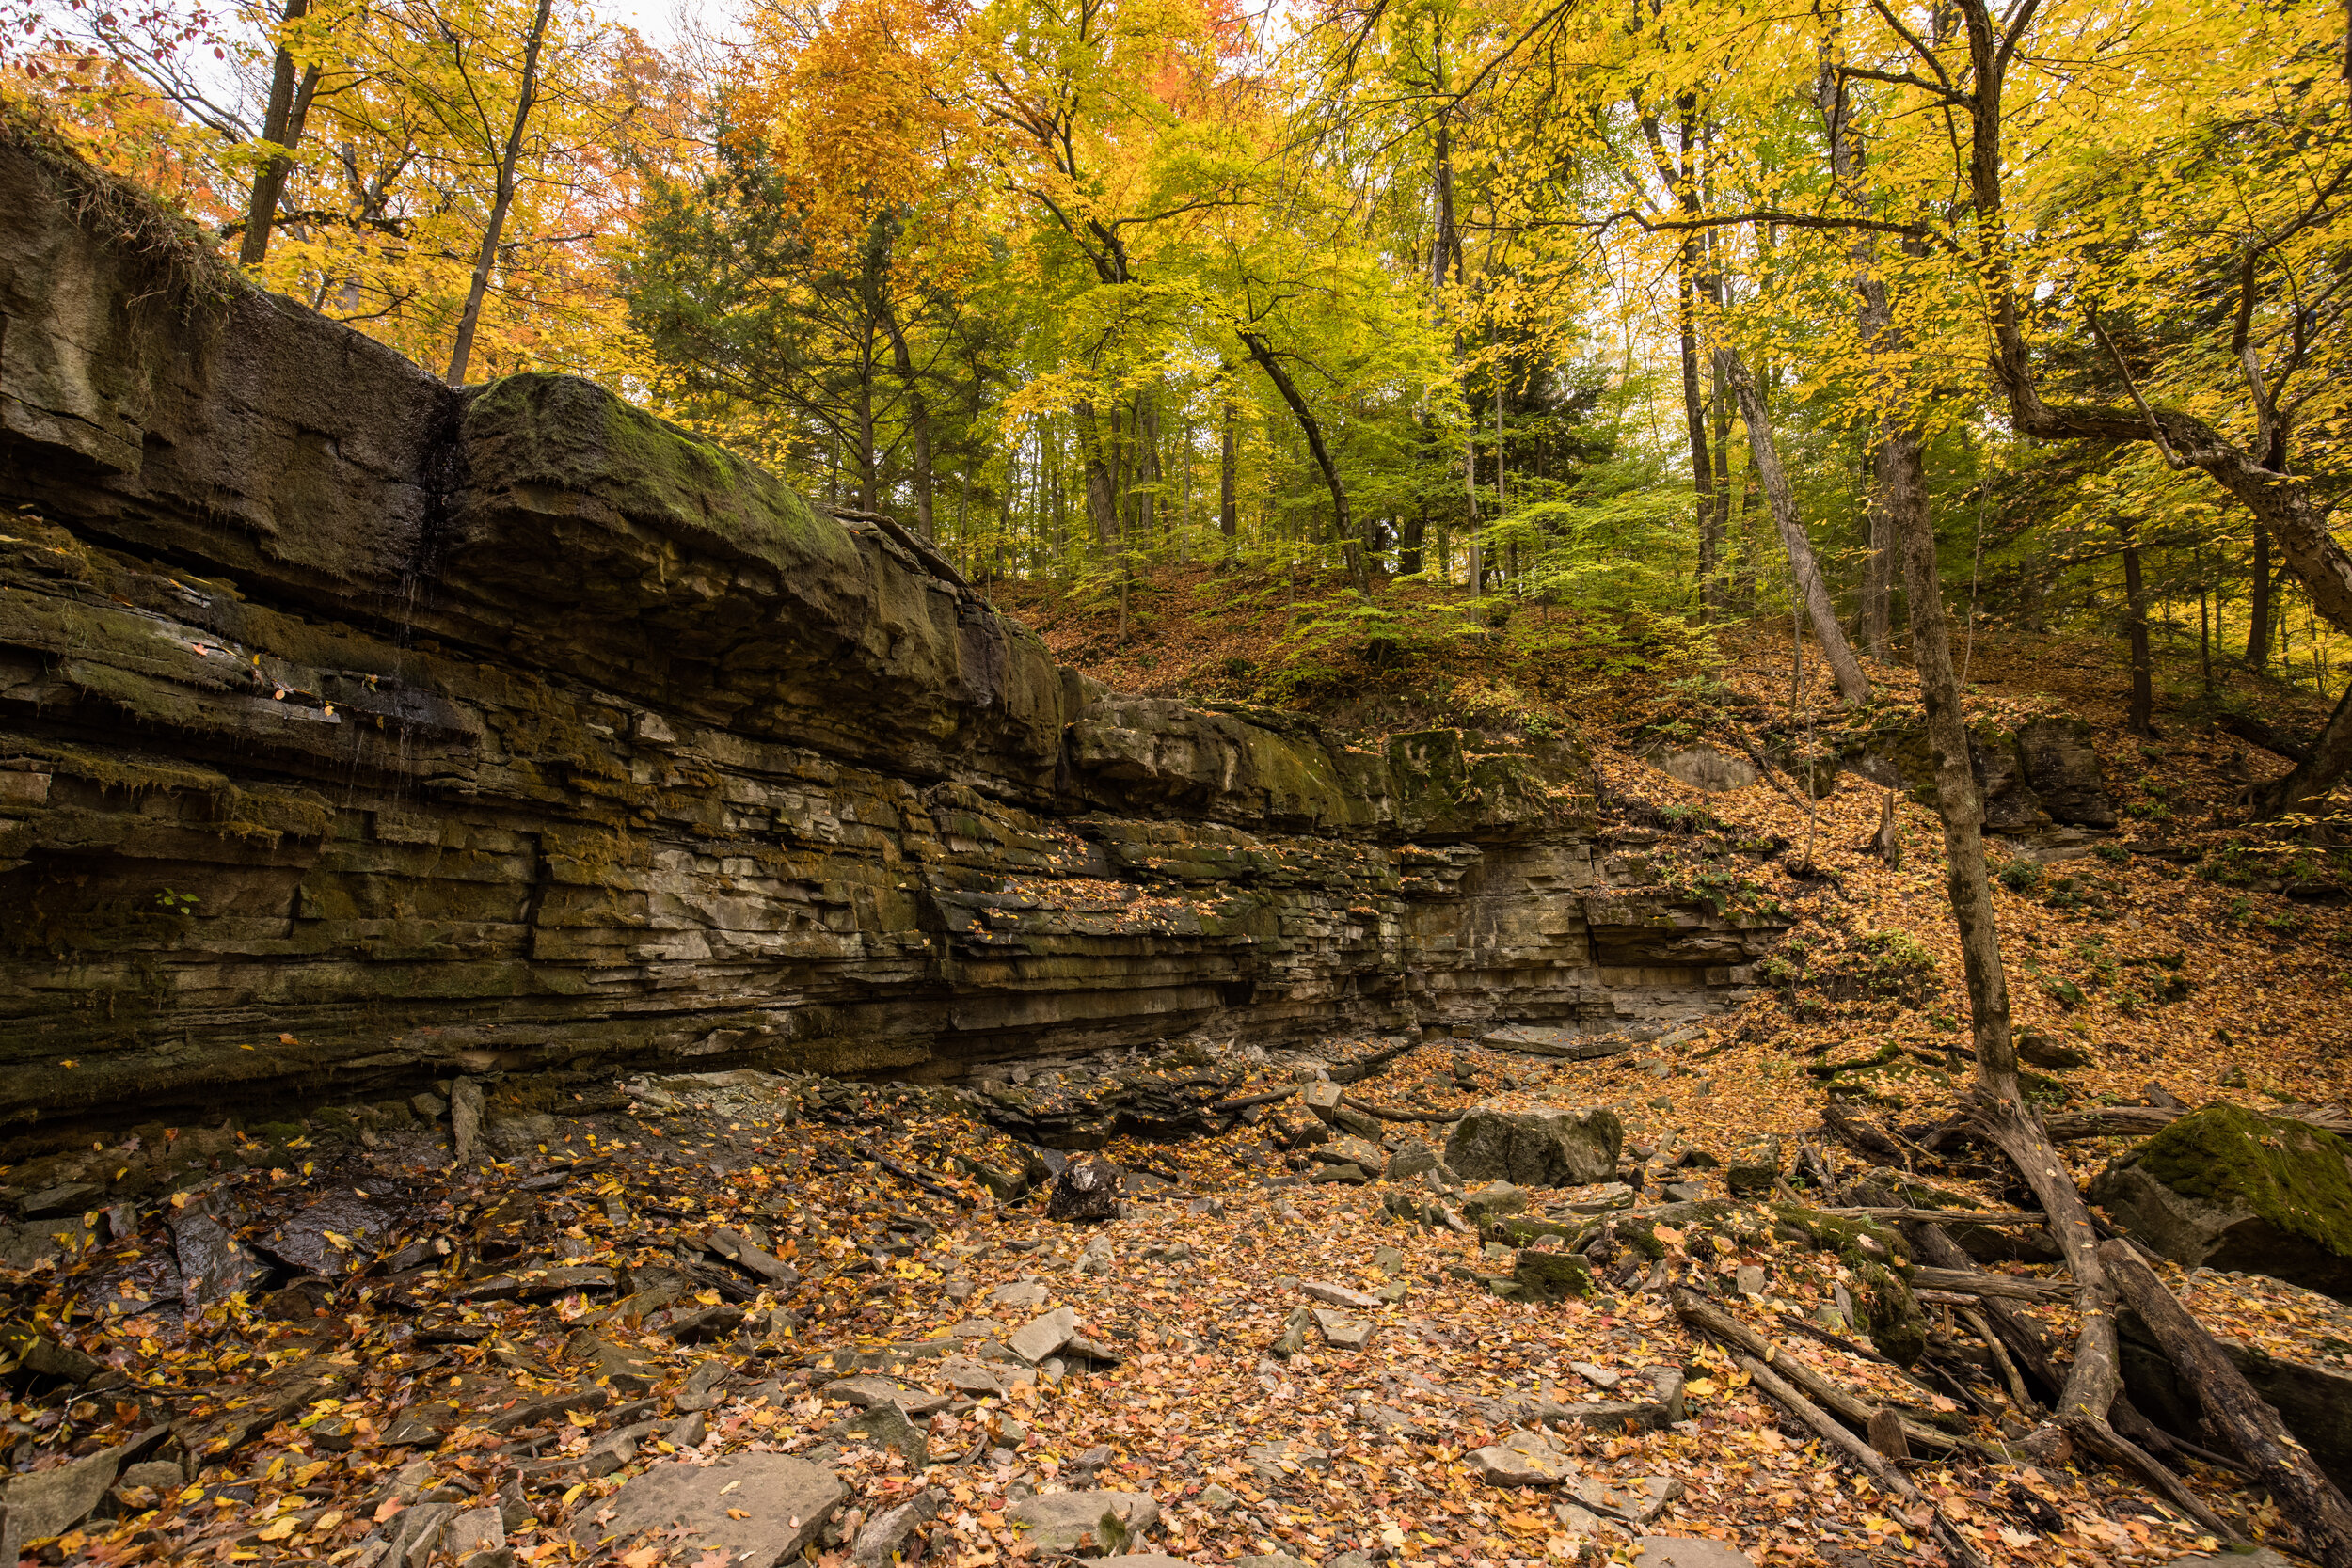
Our move out to the west coast of Canada in December did give me a chance for a few landscape shots that I found compelling.

This first one was of a waterfall in Kokanee Creek Provincial Park and although the light is kind of neutral I really liked the scene and textures. I hope to come back to this location a few times with more interesting light to see what kind of compositions I can get.
11
In the East Kootenays we spent a few days at Fairmont Hot Springs while waiting for our little apartment to be available.
The view from the hot springs was absolutely amazing and I managed to get a shot of the mountains as the sun was dropping and with a few clouds passing across. In the end a panorama made the most sense. This was shot on the Sony A7RIV with the 24-105 f/4 lens at 40mm, f/4, 1/1000s at ISO 100. It was cropped to a 4x1 aspect. I really can’t wait for the weather to improve to be able to explore these regions more.
12
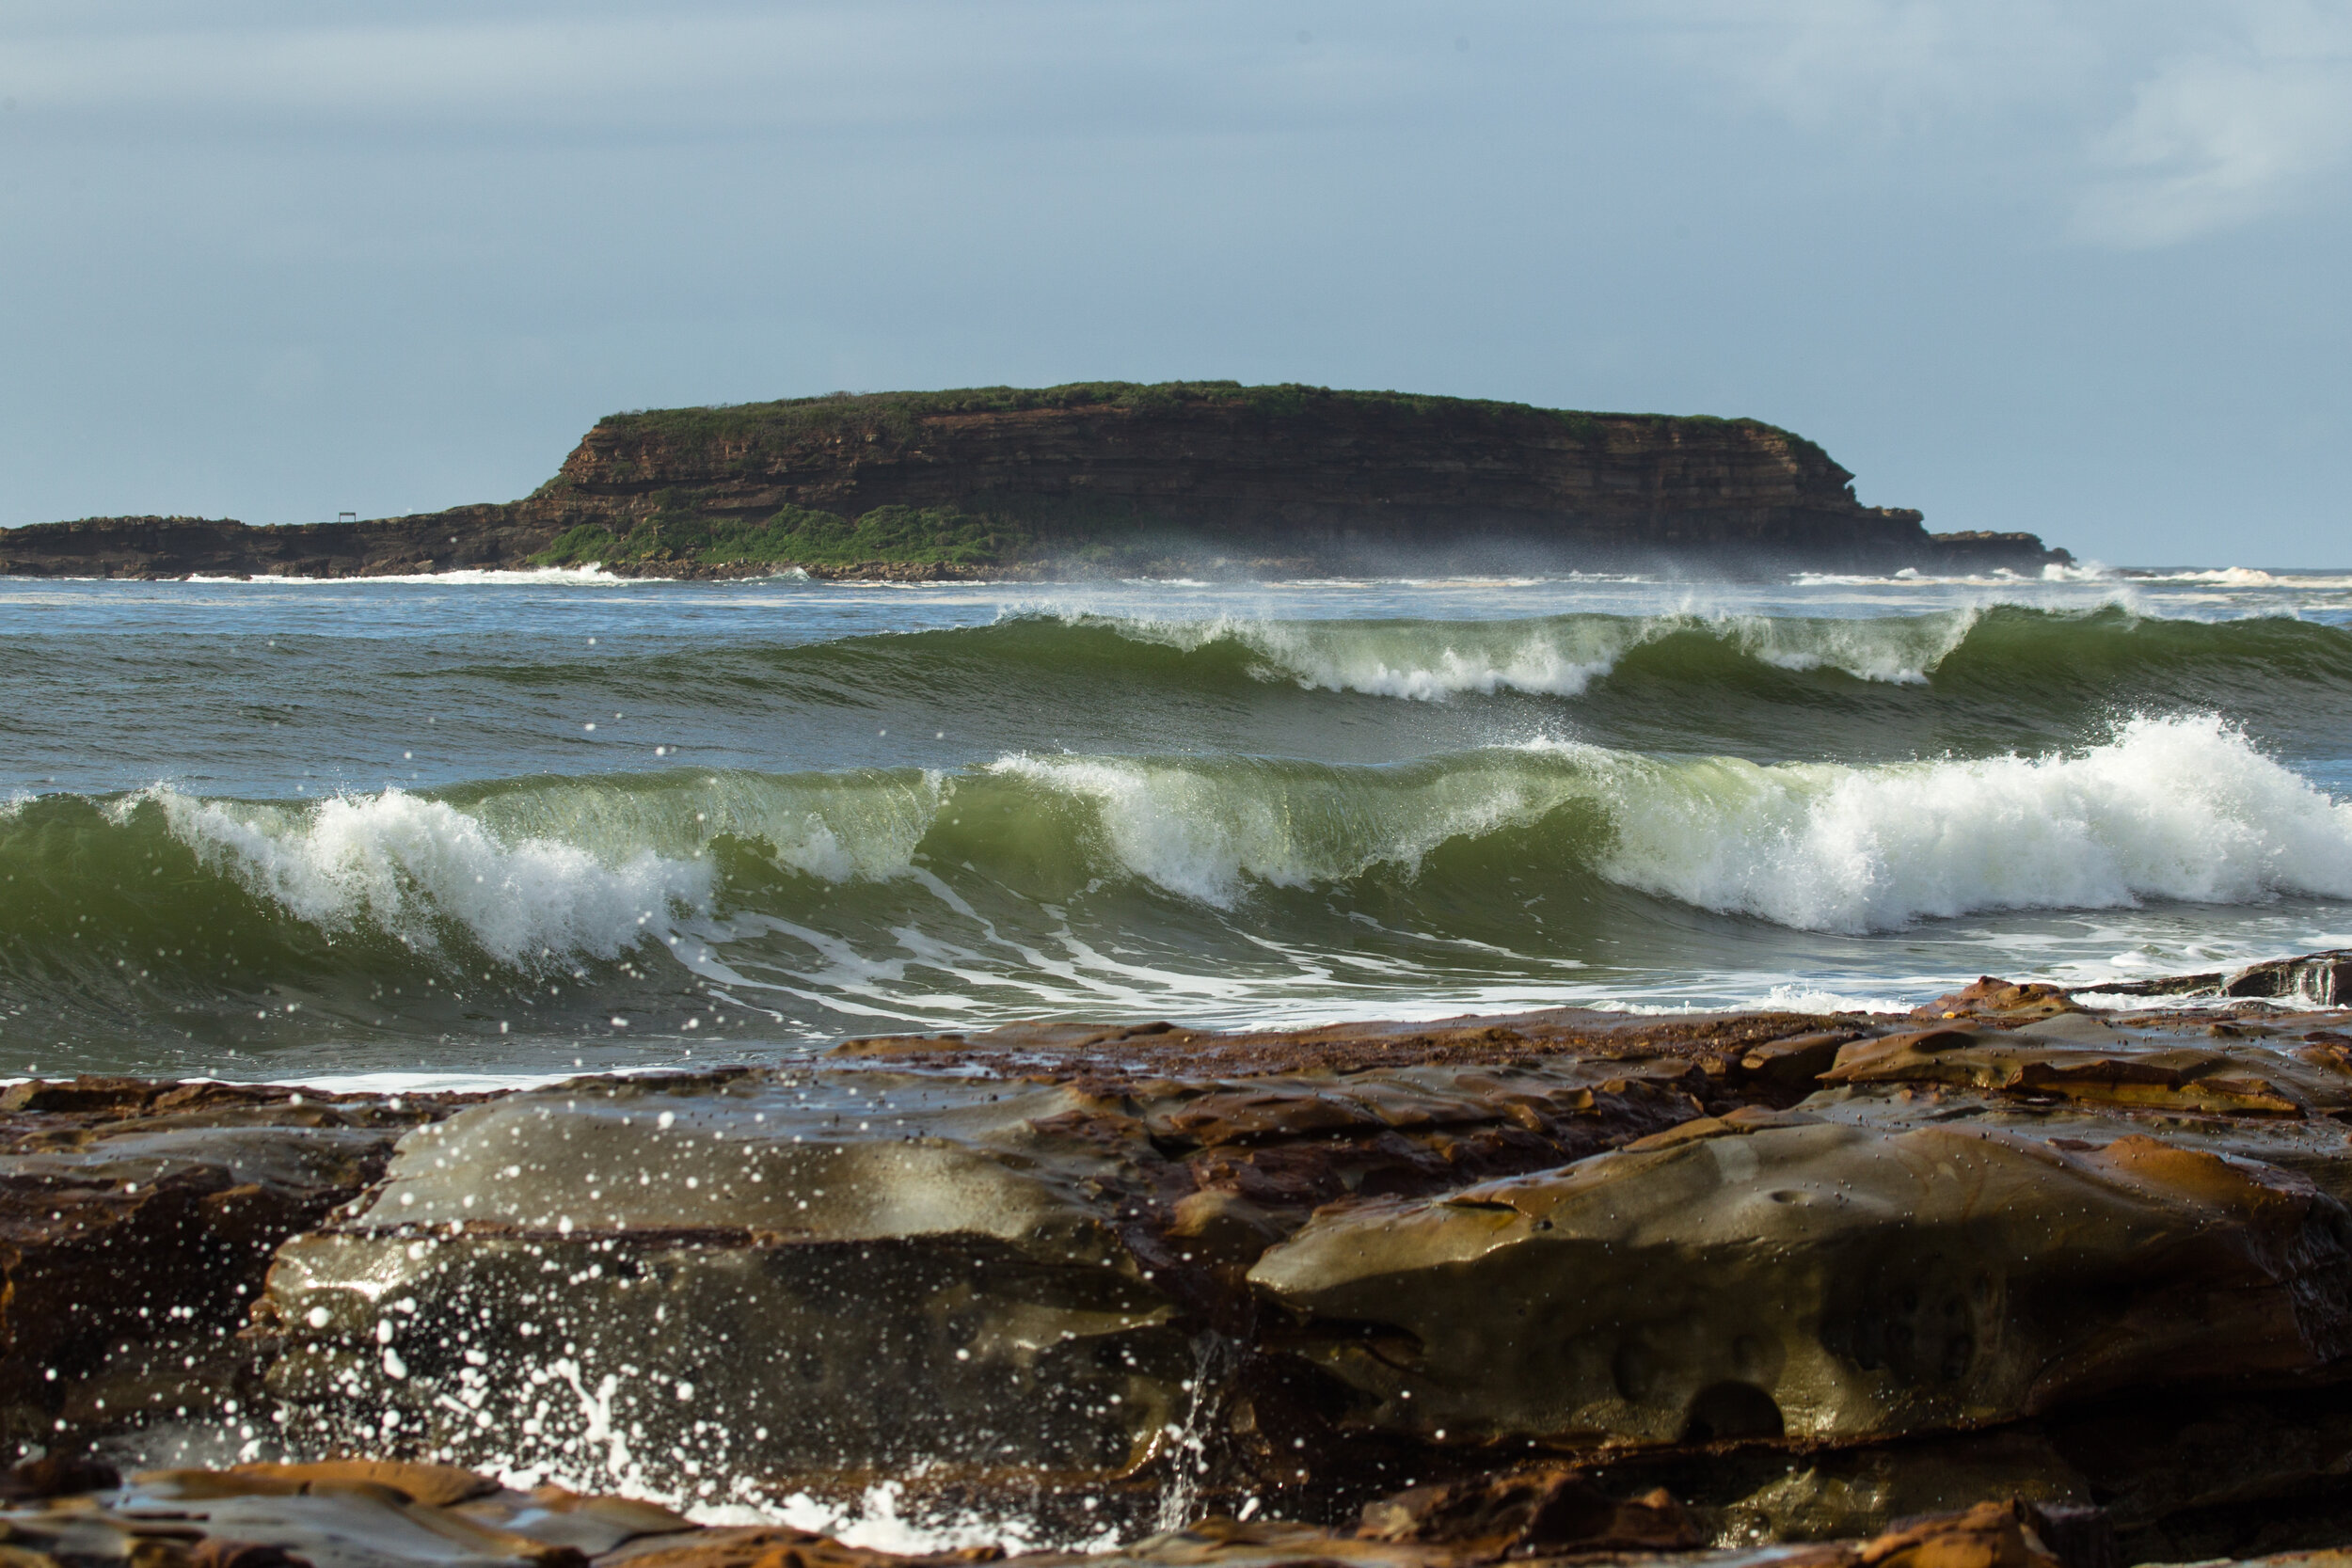
The last shot was taken very close to the end of the year. A very foggy day in Slocan Valley watching 6 Bald Eagles interacting along the river. As the clouds or fog moved through the valley I was able to get some interesting shots. This one just started to reveal the trees on the edge of the valley with the eagle staring into the distance.
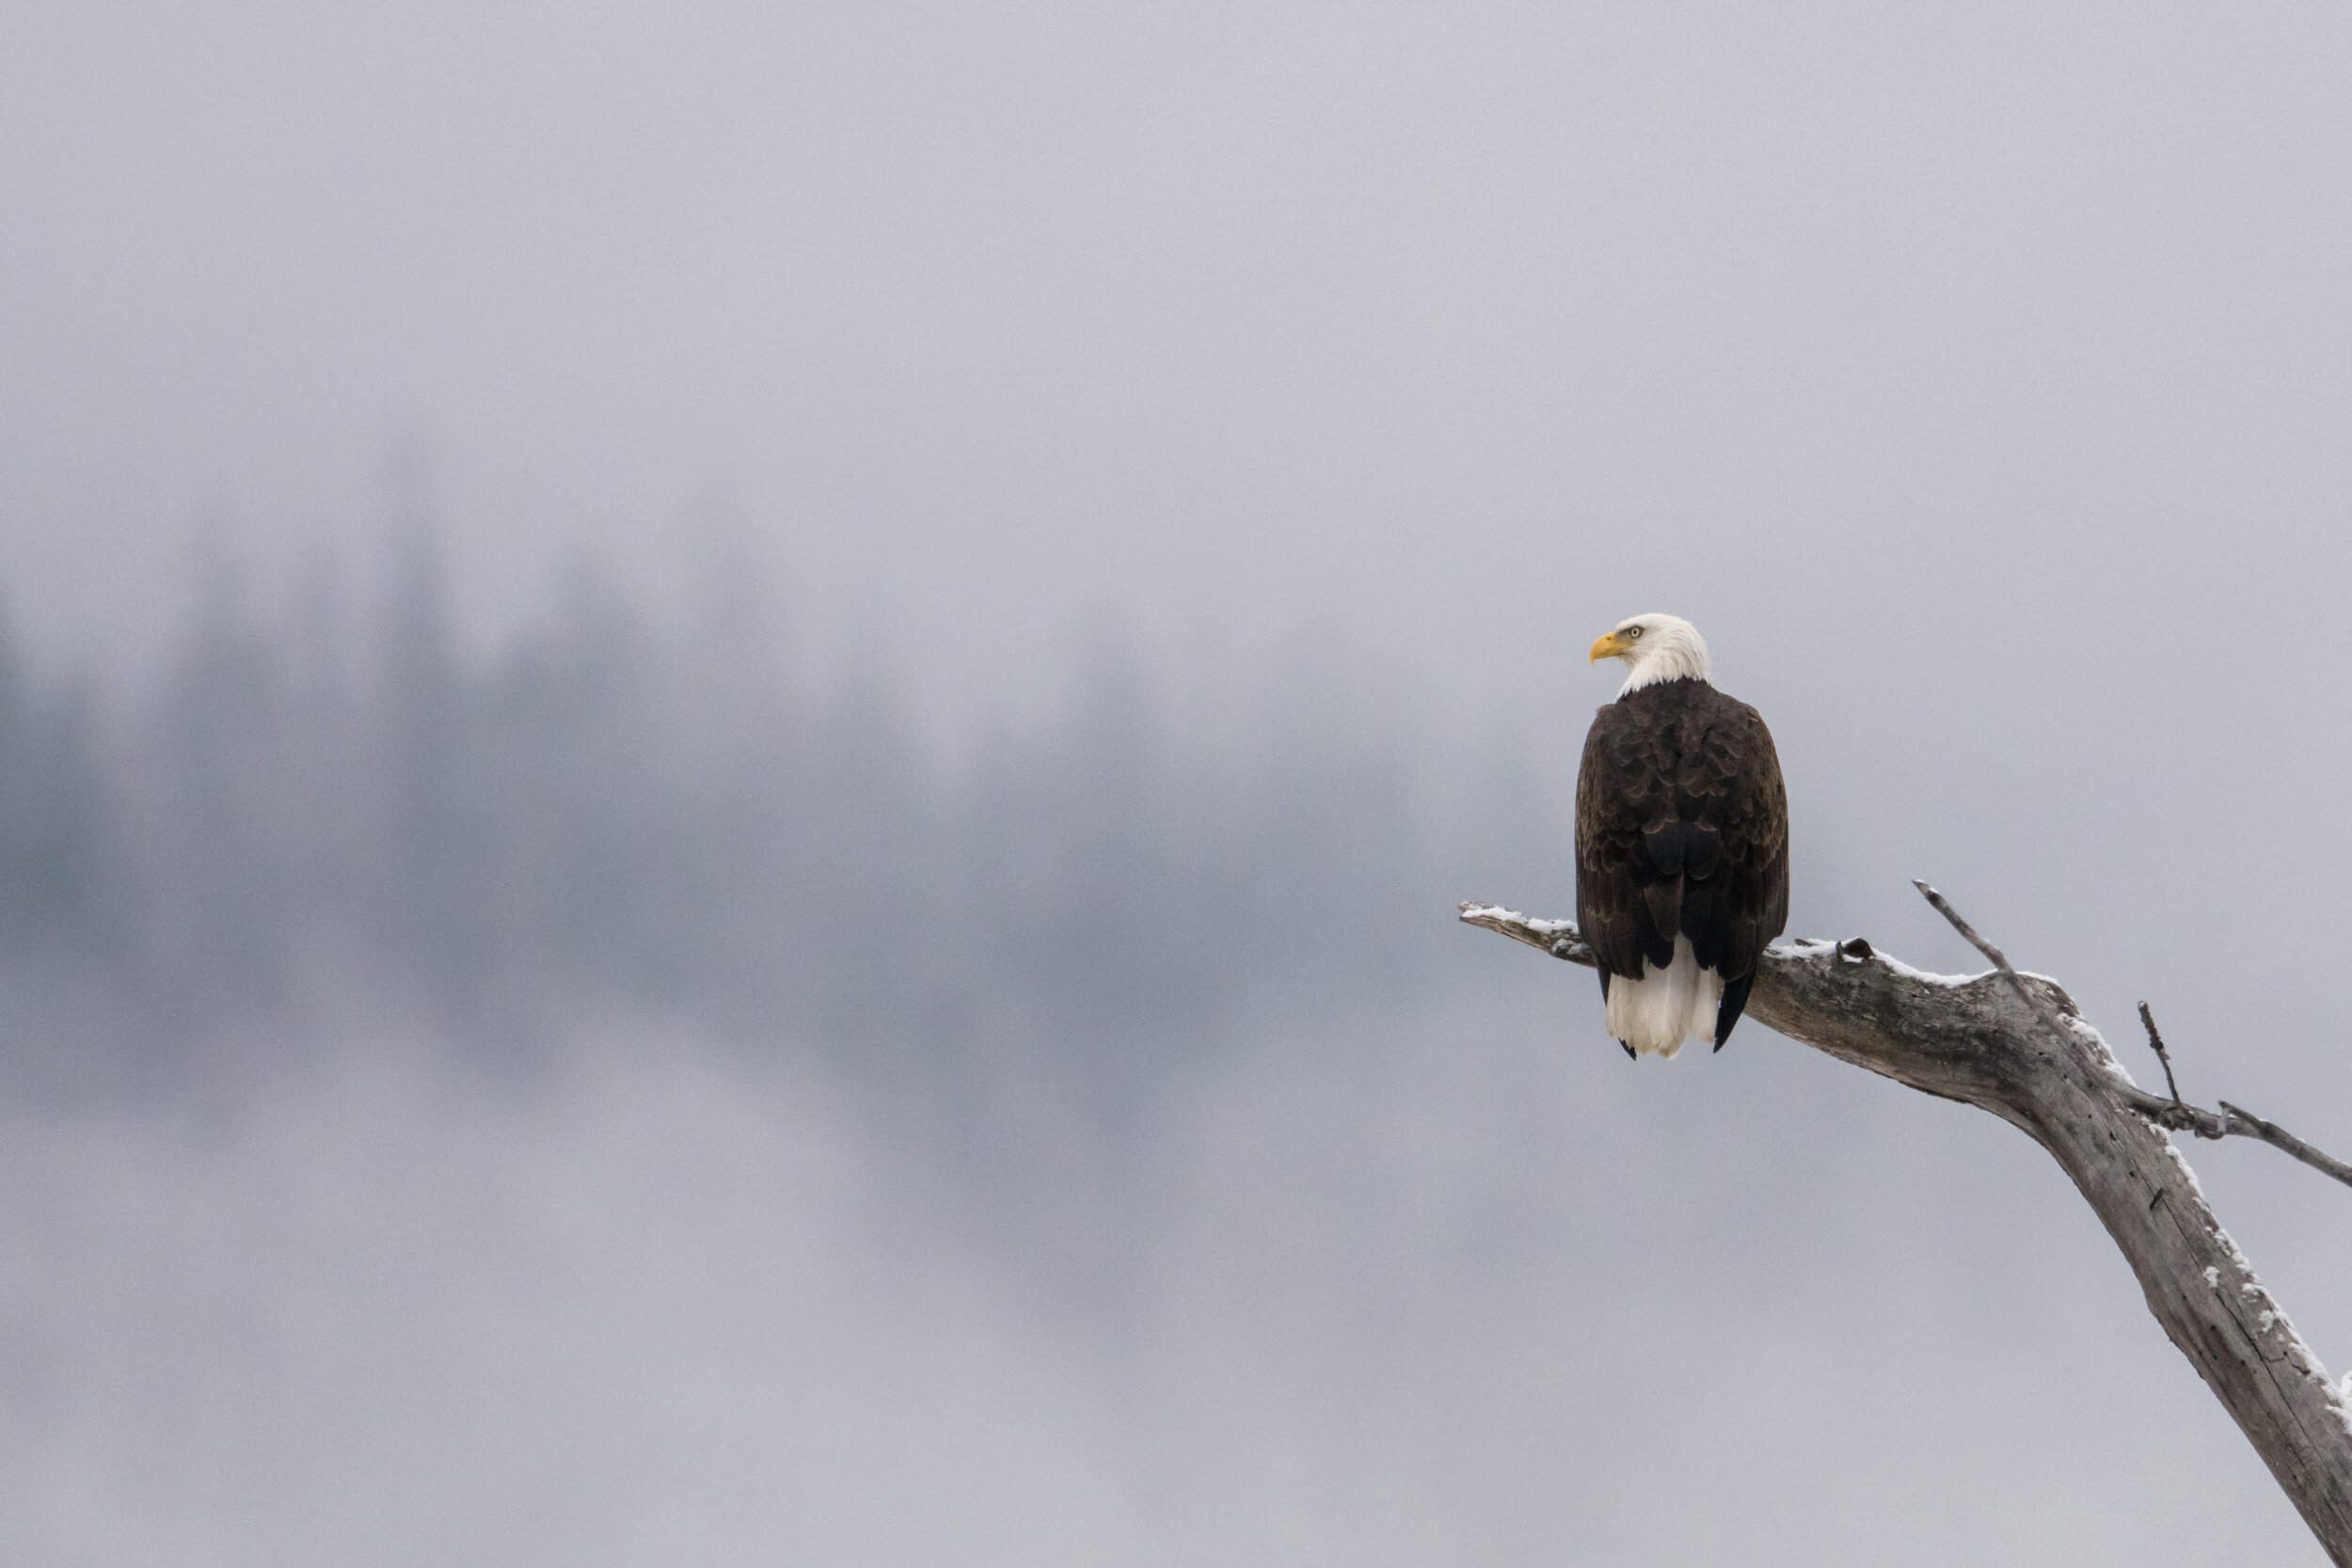
The shot was taken with the Sony A7RIV and the 200-600 with the 1.4 teleconverter. 840mm, f/9, at 1/1000 s and ISO 4000. I was hoping at the time for the eagle to take off but it was content to sit there for quite a while. I’m sure I’ll get more chances for these types of shots soon enough.
That was the 12 top shots from last year. This next year I’m really looking forward to new opportunities that come along with a new location and am really looking forward to getting more use out of the new gear. Should probably get out a review of that soon :)
Canon EOS R5 - Nature photography first impressions
Focus speed and accuracy with the 500mm and the Commlite adapter is excellent and for the most part the only shots I got out of focus were user error.

After a quick reply to a tweet about the Canon R5 from Downtown Camera asking when I could get one, I got a message from the person we have been getting most of our gear from for the last 15 years letting me know that if I wanted an R5 I could pick one up the next day…so, off I head to the big city to pick up a new camera and a new lens to play with.
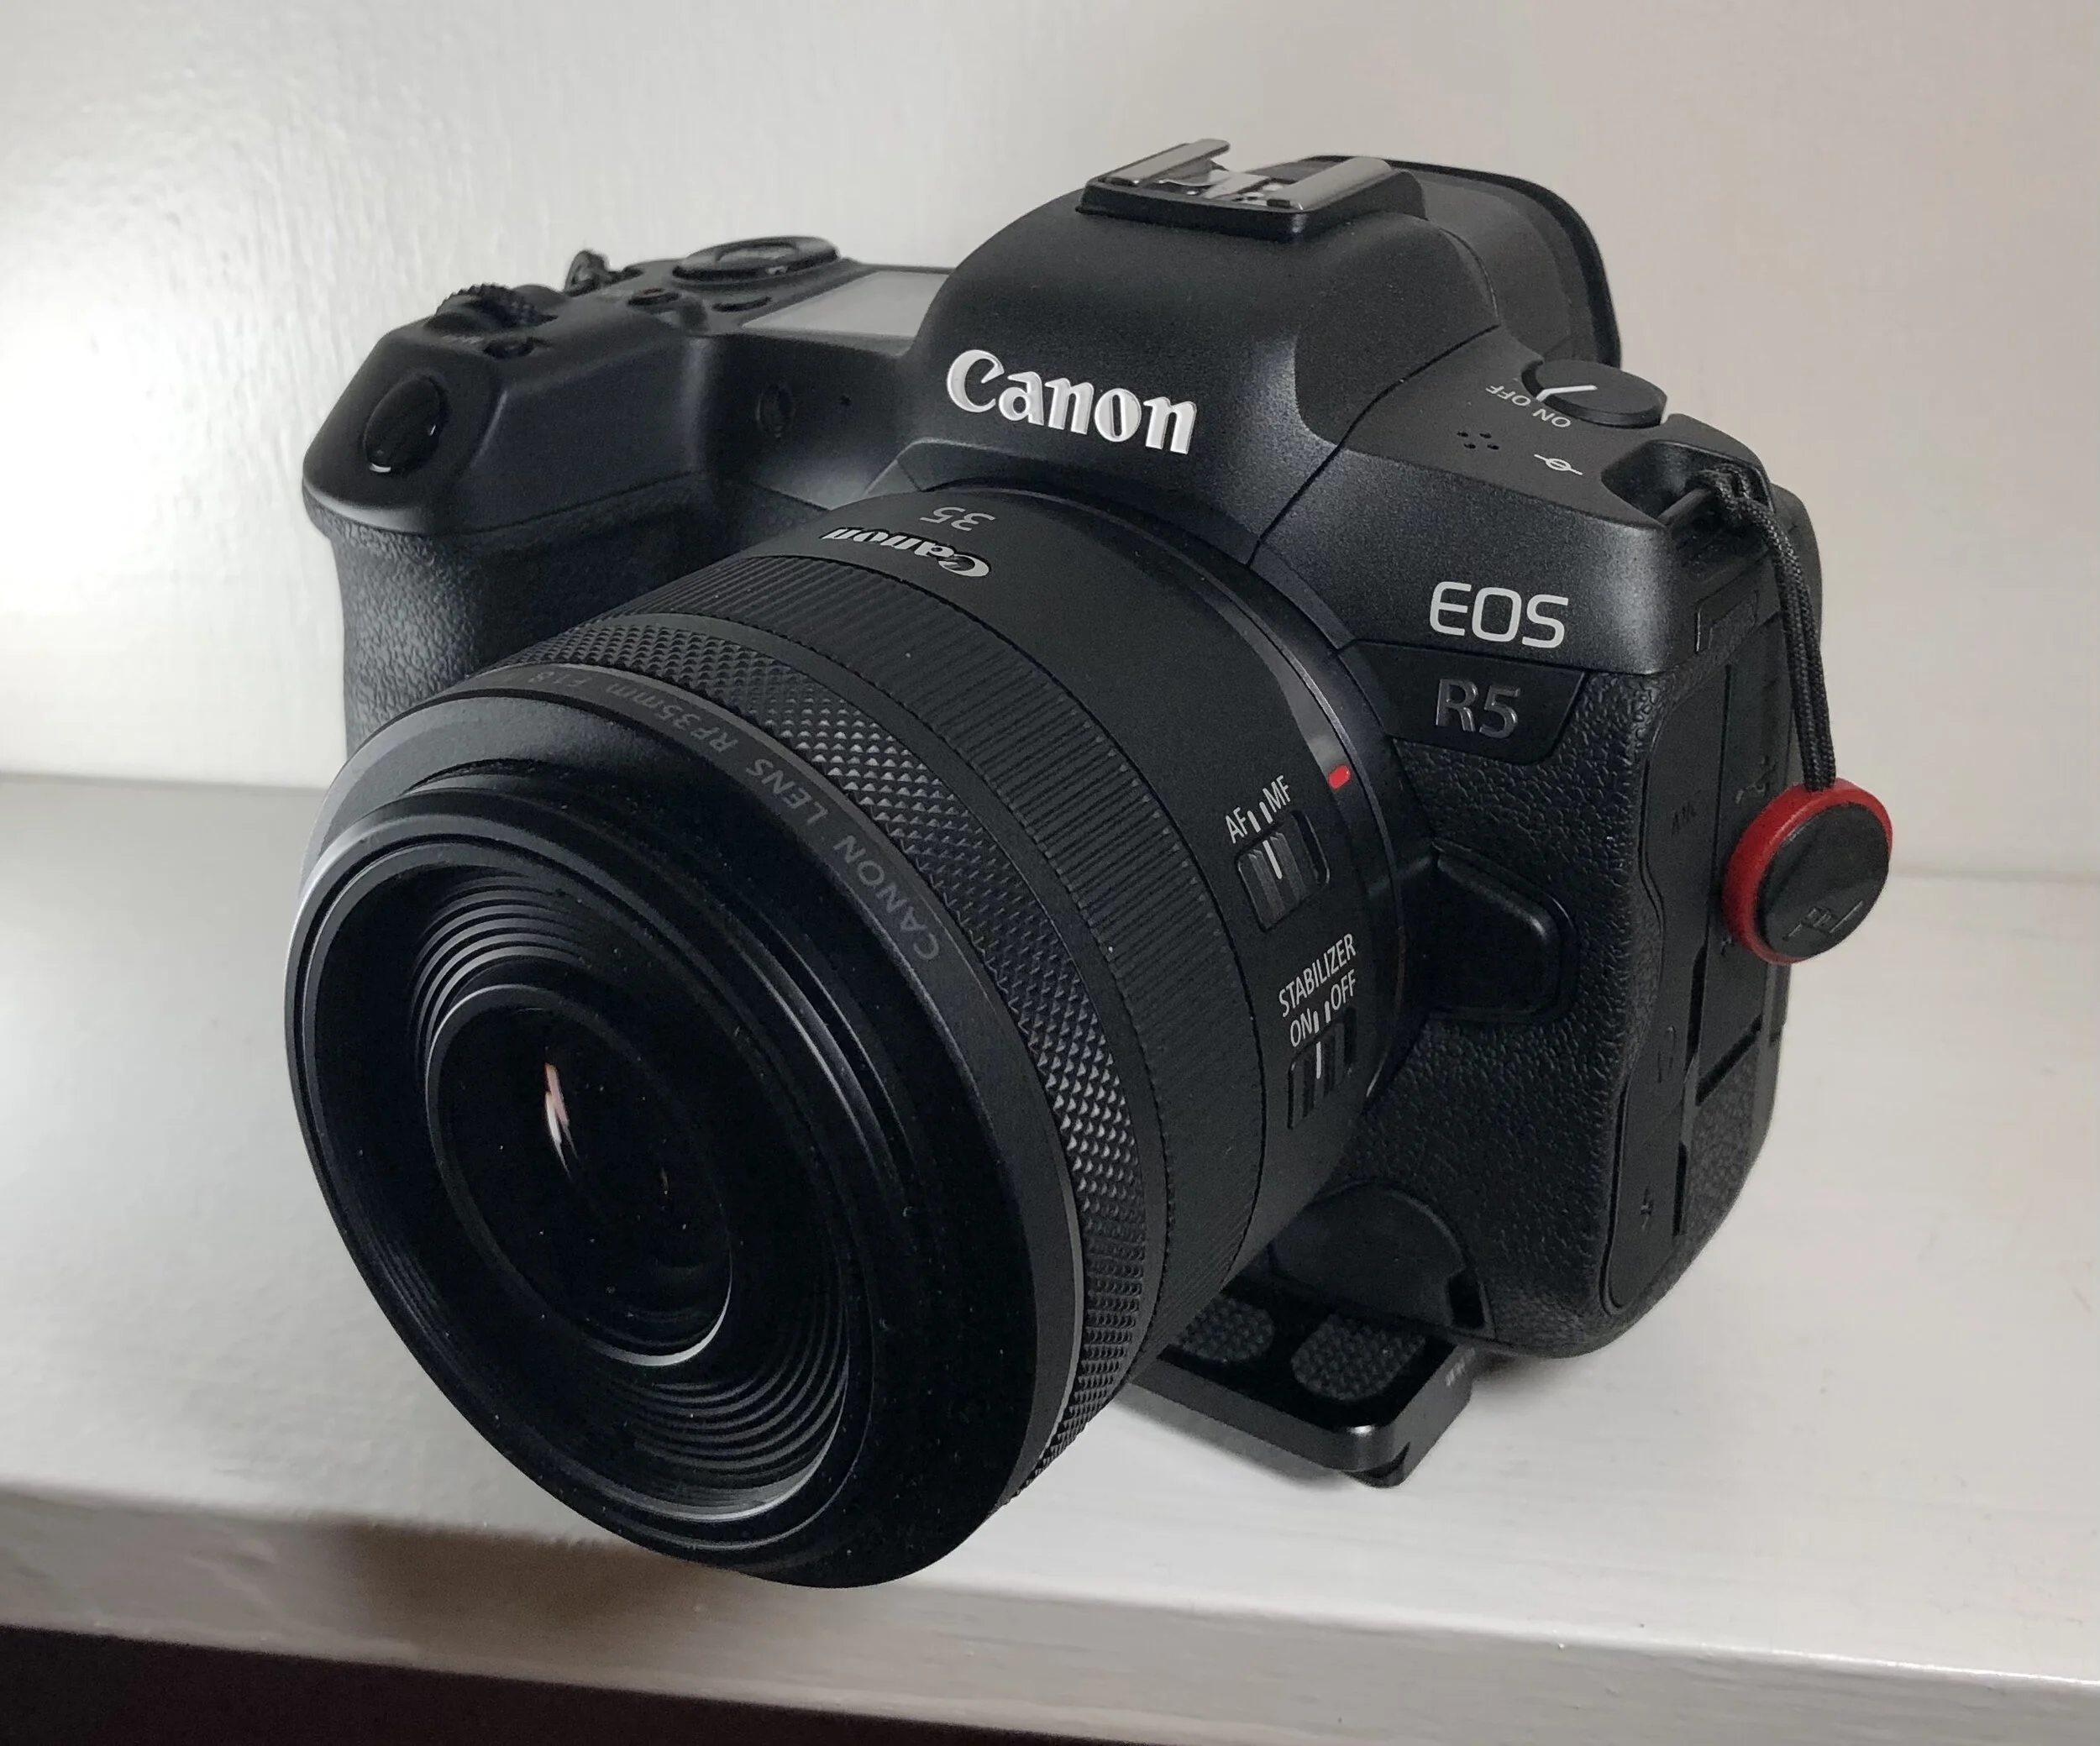
While I was in the camera store I checked out the new 100-500 lens and was pretty tempted but adding another $4000 CAD to the already large purchase was not really necessary since I have a perfectly good 100-400 II and 500 F/4 at home that should work well with the adapter. I did pick up the 35mm F/1.8 lens to ensure I had something to play with while waiting for the adapter to become available, and because it might be a reasonably good video lens for this system.

Commlite R to EF adapter
It seems either everyone is trying to get the EF-R adapters all at the same time or Canon is limiting the supply to try to urge more people to buy the new R lenses. Either way, it was going to be months before I was likely to get one. In the end I went to Amazon and a Commlite adapter arrived at the front door the next day. As you can tell I was very eager to get out with the longer lenses to see how this camera performs.

Bonaparte Gull. Canon R5 and 500mm F/4 IS II at F/4, 1/2000 sec, ISO 200
The bald eagles and osprey had already moved on from the Niagara River and so far there doesn’t seem to be much around to shoot. There were, however, hundreds of Bonaparte gulls fishing along with the cormorants on the Niagara river near Lake Erie, so that became my first test case.

Bonaparte gull looking for fish. Canon R5 and 500mm F/4 IS II at F/4, 1/2000 sec, ISO 320 in Black and White.
I set the camera up with the animal eye focus, with the rest of the autofocus settings left at the default settings. The scene was relatively simple, a bird a few feet above the water and little background to be a distraction. This is the best case, high contrast between the subject and the background. Shooting with the 500mm F/4 IS II handheld and the birds between 25 and 50 feet away, I was able to lock onto a bird amazingly quickly compared to using my Canon 5DS. Most of the time it locked onto the bird immediately and was on the eye if it was visible. Compared to the Sony A7RIV and the 200-600 F/5.6-6.3 I could really see no difference in getting the subject and tracking. While the A7RIV does not have useful eye focus for birds at this time, it is still able to get the bird itself just as quickly. The results of my first couple of outings with the R5 were impressive.

Greater Yellowlegs in the morning light. Canon R5 with 500mm F/4 IS II at F/4, 1/2000 sec, ISO 200
Using the camera in H+ speed I really didn’t notice much blackout in between shots and was able to track the fast moving Bonapartes consistently. Again this felt the same as using the Sony A7RIV, and while I’m used to this, others might find they see more blackout than me. One thing I did notice, and have since going to mirrorless cameras is that because the focus points go to near the edge of the scene, I can quickly focus on a clear image in the viewfinder with both the R5 and the A7RIV, and with the object tracking I can place the subject easily in the composition as I’m tracking. With the 5DS I tend to have to use the central 9 point focus to track well and even if I move those points before I start, I usually end up having to crop later to get the composition I wanted. This is no longer the case with the R5 so I’m more often able to get pretty close to the crop I want in camera as long as I have the length in the first place.
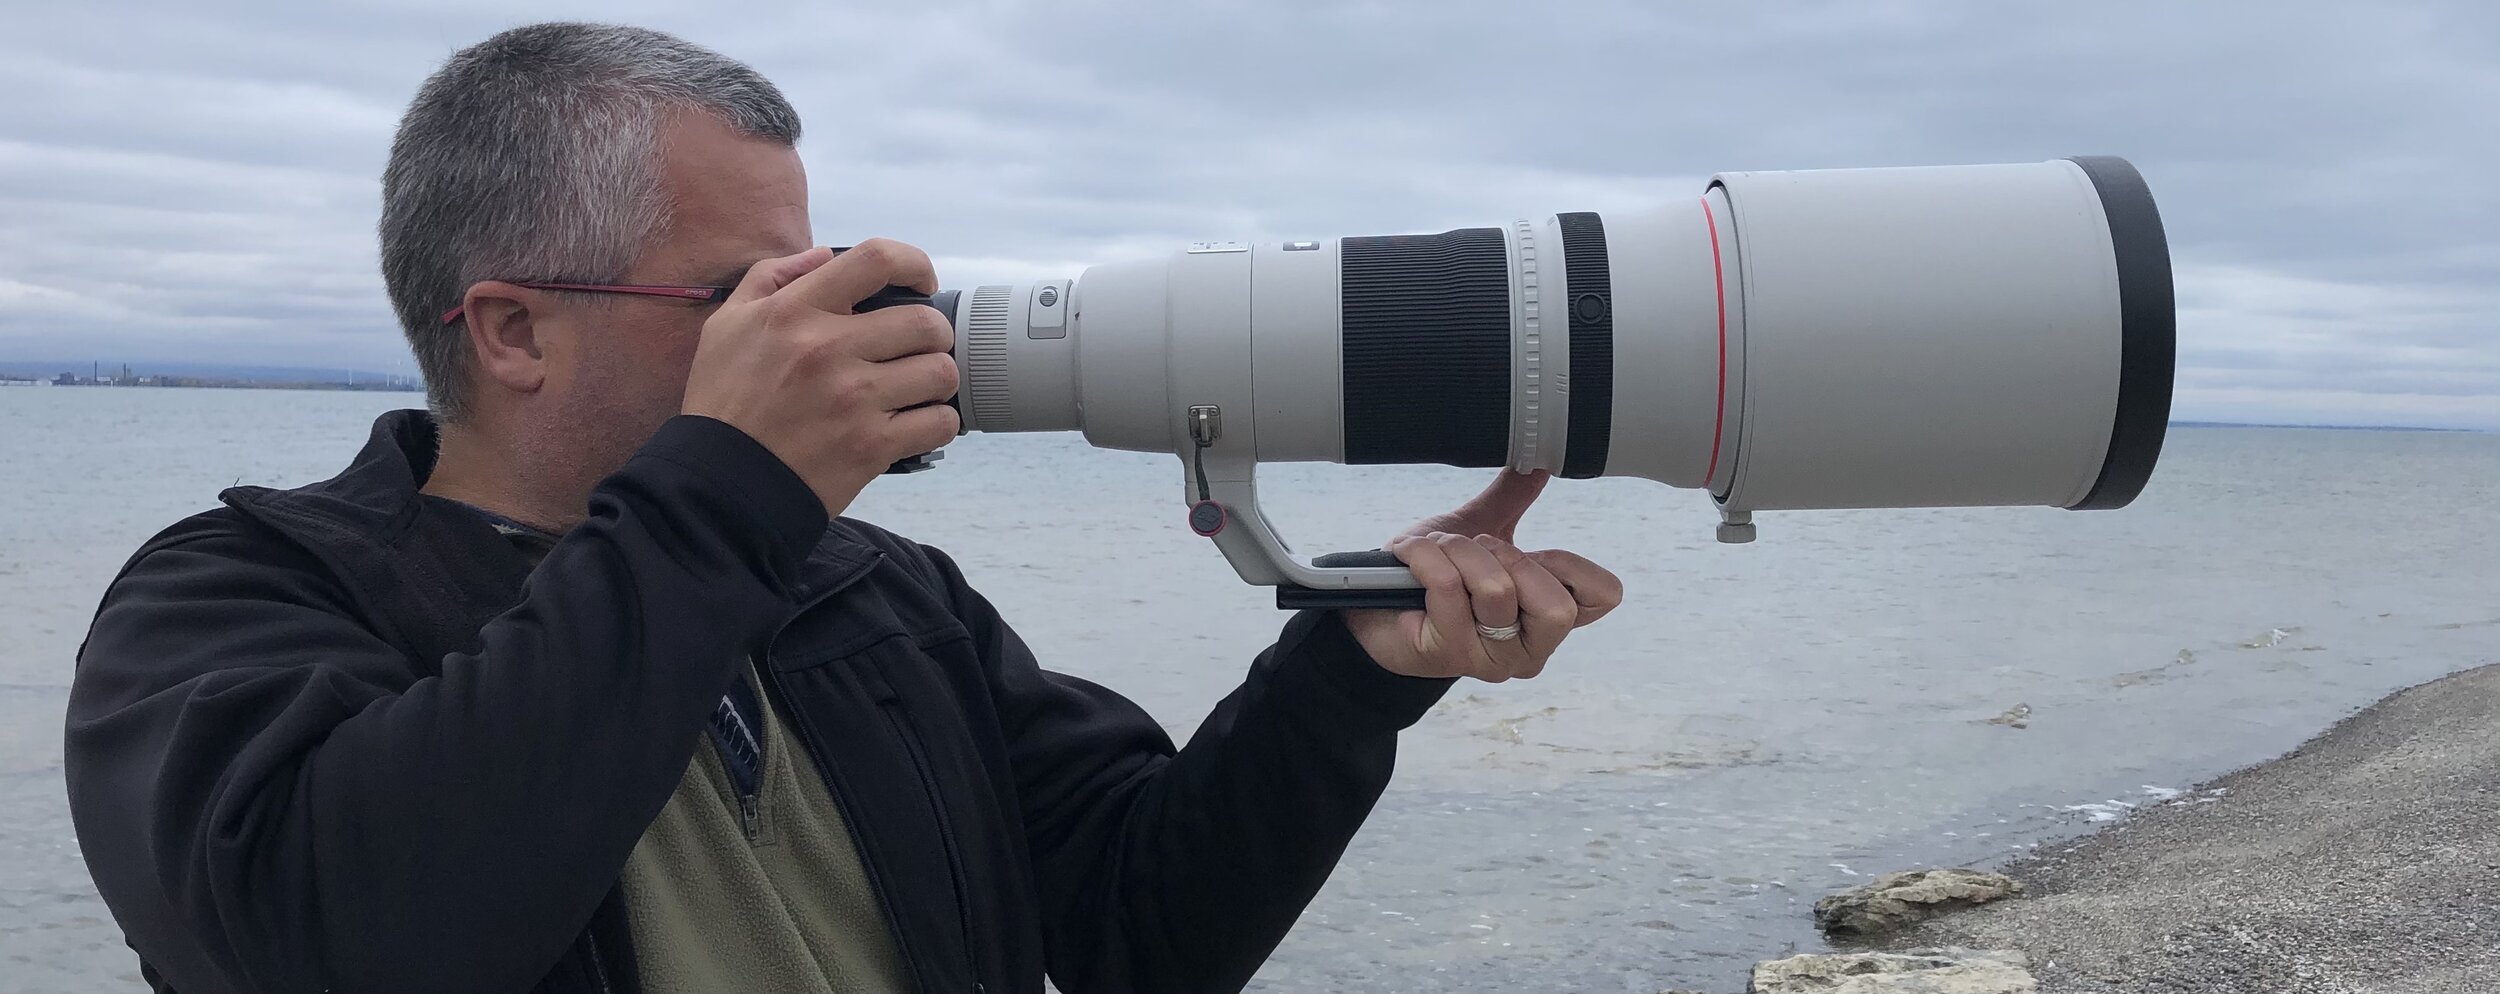
Shooting Canon R5 with commlite adapter and Canon 500mm f/4 IS II, a pretty fantastic combo.
Focus speed and accuracy with the 500mm and the Commlite adapter is excellent and for the most part the only shots I got out of focus were user error. Buffer is certainly sufficient for the way I shoot which is usually bursts of 3-4 shots at a time, although there may be many of these bursts when the action is happening. I never hit the buffer limit during this trial shoot on the R5. Likewise I have rarely hit the limit on the A7RIV but I nearly always hit the buffer limit on the 5DS and the 5DIII. This is a huge improvement for any non-1D series Canon as the last camera I had with a good buffer was the 1DIV.

The sun shines on a field of flowers. Canon R5 with 35 F/1.8 at F/1.8, 1/6400 sec, ISO 100
I will be doing a good deal more comparisons as soon as I get a chance to be outdoors with something interesting - that might be snowy owls if they start heading back south again soon.
The other main use case for this camera is nature landscapes. The fall colours are a great excuse to get out with the camera. I bought the 35 f/1.8 RF lens with the camera since I wasn’t sure if I was going to be able to get an adapter and this was one of the few relatively inexpensive lenses currently available for the R mount. Although I find the autofocus on this lens to be a bit underwhelming, the visual quality seems to be pretty good.
Very dry waterfall on a colorful autumn day. Canon R5 and 16-35 F/4 at F/6.3, 1/30 sec, ISO 400.
The Canon 16-35 F/4 is a lens that pretty much lives on Salwa’s camera (currently the 5DS) but I did manage to use it with the adapter for a while this past weekend. I really love this lens, and adapted on the R5 it is really great. I do think this will be a go-to lens as we start to do video with the R5.
I have also used the 100 F/2.8 IS macro and the 100-400 II for a short amount of time. Both lenses have worked well, in fact they both feel like they work better on the R5 than on the 5DS. I have seen 2 errors when using the adapter over the past couple of weeks that both required me to remove the battery to get things running again. It hasn’t yet happened when using a native lens but since it happens so infrequently I can’t be 100% sure it is due to the adapter.

Praying Mantis taking advantage of the bugs on our porch screen. Canon R5 with 100 F/2.8 IS at F/5.6, 1/80 sec at ISO 3200 handheld.
The Canon R5 is a fantastic camera for a nature photographer. It has fast and accurate autofocus tracking, amazing picture quality, ISO is great at least up to 6400. There are so many useful features and I’m told it can do some pretty amazing video tricks as well.
other observations on the r5
Battery life is not great. When compared to the DSLR it is pretty horrible but even compared to the Sony A7RIV it seems to have at best 2/3 the life. To be fair, I nearly always use cameras with servo focus and I don’t turn off the camera during a hike but under similar conditions the R5 does not do well. I really haven’t tested out anything to do with video so my observations here are purely from a photography point of view. From what I have experienced so far I will need to have 2-3 batteries for a day of shooting. With the Canon 5DS I would rarely need a second battery unless I was tracking focus all day with the 500mm. To put it into perspective, I can also usually get through a day of shooting with the Sony A7RIV with a single battery but always carry a second one especially when using long lenses. I don’t really find this to be a huge deal, bringing a couple of extra batteries does not add that much weight but it can make a difference when I’m away from power for more than a few days of shooting. The new battery that comes with the camera is definitely longer lasting (as it should be), which means that I will likely be picking up a few more of those instead of relying on the extras we have already.
Ergonomics are pretty good. If you are used to Canon 5 series DSLRs then this will feel pretty similar but just a bit smaller in your hands. I personally do not prefer having a huge camera with the 5D being almost too big. The R5 and the A7RIV both feel great in my hands. I find the new mode dial to be a bit odd but I’m getting used to it since it needs to house all the new video modes. Button layout is very similar to the 5D which is a good thing in some ways but disappointing in others. I’m used to the layout, that is good. I was hoping for more custom buttons as I have become used to having on the Sony cameras. I like to be able to use buttons for most things I change regularly and although Sony’s menus can be deep and convoluted, once I have the items I use most often on a button, I rarely go into the menu when shooting. There are a couple of buttons you can reprogram on the 5R but I would have liked a few more. For many people this last complaint may be mitigated by the use of the touch screen but I rarely like to take my eye from the view finder to change things if I don’t have to. I would really love to see the back wheel be replaced with a wheel and four buttons like on the A7 series. It took a while to get used to not hitting one of the buttons while spinning the wheel, but now it is just fantastic to have the extra four buttons all within normal reach of my thumb.
On other Canon cameras I have exposure compensation set on the back wheel for modes other than Manual and you have the ISO button on top. With the R5 I have the same setup but since there is no ISO button, I have it set for the extra wheel on the lens. For adapted lenses though I can only change it with the touch screen unless I use up one of the other buttons but that will still mean pressing that button and then moving one of the dials. On the Sony it is set for the right side of the wheel, so press the wheel and then turn all in one motion. On the other hand, the location of the exposure compensation dial is hard to change while shooting on the Sony so nothing is perfect.
The touch screen is great for when I’m on a tripod. It is very responsive, easy to use and has great functionality. I like the swivel screen, it will be amazing for astro photography. I don’t use the touch screen much handheld and the settings allow it not to get in the way without having to turn it off unlike the Sony where I just turn it off unless I’m doing video.
Thank you Canon for bringing back the joystick after the trial with the original EOS R. I use it constantly with gloves on in the winter.
Top screen: I guess this is a nice to have, but everything on that screen I can see in the EVF or the back screen. So it is neat but really I could easily live without it. I know some people love it and it doesn’t get in the way so I’ll just mostly ignore it.
Eye cup: Now this is my first real complaint. This eye cup is just not as good as the ones on the 5D series. As a person who shoots with glasses I get a lot of glare when looking through the eye piece if the sun is anywhere to my right. This is the first camera I have ever used that I have seen this problem. I’m sure there will be some sort of accessory that I can use to fix this issue since it may just be for people like me who try to shoot with glasses on.
Autofocus modes - it would be nice if you could have object tracking (and eye tracking) associated with each of the focus modes. I will often use single point or small group to acquire initial focus when the subject is slightly obscured but want the camera to track that specific bird. You can have it acquire from the center point initially but not from any given focus group. This works really well on the Sony cameras currently even if their eye autofocus is not as good with animals.
Tracking autofocus is easily as good as the Sony A7RIV in almost all use cases. It is better than the Sony when it comes to eye tracking of animals and birds. This seems almost instantaneous and has often gotten focus before I see the bird clearly in the frame. The only times so far that I have had issues is where the bird is flying near a complex background like along a line of trees. The R5 often is unable to get initial focus in these cases, however if it does get focus before going into these areas it usually keeps focus on the bird. This was a problem as well with earlier Sony cameras like the A6000 but has gotten much better since the A7III. I wouldn’t be surprised to see some of the algorithms improve with each software update. It may also be something that can be improved with the autofocus adjustments in the menus but in the default settings it currently is not quite as good under those conditions.
One thing I have to get used to again is how Canon’s evaluative exposure metering works. If you are used to Canon cameras then this will not be an issue but Sony cameras tend to meter in a way that I find closer to what I see. The good thing is that both systems are internally consistent and all I have to do is remember that when I’m using the Canon cameras I have to increase compensation often by a stop in situations where there are a lot of grey clouds in even part of the image. This used to be a bigger problem with older Canon cameras that would lose detail in the shadows, not so much of an issue now as if I make a mistake, recovering a stop or two is no problem.
Image quality - This is fantastic. At low ISO I don’t see much difference between the R5 and the 5DS. I do see a bit more detail in the Sony A7RIV. This is great for large prints but it is mostly useful in nature photography for the ability to crop into a subject that is still too far away even with a large lens. This is also where the image stabilization comes into play, with IBIS allowing handheld shots that are easily cropable as long as you have your shutter speed fast enough to handle the motion of the subject. At high ISOs the R5 seems just a touch better than the Sony A7RIV and both are significantly better than the 5DS which I really wouldn’t shoot higher than 1600. I will test the usable high ISO range as I get out with the owls again but so far I think 6400 will be usable even on slightly cropped images.
It may seem that I have found a lot to complain about on the R5 but really every camera has a few things that you would like to change or improve. None of those are really things that would make me not want to use this camera, just as a similar list does not make me dislike the A7RIV. So far I really enjoy using the R5, especially since I can use it with EF lenses that have been sitting on the shelf since Salwa’s 5DIII kicked the bucket and she has taken over my 5DS.
I am planning on doing some comparison videos of using the R5, the 5DS and the Sony A7RIV for birds and animals during our next big trip coming up. I will also take some time to shoot video on the R5 and A7RIV hopefully testing out tracking of animals in video for both. I will likely do another blog or two as I try out other lenses and get more time in the field with this new toy.
Wayback Wednesday (Take 2) - Australia
I chose our trip to Australia from seven years ago for my look-back. Ever since I was a young kid I remember thinking how great it would be to travel around Australia to see the exotic animals and birds, amazing coastlines and reefs, not to mention those cool accents, right?

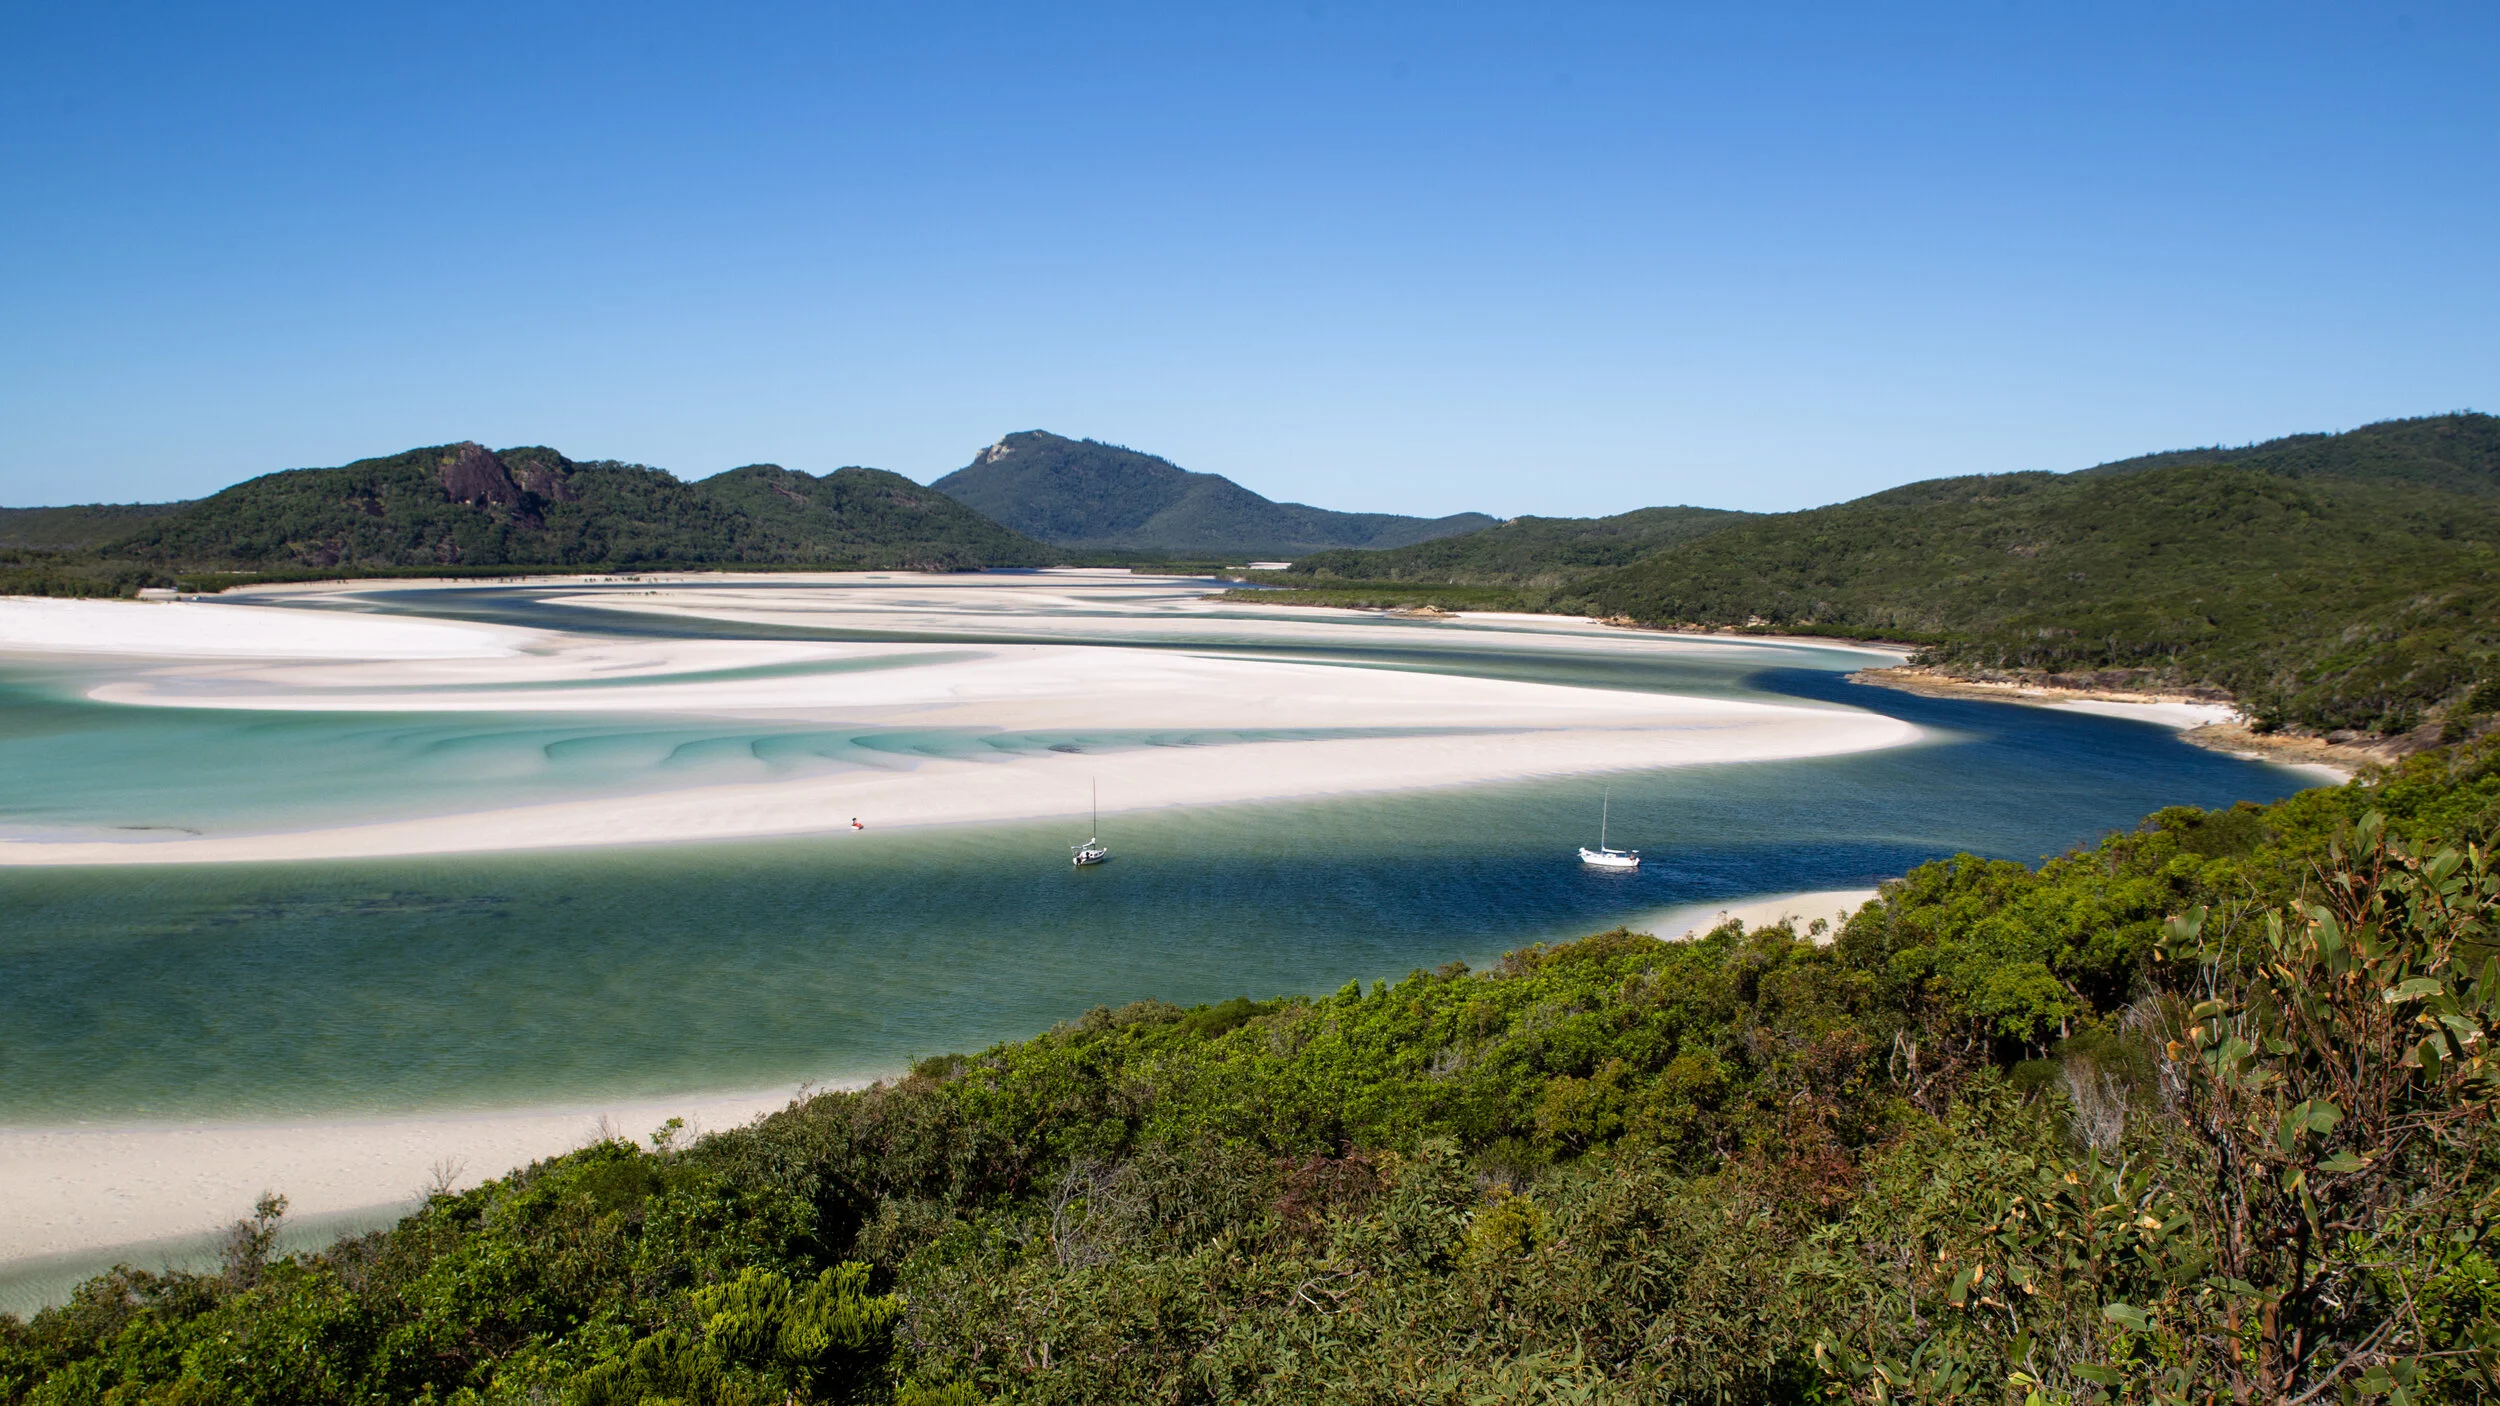
Sandy beaches and light blue seas around the Whitsunday Islands
Time for episode 2 of this series where I look back at pictures from past trips, much like I would have in bygone days, flipping through photo albums. I find it helps bring into focus things I did well, or mistakes I’ve made. It also highlights how I have grown over that time in terms of my technique and composition.
The iconic laugh of the Kookaburra startled us many times with a call that almost sounded like monkeys in central America.
I chose our trip to Australia from seven years ago for my look-back. Ever since I was a young kid I remember thinking how great it would be to travel around Australia to see the exotic animals and birds, amazing coastlines and reefs, not to mention those cool accents, right? To make it worthwhile for a plane ride that takes more than 24 hours, we hoped to make this trip for a longer duration. As luck (or something similar) would have it, I finally had more than a week off work for the first time since leaving high school (that can’t be healthy) and we booked a little camping van for a 6 week tour of the east coast of Australia.
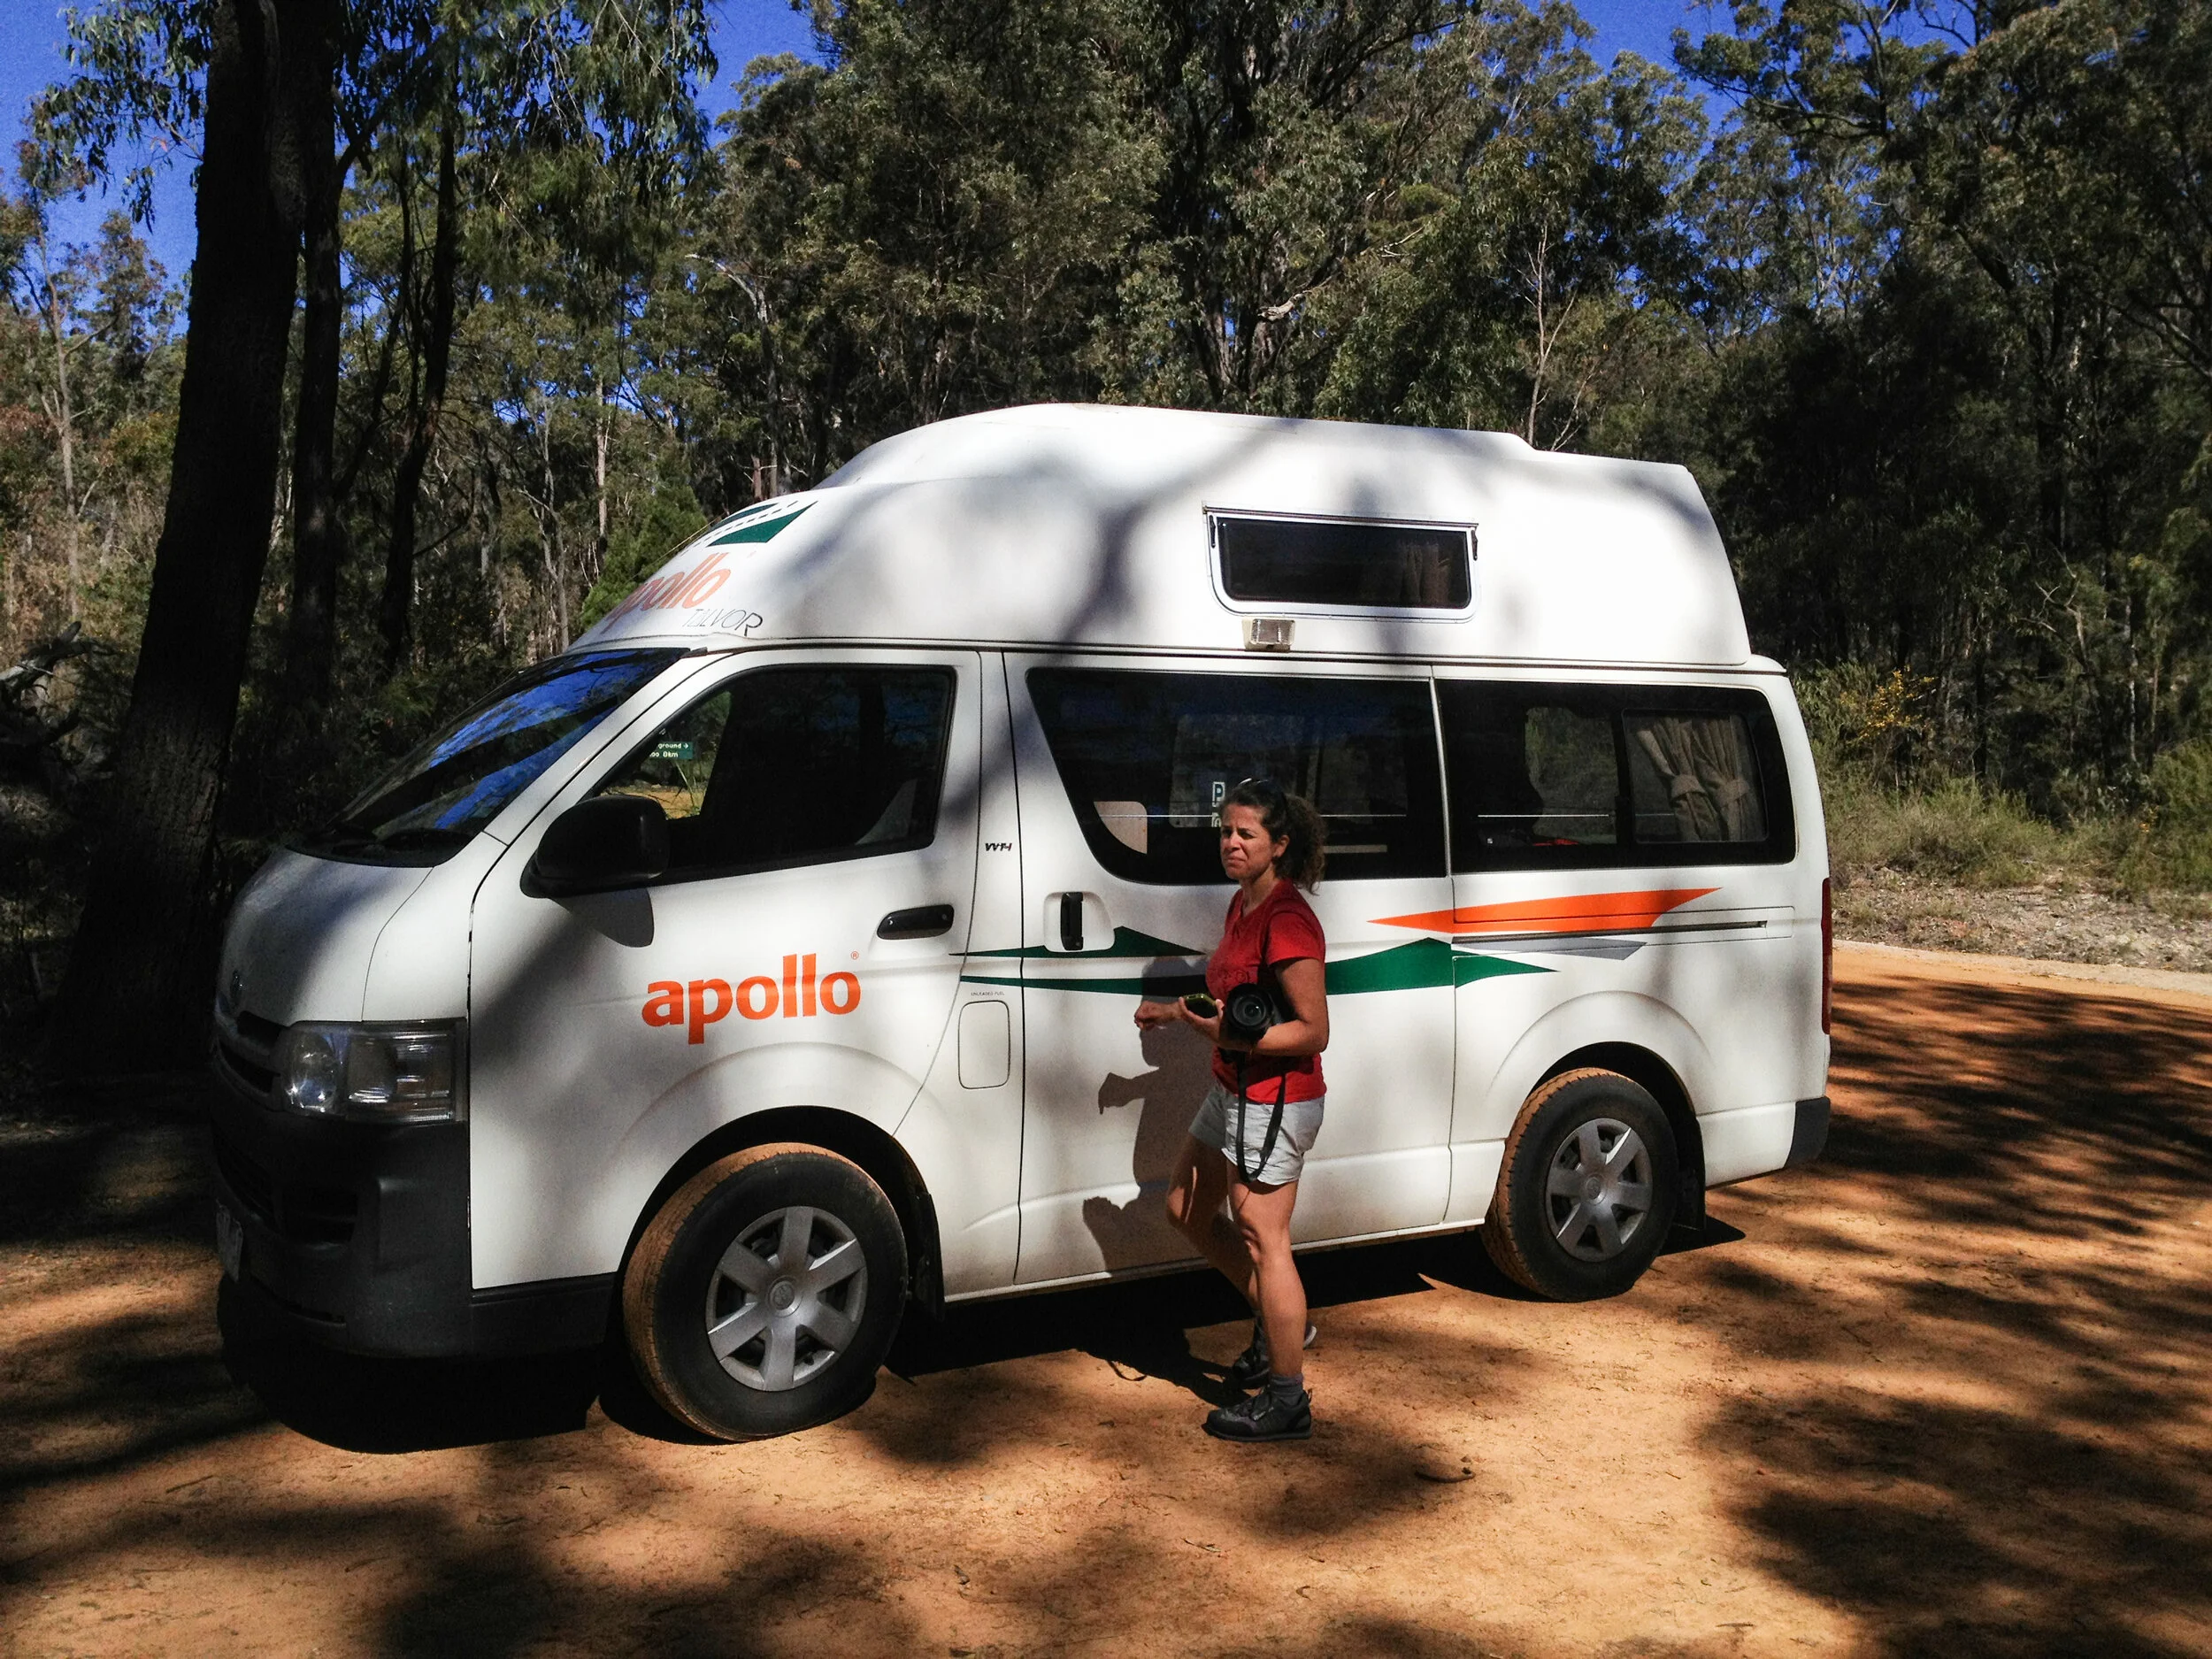
Our little home for six weeks on the road
We had already completed a couple of trips in VW Westy camping vans, and we knew we enjoyed this style of travel. Since this was going to be a photography trip as well, the camper van was a great way to take our gear and always have it at hand.
The six-week tour started in Brisbane with a visit to Salwa’s brother and family, and then we started the trek north along the coast towards Cairns, Port Douglas and the Daintree National Park.

An old pier in Brisbane…used a vintage monochrome filter to bring us back to the days where the pier was a center of commerce.
There….northward bound
After departing Brisbane the first area we explored was the Sunshine Coast with some beautiful beaches, especially around Noosa. If we had a 4x4 camper I think we would have spent more time in this region along Great Sandy National Park and onto Fraser Island but that will have to wait for another trip.

Sunset at Noosa Beach heading up the sunshine coast
We had heard great things about the Whitsunday Islands National Park and wandered up the coast with the goal of taking a boat out to the islands. The beautiful white beaches on the island were breathtaking. There were a few sailboats anchored in the bay and I think that would be the perfect way to be able to really see these islands. It was beautiful at midday, I’m guessing it would be spectacular at dusk and dawn.
The white sandy beaches and a safe anchorage. What else do you need? Lemon sharks and stingrays were abundant in the shallows.
We continued to wind our way up the one main highway stopping at various beaches, towns and small wildlife sanctuaries with a main goal of getting up toward Cairns and Port Douglas. Along the coast and in the wildlife sanctuaries I was able to get my fill of bird photography, most of which I have never seen before. The slideshow below has a sample of these.


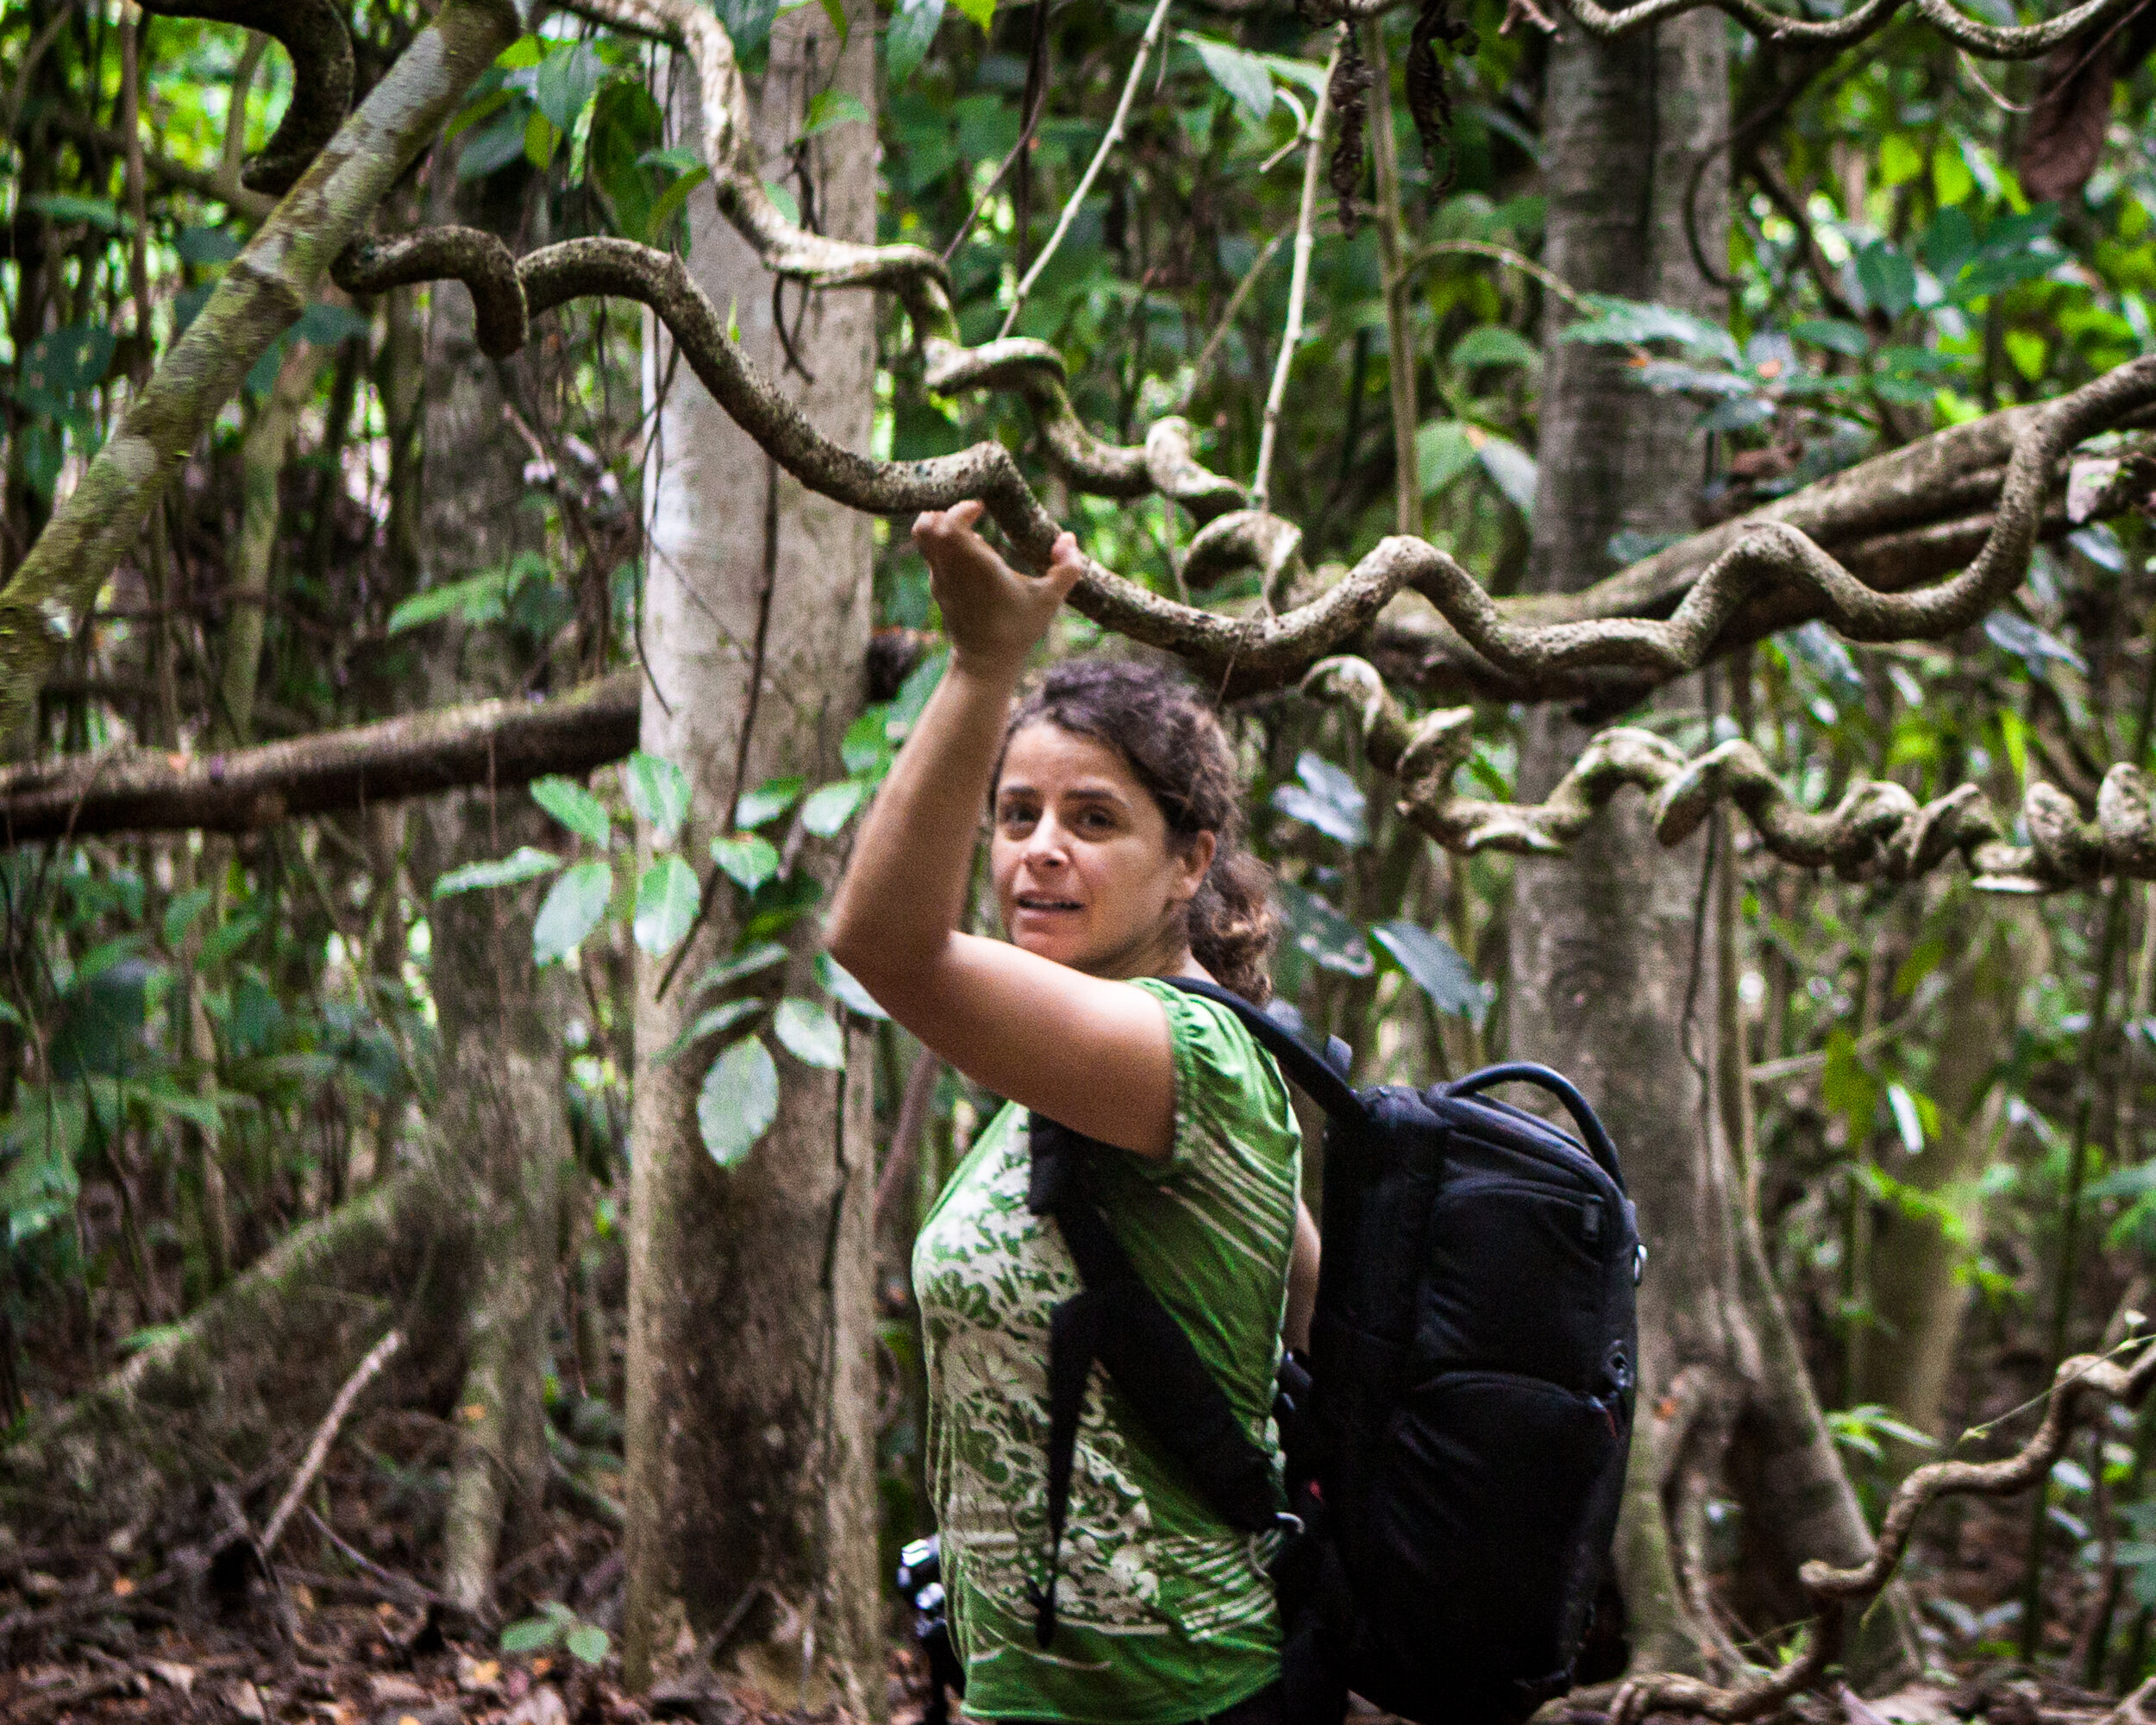
We picked a great time to head into the north end of Australia, going into their winter season it was still hot like a Carolina spring but not to the point that we couldn’t handle the heat. For those of you who love the heat, the north of Australia has enough to explore to spend months wandering. This area becomes very under-populated so you do need to plan well ahead if you are camping. From a nature photographer’s perspective, the rainforests are so unique to those of us from North America that I found it difficult to focus and found myself wandering aimlessly pressing my shutter button for everything that caught my eye.
A little Oasis in the rainforest
Although I did get plenty of interesting shots, slowing down and thinking about what I wanted to capture would have allowed me to get much more interesting bird and animal shots. I think the excitement of seeing things for the first time can make you just want to get a bit of it all, even if you know better, and would normally stop and wait for the action to come to you.
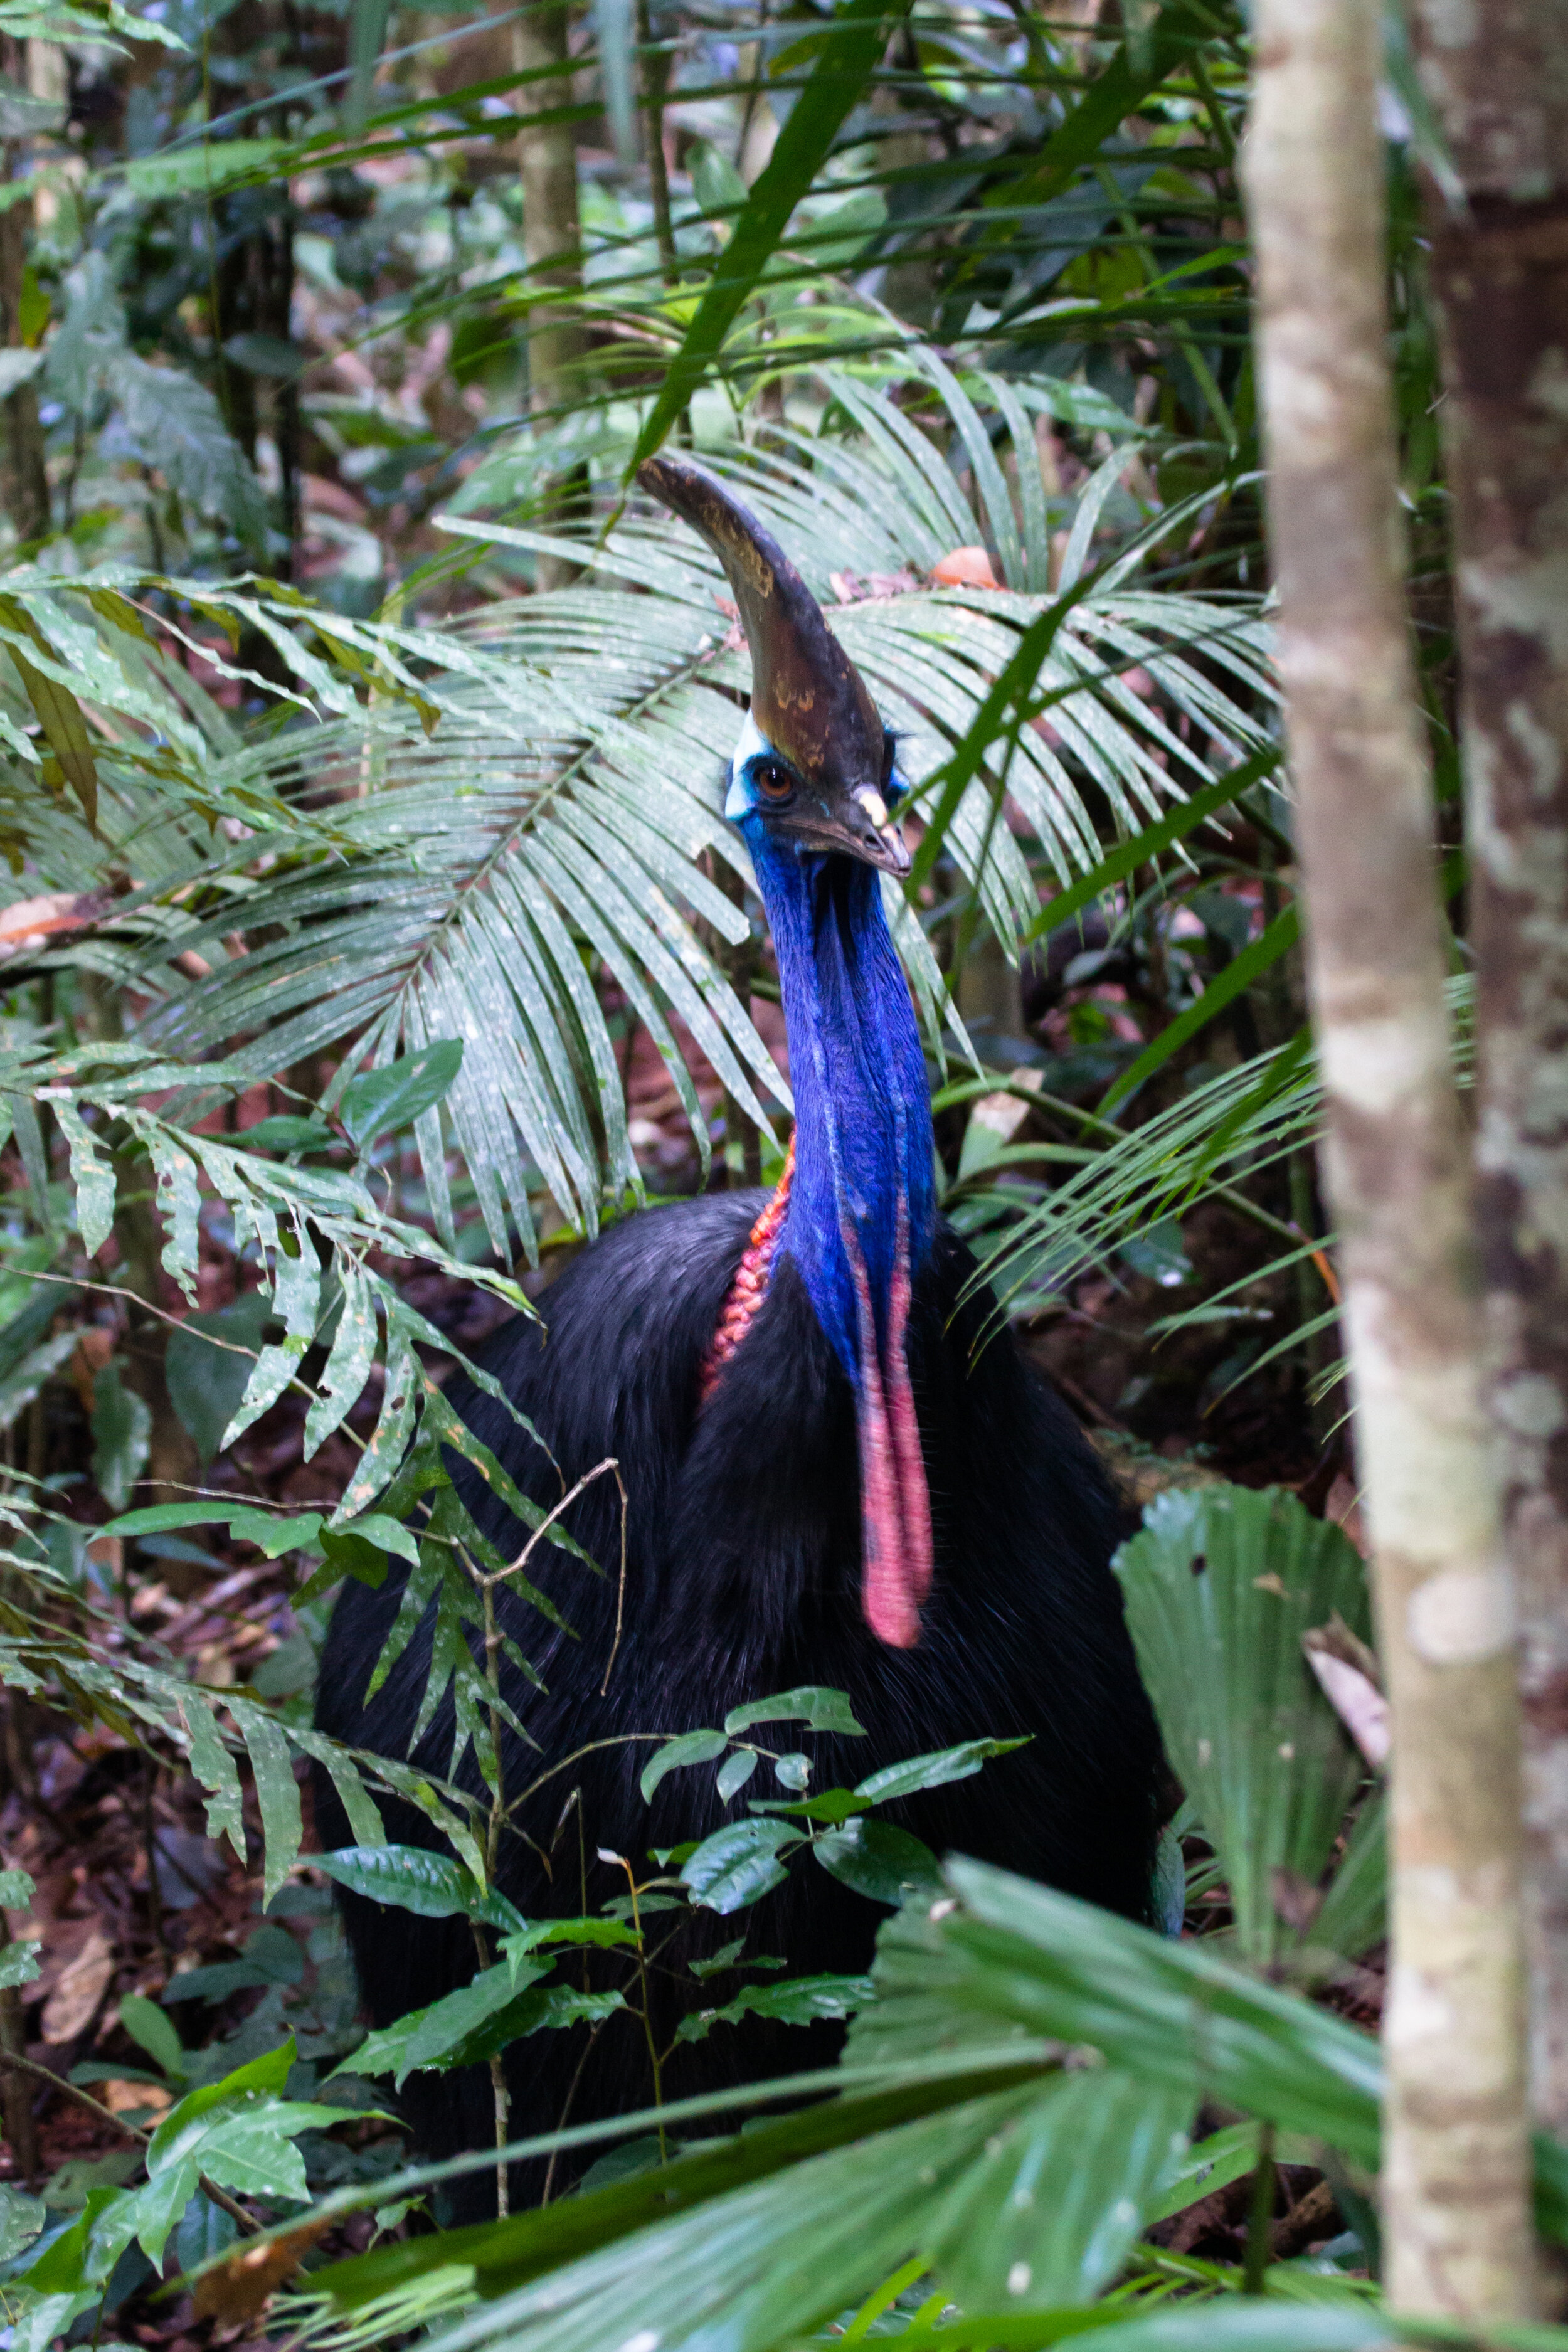
One of the more fascinating birds to capture. A Cassowary in the Daintree forest.
Both the rainforest and the Great Barrier Reef were things that I will remember for a long time. I think in some ways this trip became like a wine tasting tour. We got just enough to know that we want to go back and get more of some areas - and in some cases we might want to buy the vineyard and never leave.
would love to go back and dive the great barrier reef again with a proper underwater camera. Talk about opening a whole new world and rekindling my love of scuba diving.
…and back again….southward bound
On the way back south we ventured inland and were rewarded with completely different landscapes and creatures. The people were very different as well, most of the people we met in the campsites were transient workers for the mines. They would stay for weeks at a time in the camps and head back to their families on the coast for some weekends and holidays. Looked like hard work, and they traveled where the work took them.
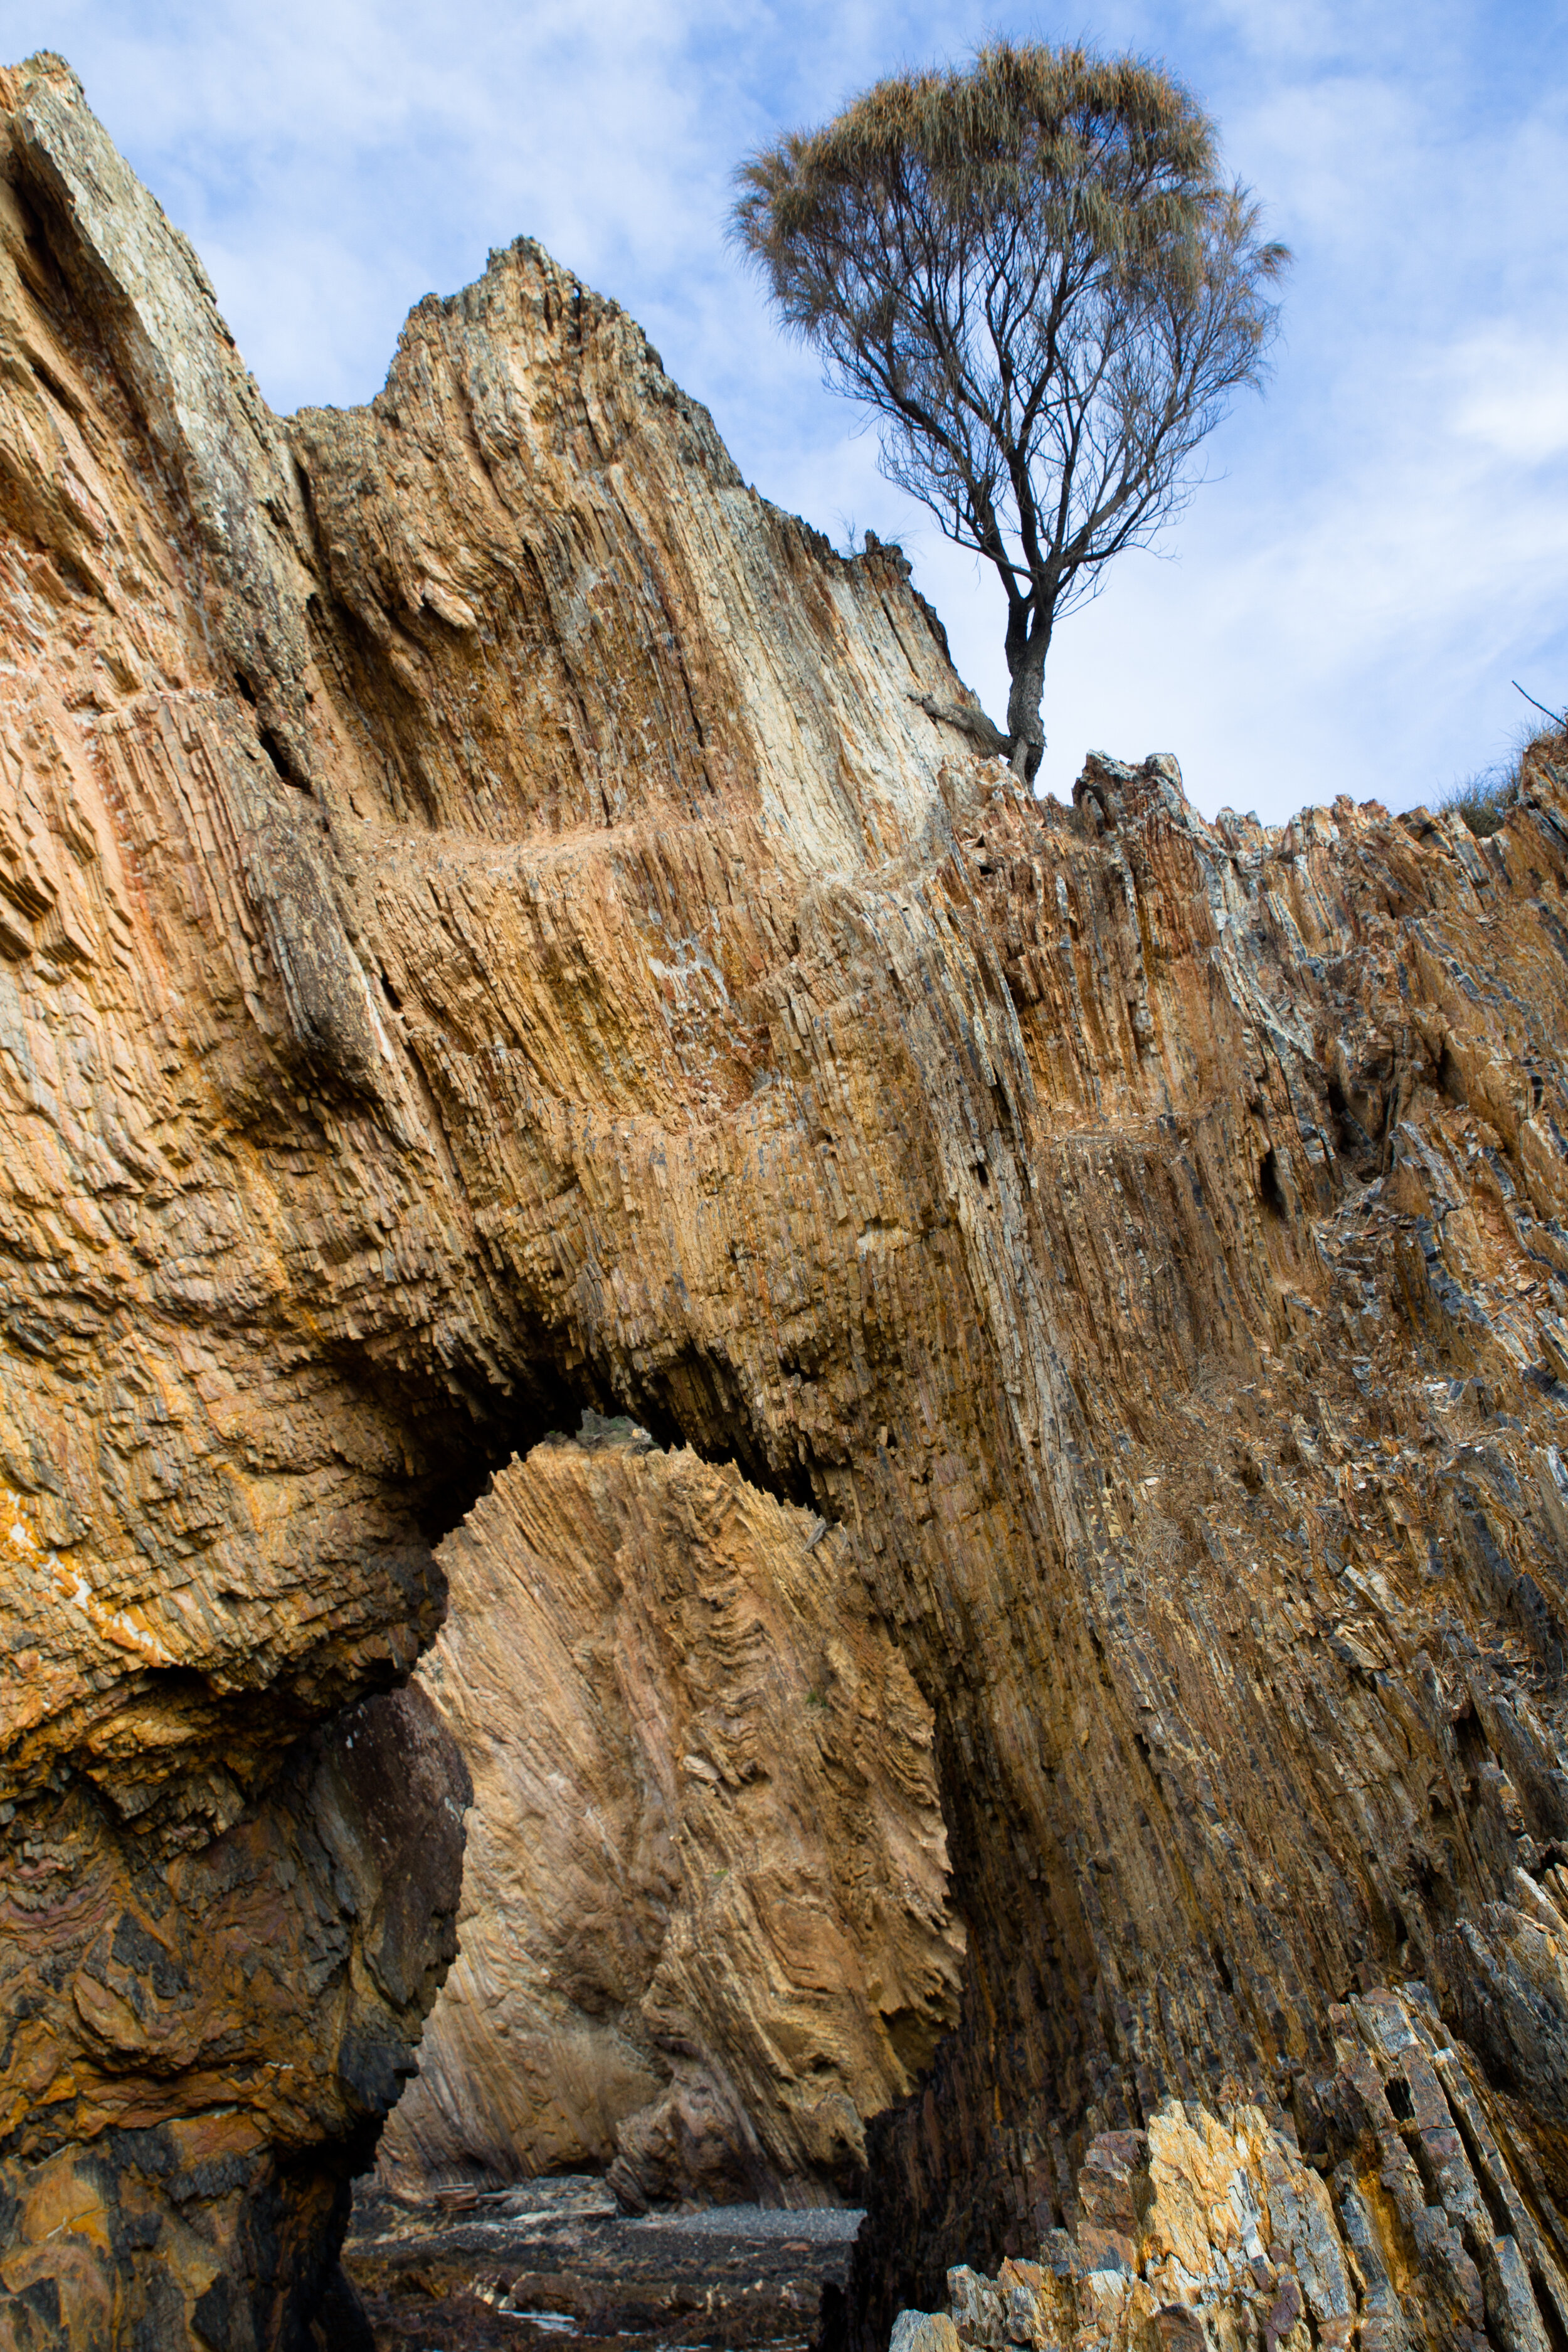
The landscape changed considerably as we headed inland. Far enough inland to get some different rocks and trees but not quite far enough to be in the desert this time.
There were many National and State Parks that we passed on the way south. Many of these parks really required 4x4 campers to enjoy properly. Often roads that might be passable at the time could be flooded after any rainfall. Sadly, even though many of these were high on our list of places to play we had to skip this time and put on our “next time” list. One of the bigger National Parks did have some areas that our camper could drive into. Carnarvon National Park was a hikers dream. This was also a fantastic spot for landscape photography. We got some interesting shots, and again found locations and compositions for that next time - oh, and we did see the very illusive and odd platypus hunting in a creek.
hiking in the interior of Australia we found some amazing granite to climb
Past Brisbane we headed back to the coast. Beaches along the Gold Coast gave us some relaxing camping with Salwa’s family again and a taste for why this area is one of the best places to live in the world. Beautiful weather, interesting people, and if you love surfing….this is really paradise.

Where there were waves there was never a shortage of surfers
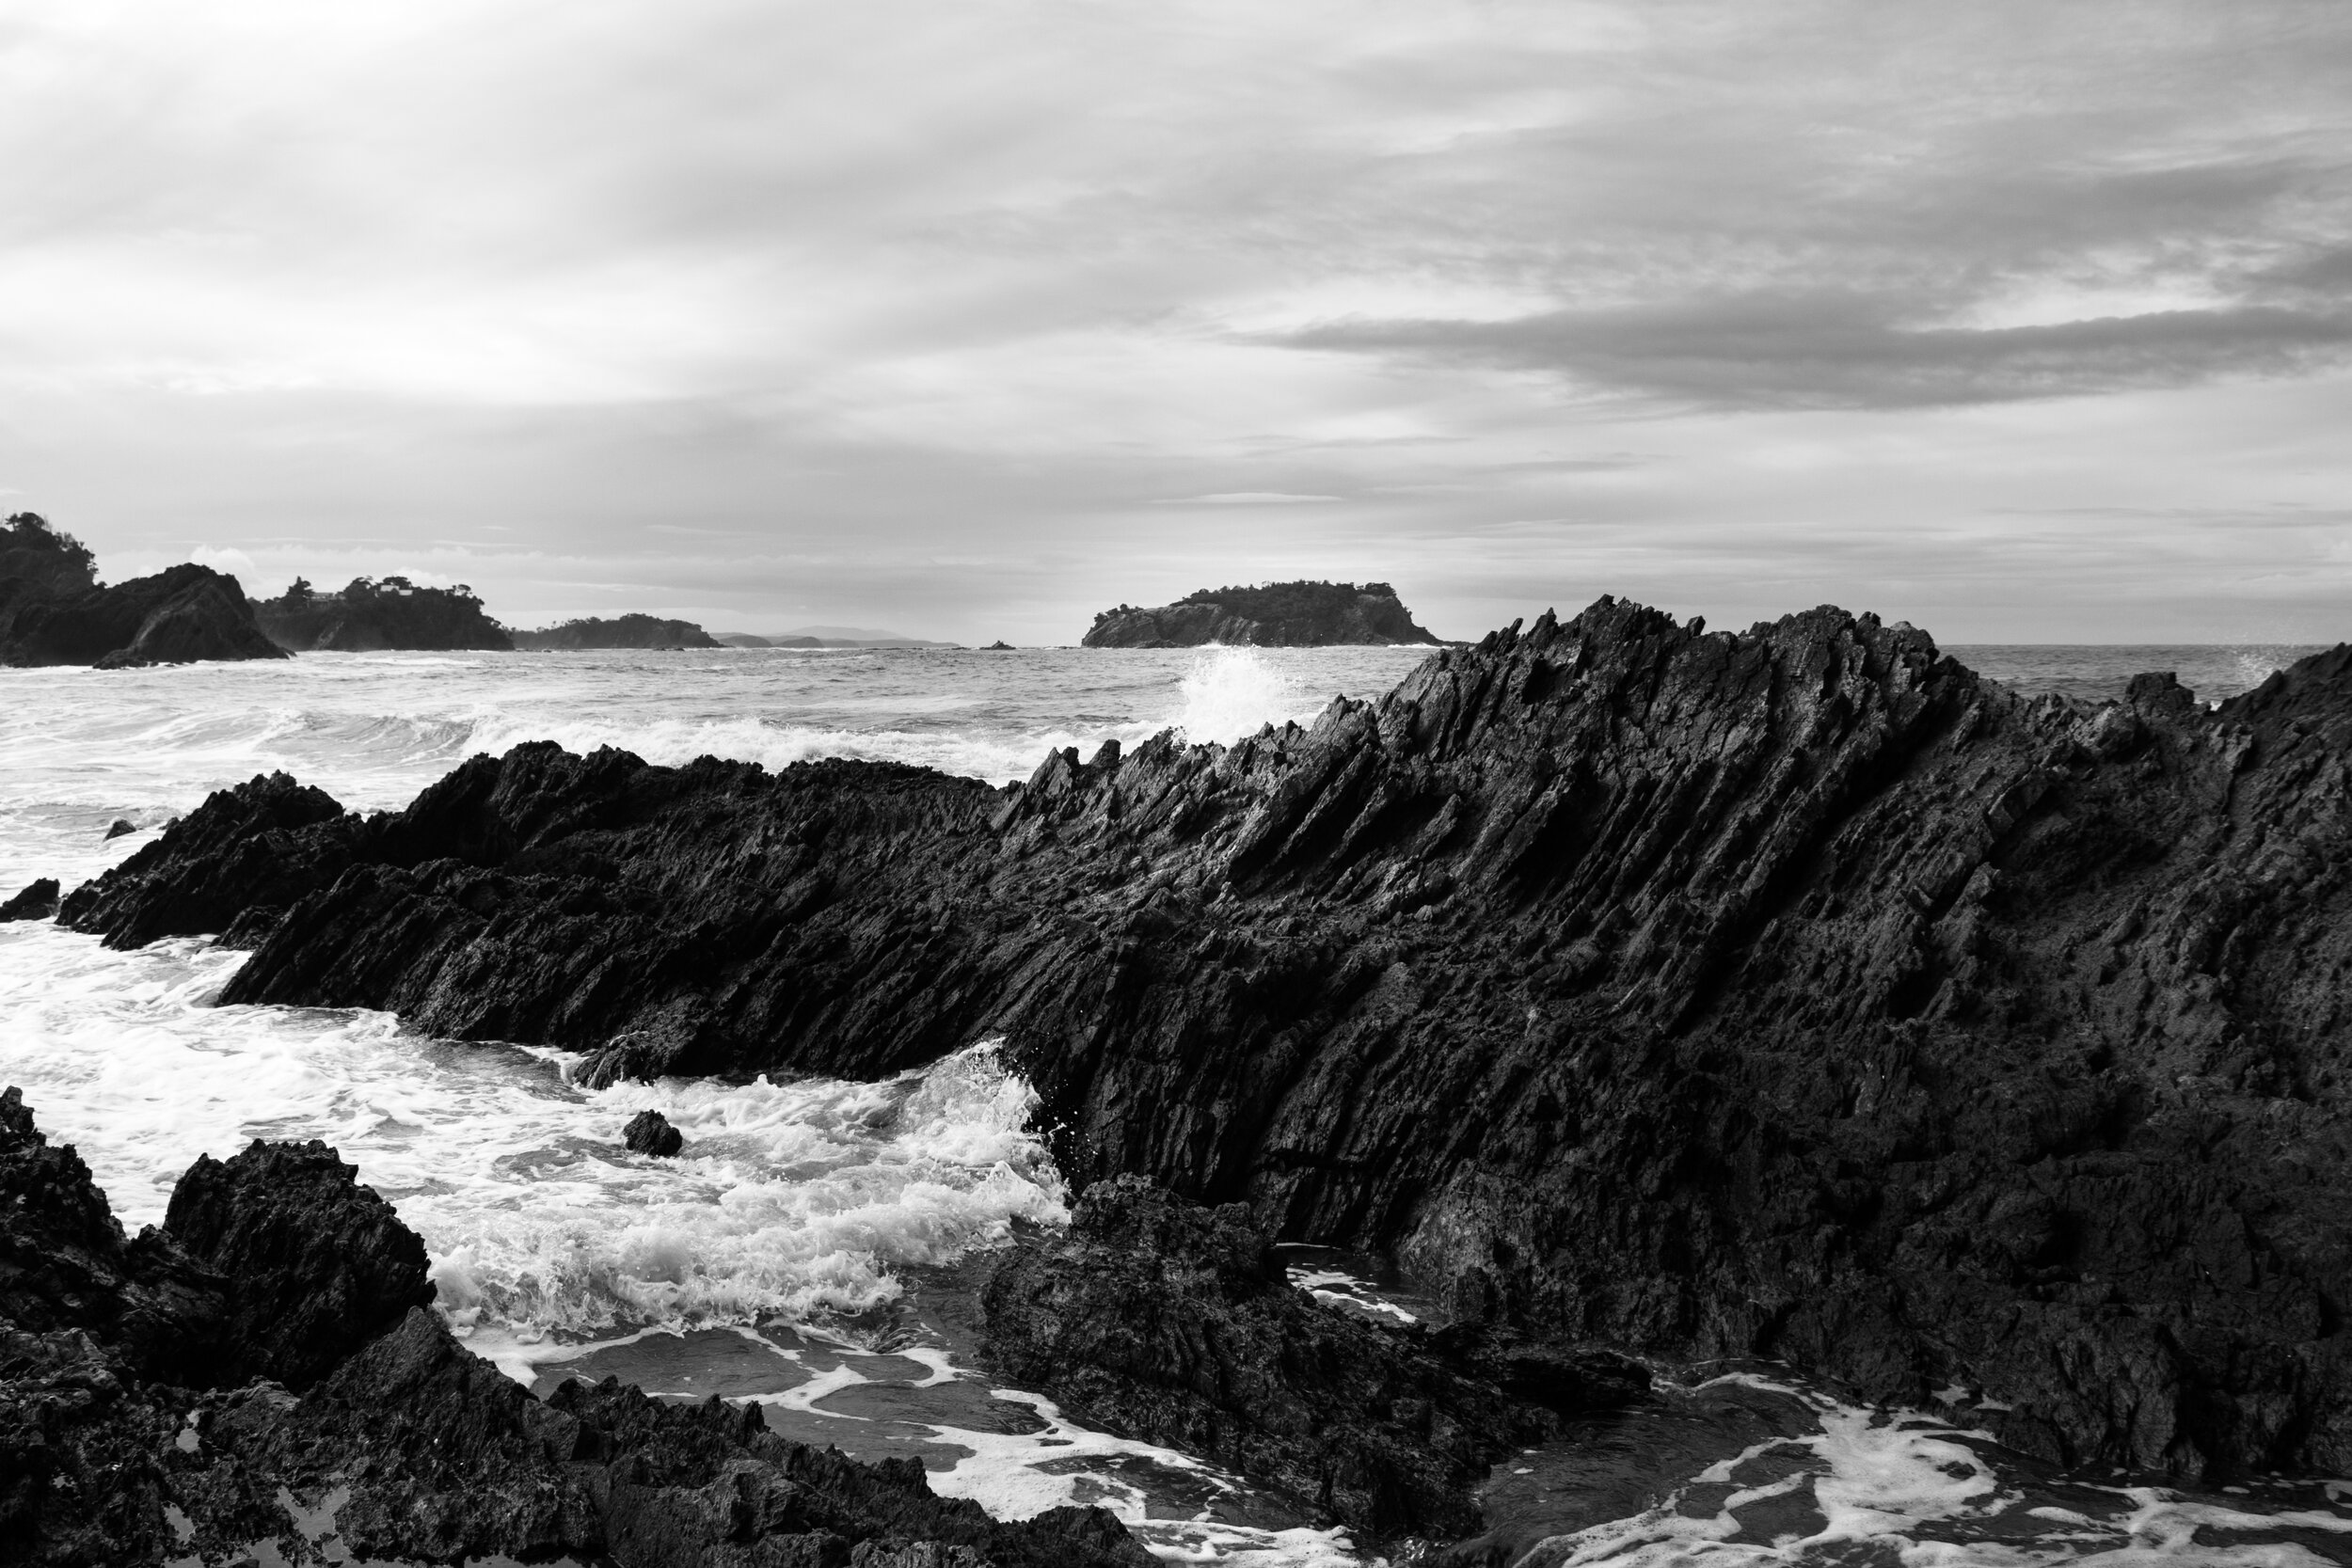
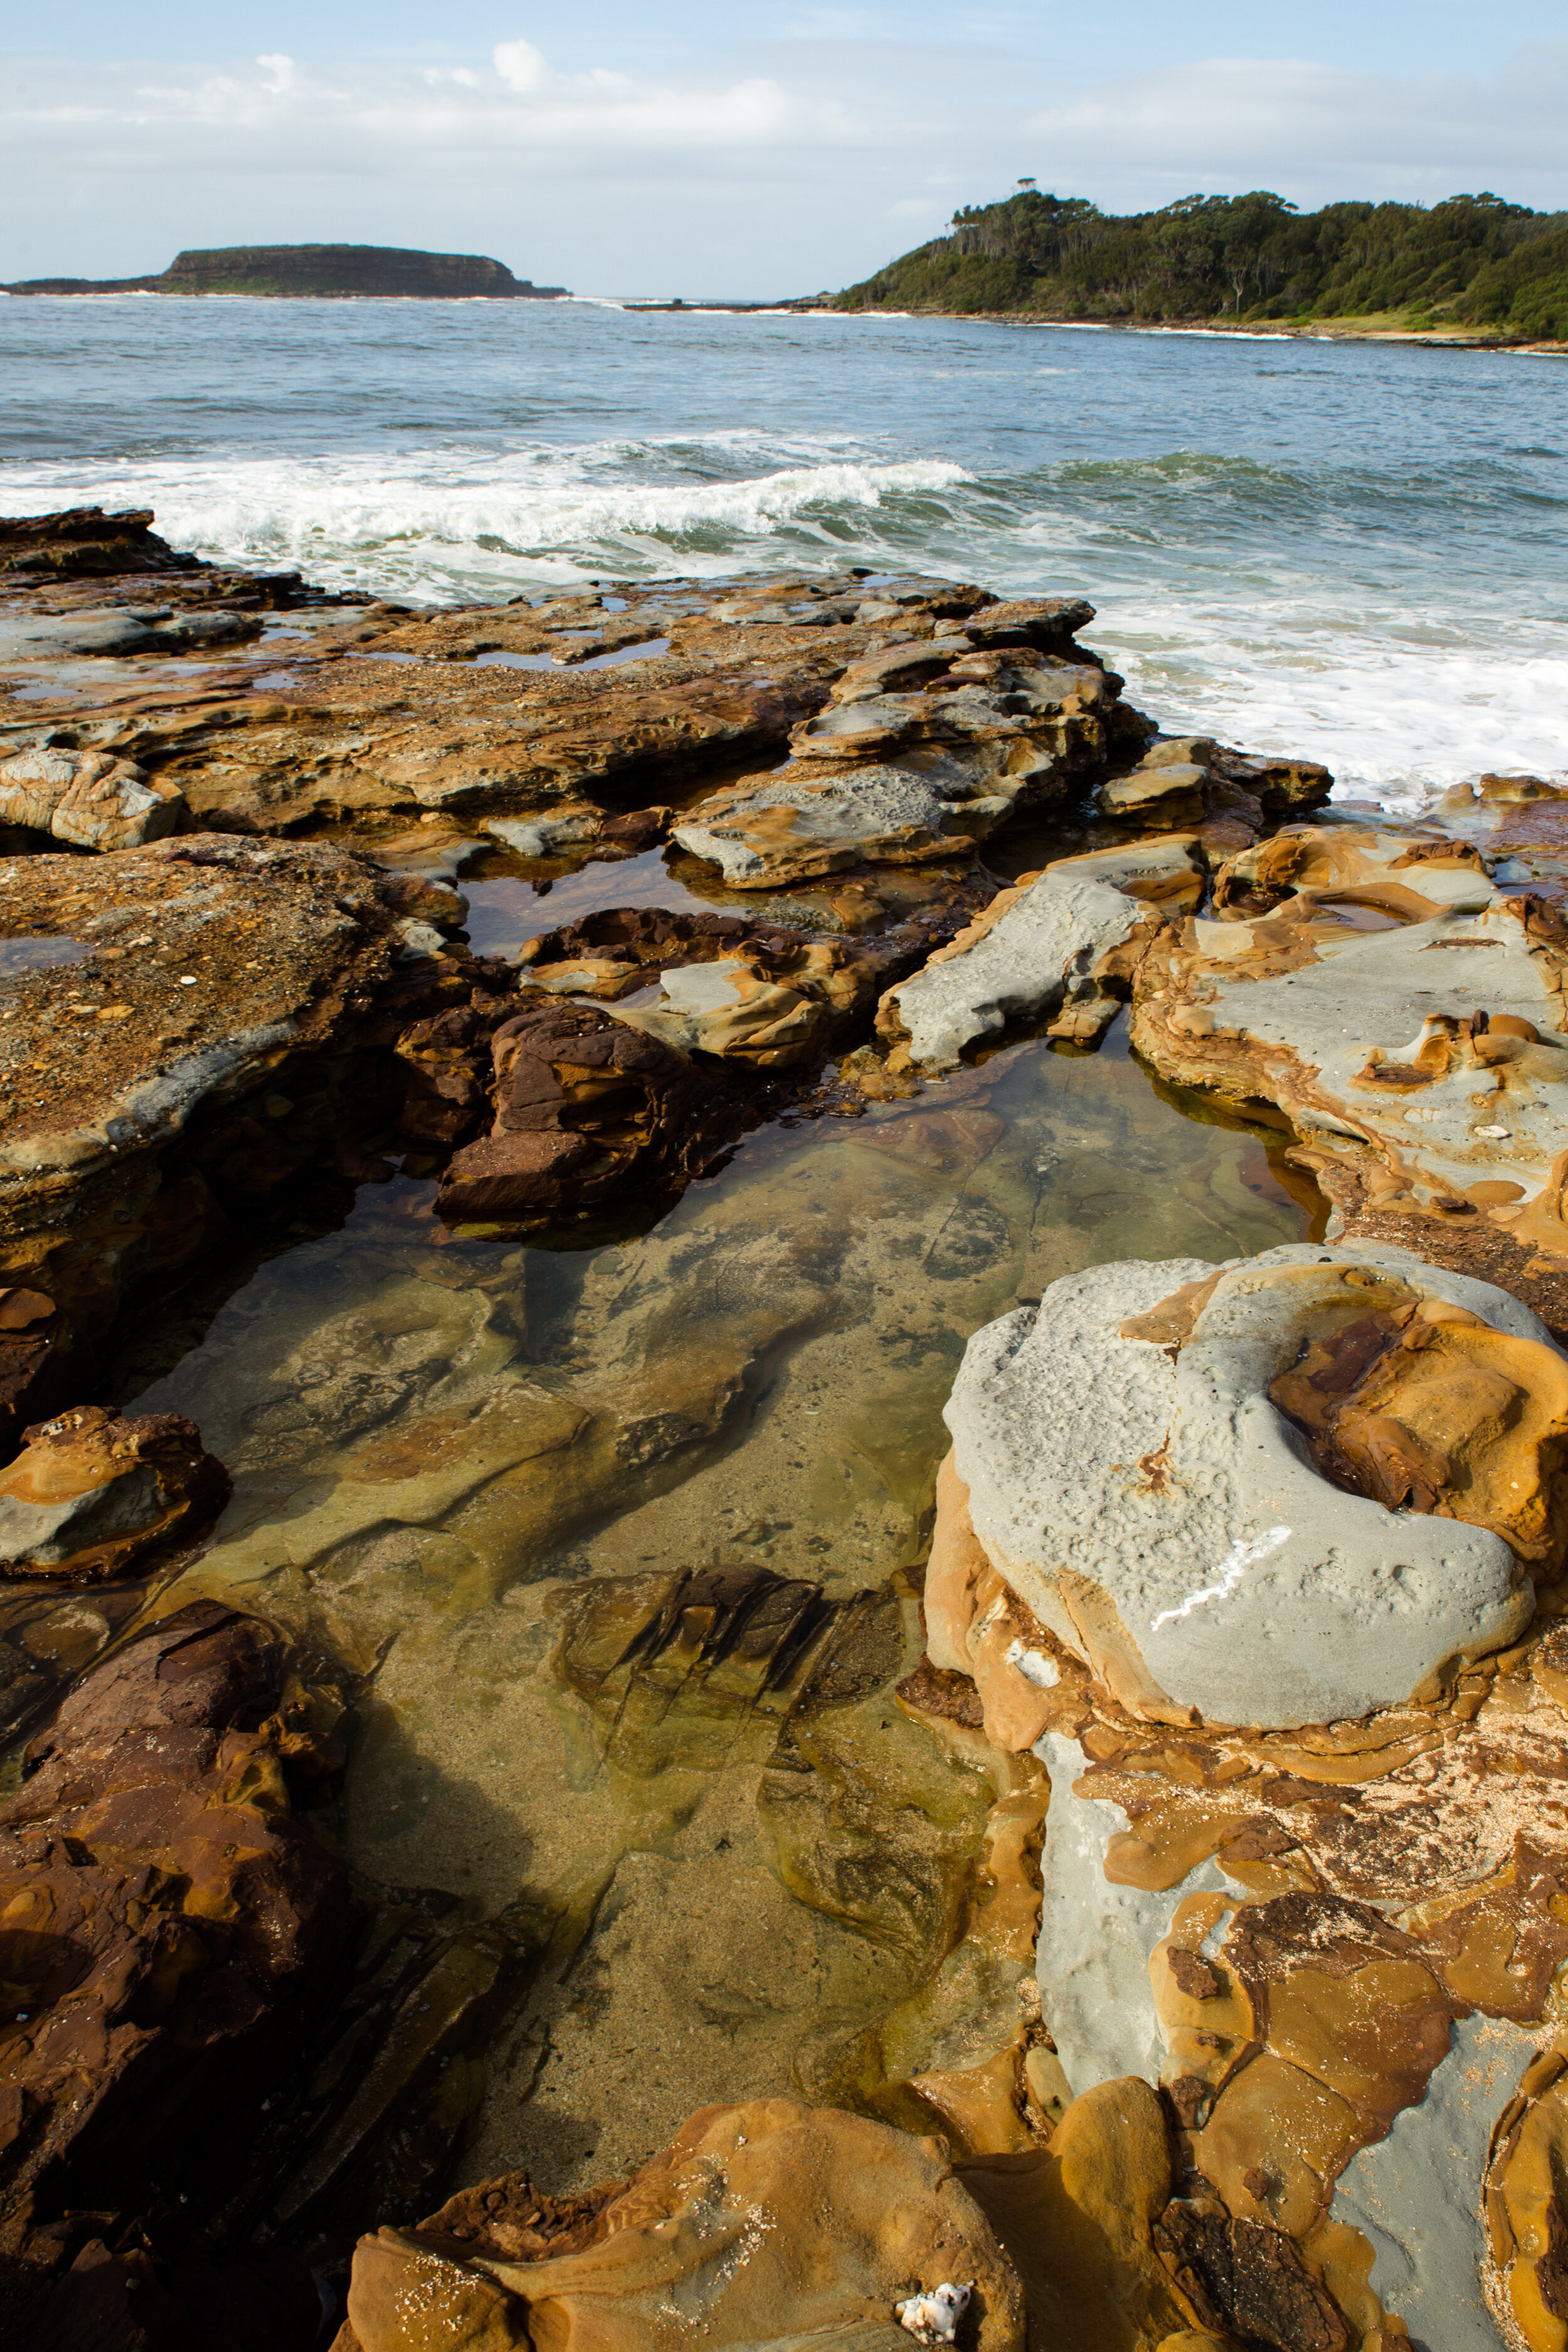
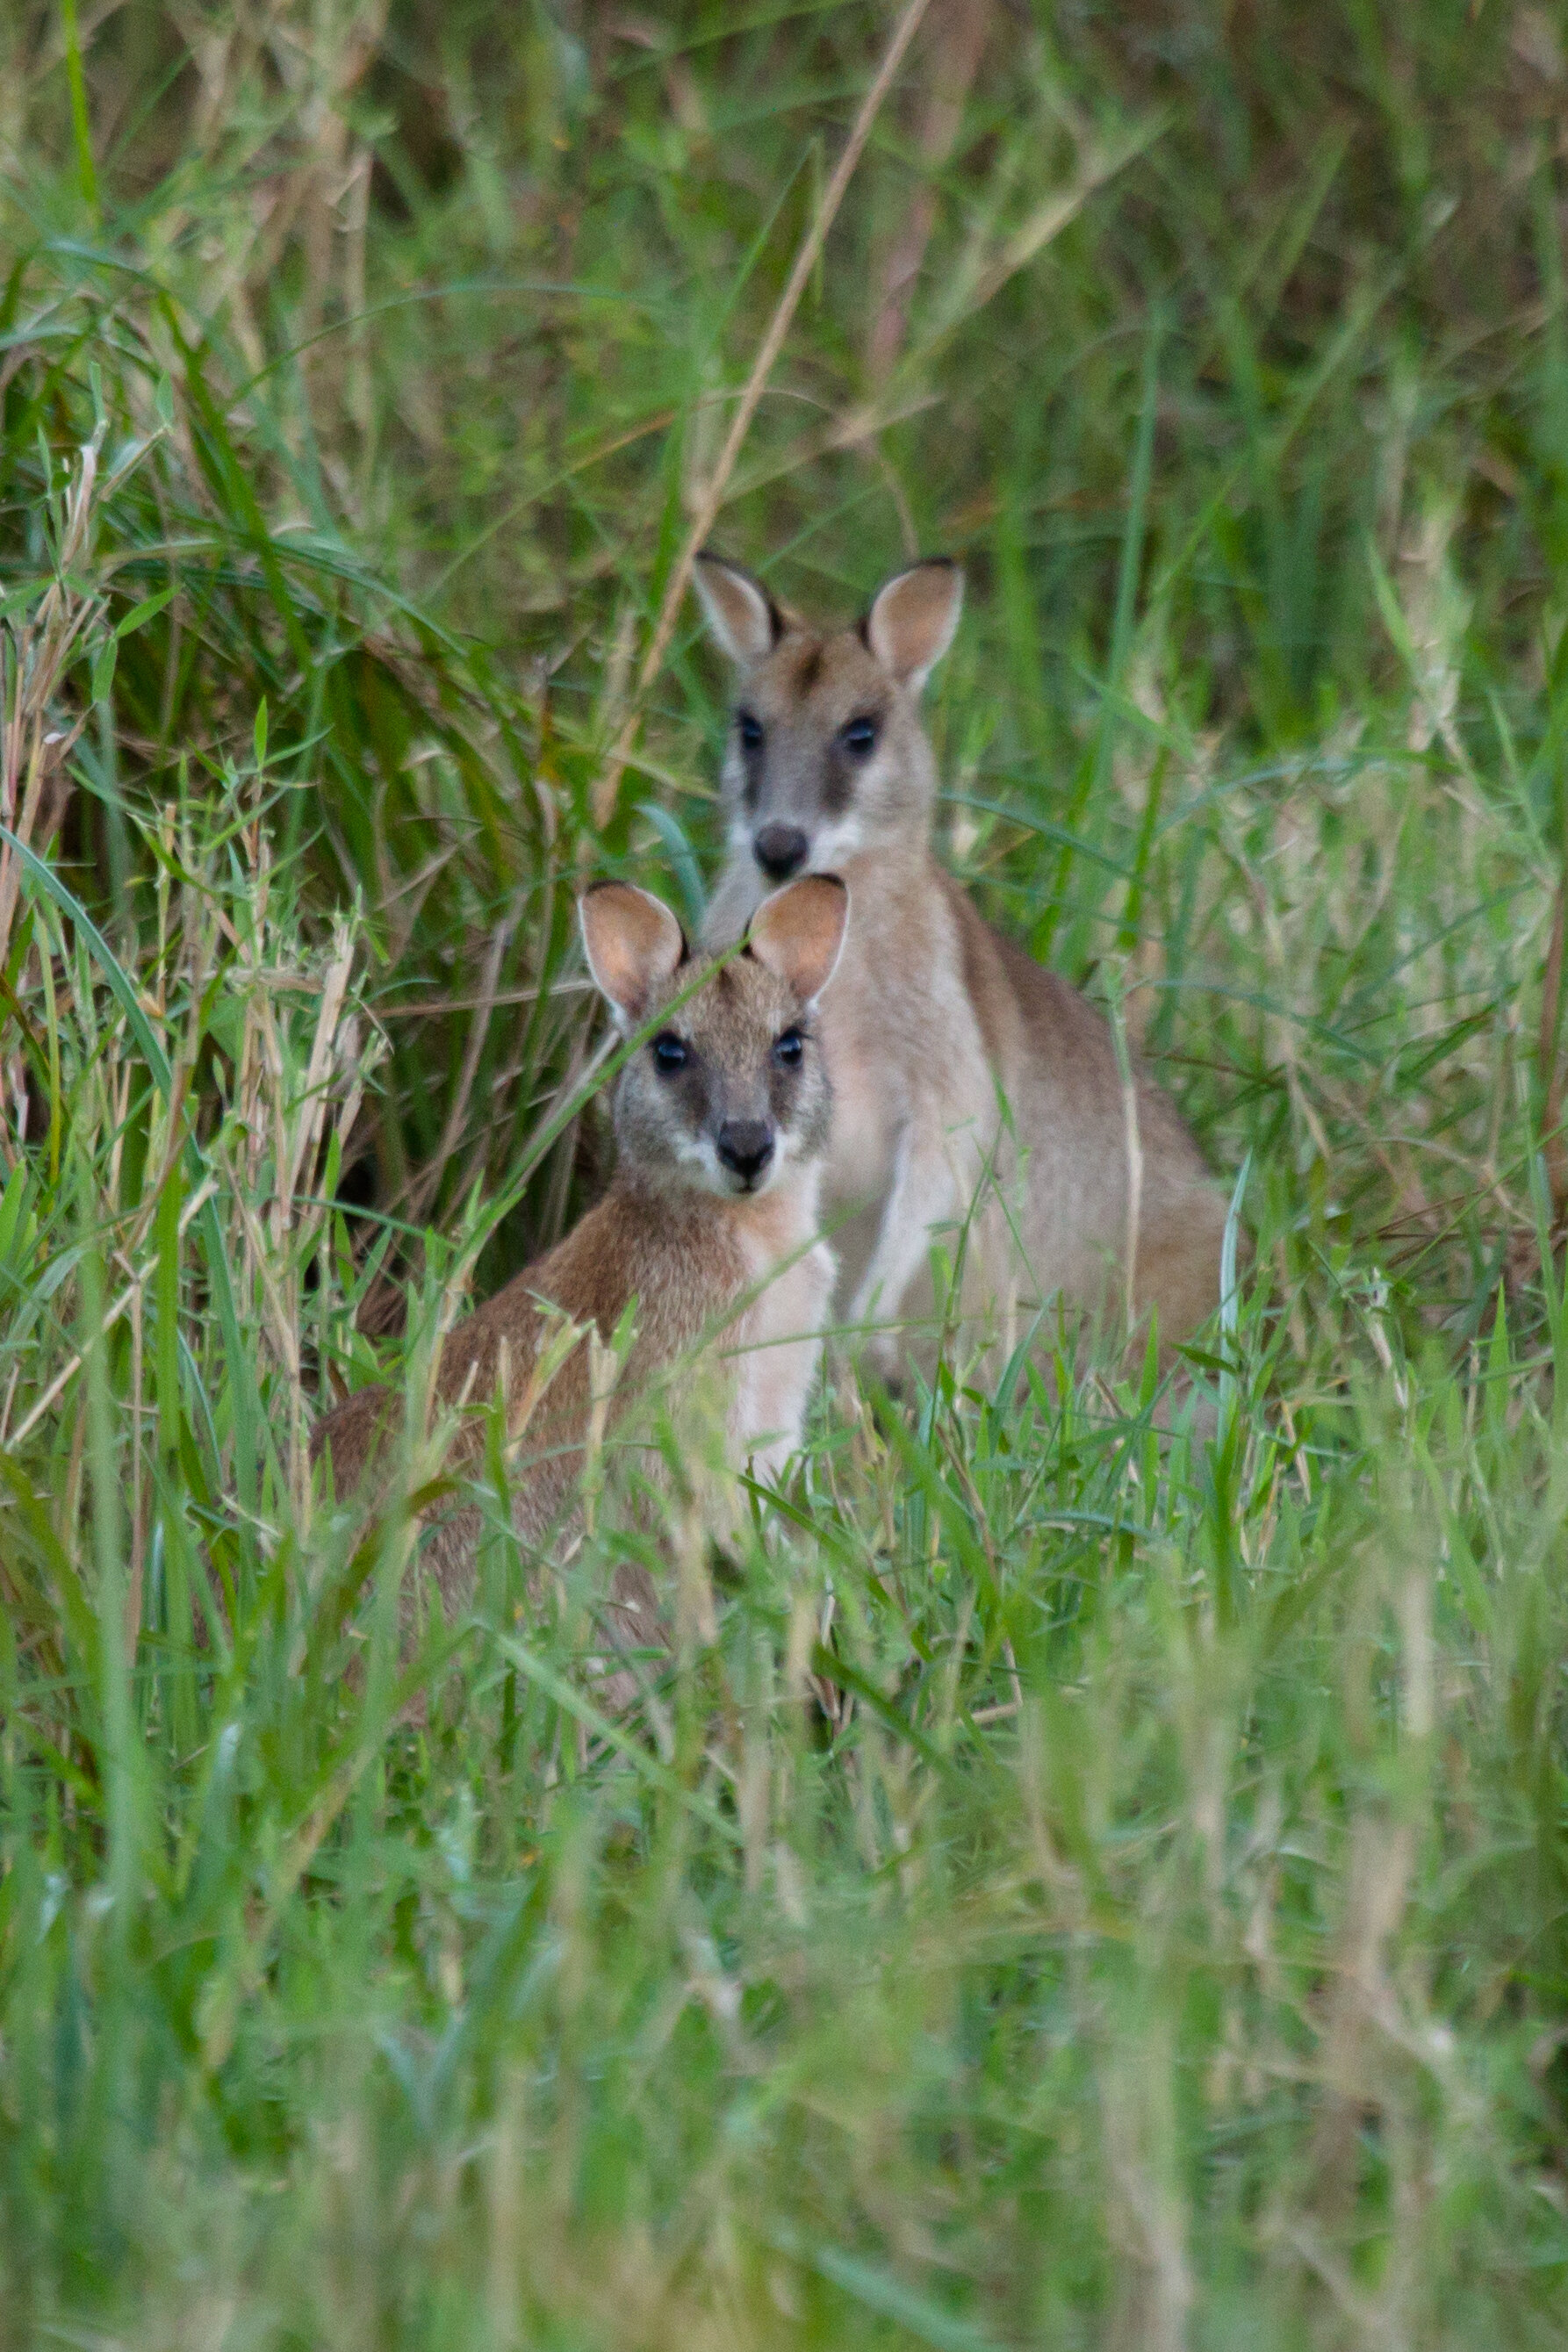
The coastline gets much more rugged and a lot less sandy as you head further south. For coastal photography this was spectacular. With many cliffs, tidal pools and waves crashing against the shoreline it felt a little like parts of the west coast of North America - but also different in so many ways. You won’t often see beach kangaroos in North America.


We managed to get down as far South as Murramarang National Park before needing to get back for our flight in Brisbane. The beach and sea scape at this park was a place that will bring back many great memories and quite a few good pictures.
…and back one more time…northward one last time.

Blue Mountains - just another fabulous area to hike
We spent 6 weeks in Australia and barely scratched the surface of what there is to see and locations we would like to shoot. I guess we can look at this trip as a very long reconnaissance trip, and hopefully we can use what we learned to plan more trips. We did also spend time doing the usual tourist stuff, visiting historical sites, vineyards, and beaches along with many coffee shops and bakeries. Next time I think we would purchase our own camper van and look into taking a year or more to do “the big loop”, circumnavigating the entire country and taking pictures and videos. It might even be a good excuse to get people to meet up at locations for some photo treks and work with some local landscape and nature photographers who have done most of the scouting leg-work to come up with some expeditions.
Take a look through the gallery below for a glimpse of the different sights and sounds as we wandered the country.


What did I learn from this Wayback Wednesday?
Slow down and enjoy the scenery. Sometimes we try to get everything in on a trip and don’t get to fully take in an area. Even with 6 weeks we often felt like we had to move on before we were ready. This is something we need to continuously think about as we often want to see what is around the next corner without fully exploring what is around us now.
Come back in good light. We say this often but rarely do. We would see an amazing scene but the light would not be great. We nearly always had some place to go next and often wouldn’t come back for that great evening or morning light.
Beaches can be hell on cameras and lenses. Both the sand and the salt water in the air add up. I came back with 2 lenses that sounded like they were grinding pepper. Clean your gear well after beach days.
We could have taken a full year traveling around Australia and still not explored all we wanted to. There is so much to see, and it is so easy to caravan around the country. If we were to go again for a short visit then I think we might want to limit ourselves to a couple of locations and explore them thoroughly. Otherwise we need more time - much more time.
Make sure to take time to relax, enjoy the scene around you. This goes back to the first lesson but sometimes we need to just put away the cameras grab a beer or glass of wine and enjoy what is happening around us.
Get better at documenting our trips, mostly so that we can plan the next ones.
Buy a boat and a camper van. We want to explore and we have no reason to put down roots. This lesson we will need to work on in stages. It is good to have goals.
Make some photo books of our travels. Much better for showing people than on a computer and nice to look through for the memories.
I think, looking back, that this trip will be remembered as one of the best times we have spent as a couple traveling. Wandering around the country in a little camper van was the best way to see what we wanted to see. With only a flight to catch at the end of 6 weeks we traveled where we wanted and stopped at anything that was interesting. I think we just want to be able to spend more of our time in this way.
Wayback Wednesday - Costa Rica 2010
Back in 2010 Salwa and I had an opportunity to stay at a “resort” near Corcovado National Park on the Southwest Coast of Costa Rica. This trip would mean a flight into San Jose, a second “white knuckle” flight to Puerto Jimenez and then an hour and a half 4x4 ride to the Pacific coast and the Bosque Del Cabo Rain Forest Lodge.

Spider Monkey with baby attached.
Quick look back at a trip we made to Osa Peninsula in Costa Rica.
Back in 2010 Salwa and I had an opportunity to stay at a “resort” near Corcovado National Park on the Southwest Coast of Costa Rica. This trip would mean a flight into San Jose, a second “white knuckle” flight to Puerto Jimenez and then an hour and a half 4x4 ride to the Pacific coast and the Bosque Del Cabo Rain Forest Lodge.

Relaxing in the garden cabin at Bosque Del Cabo, in the Osa Peninsula.
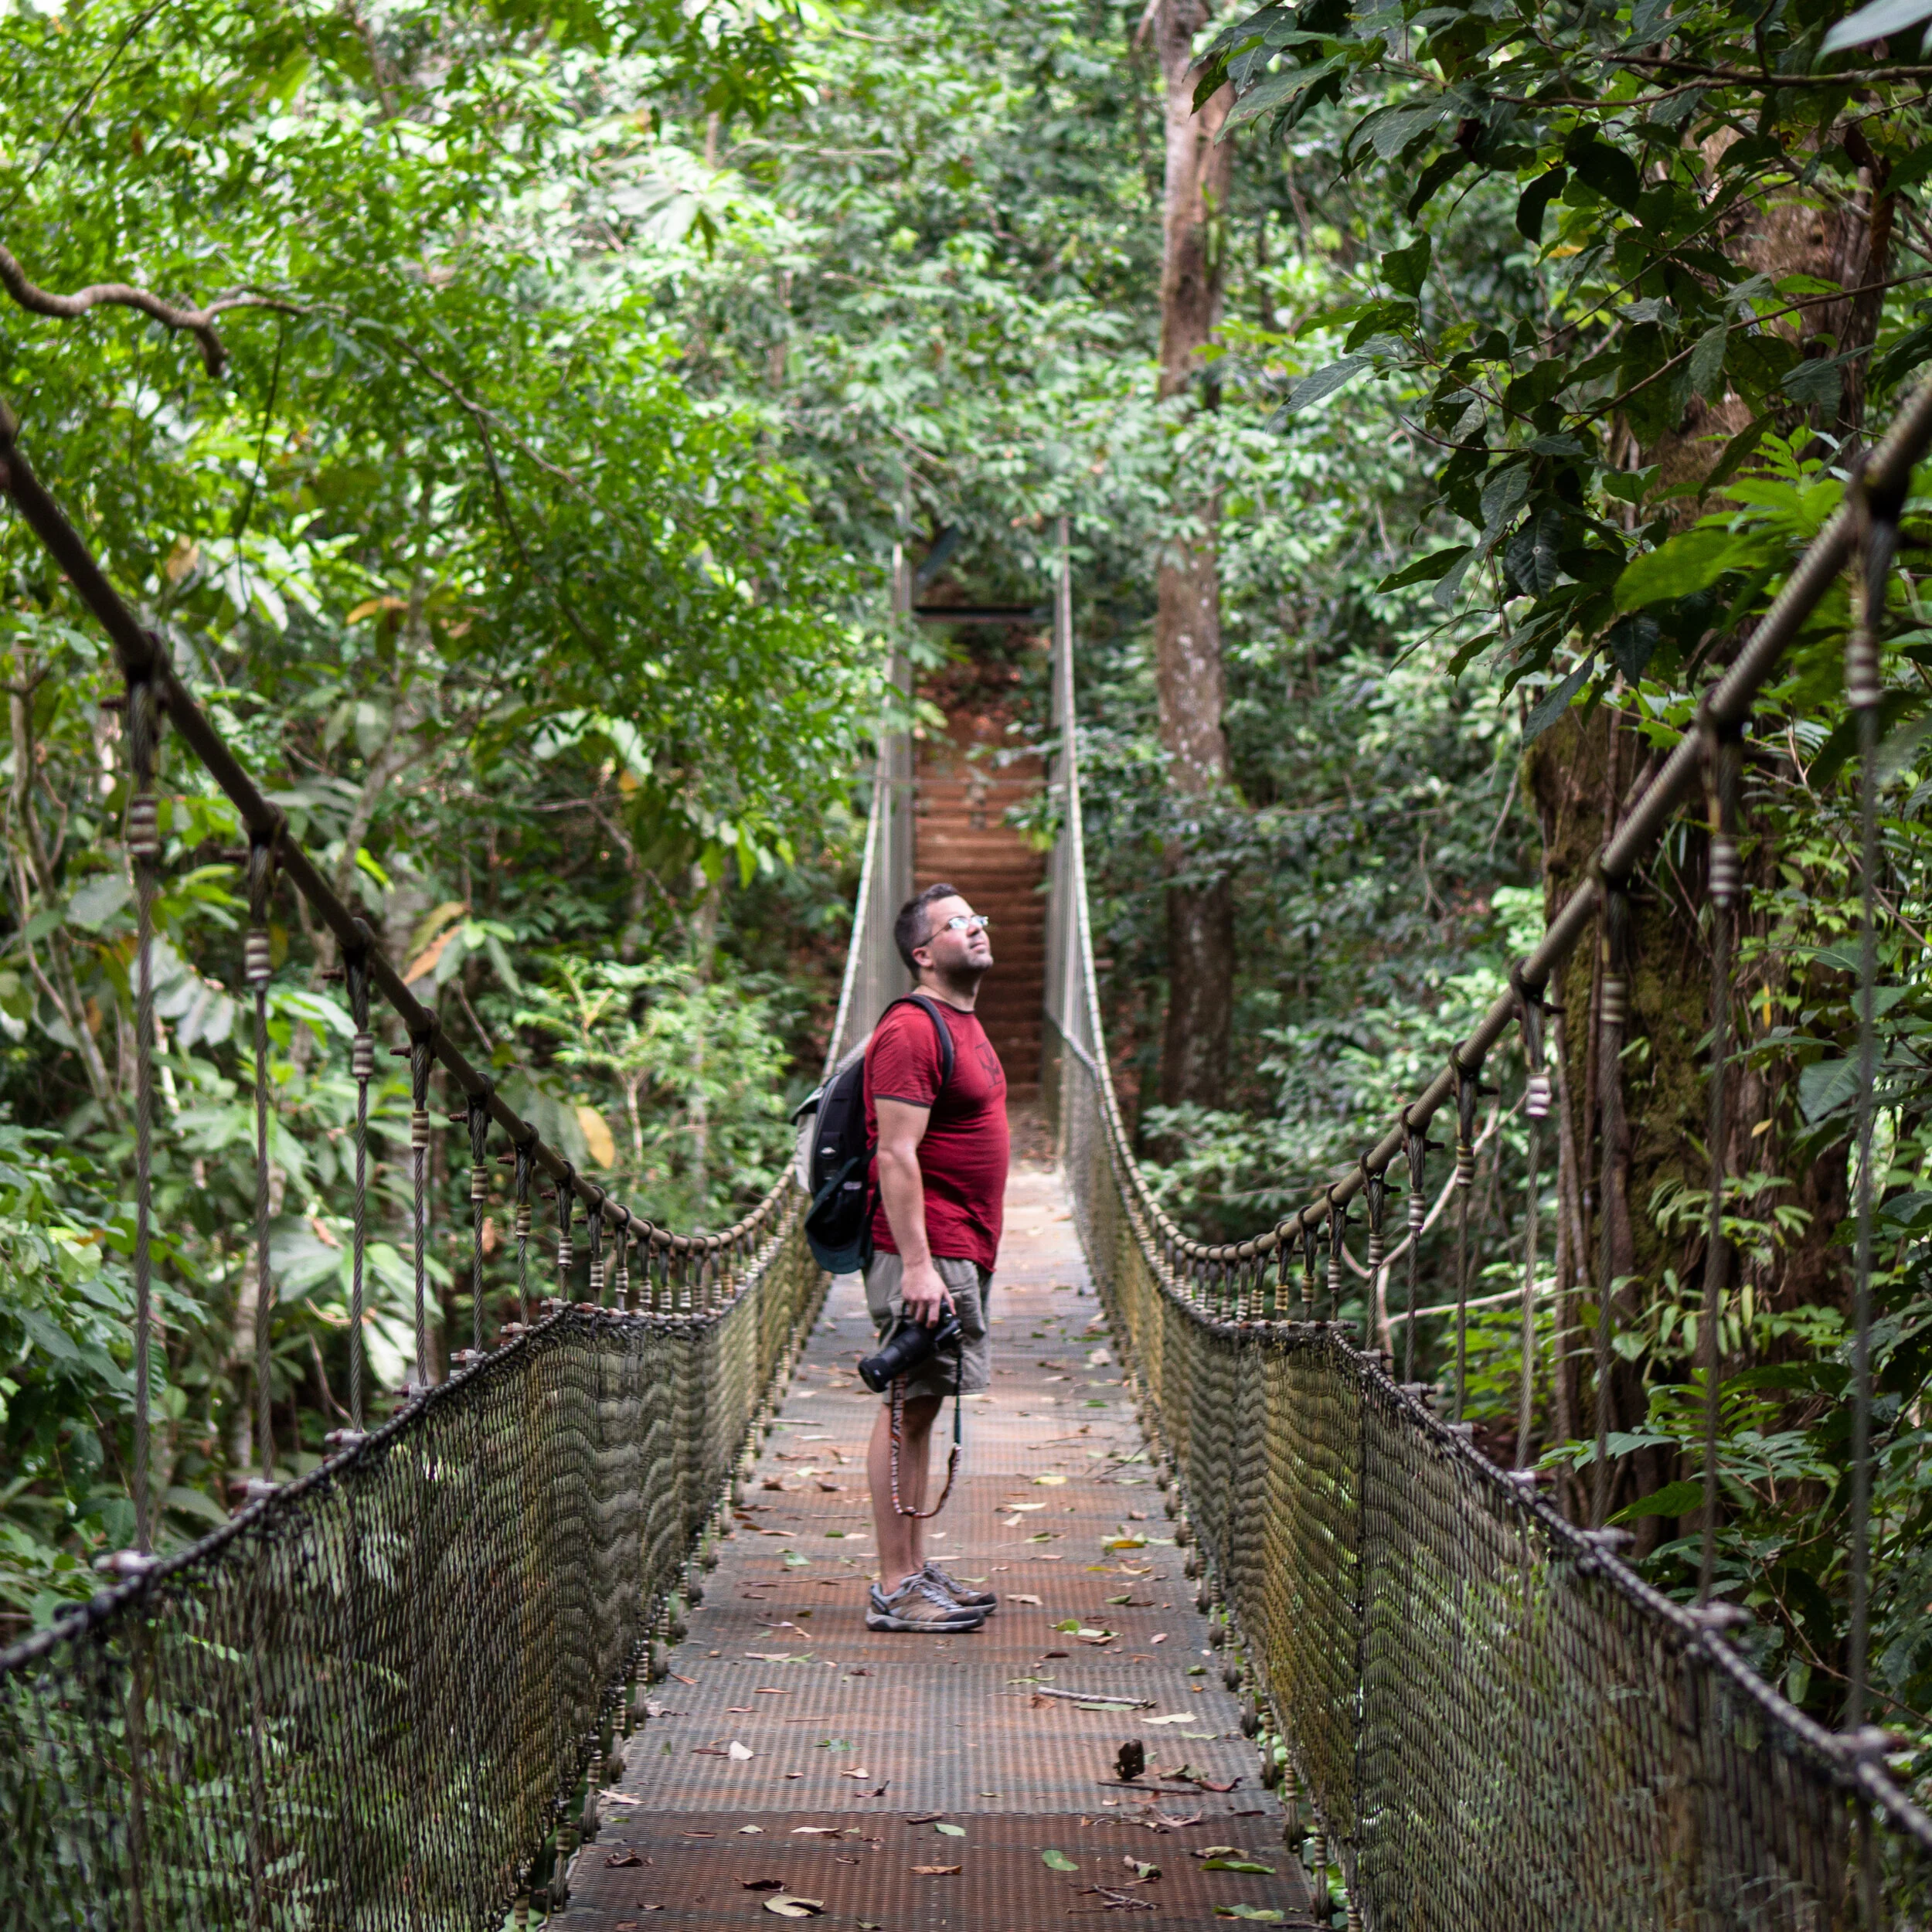
Unlike most of our trips, we were going to be staying in one location and doing small day hikes out around and through the rain forest trails. This was also going to be the first photo trip for me that would revolve around almost entirely nature photography.
The way in to the Lodge was a bit of an adventure in itself. We were weighed along with our luggage before getting on a small prop plane and then took off over the mountains towards a small landing strip with a dirt road and a couple of dogs roaming around. A 4x4 picked us up for the next stage and off we went through the little town with one store, a gas station, a few small houses, and past farm land that seemed to be growing more rocks than anything else. The dirt road narrowed and started to push across dried river beds and then into a more lush rainforest environment where we were dropped off at the common area of Bosque Del Cabo.
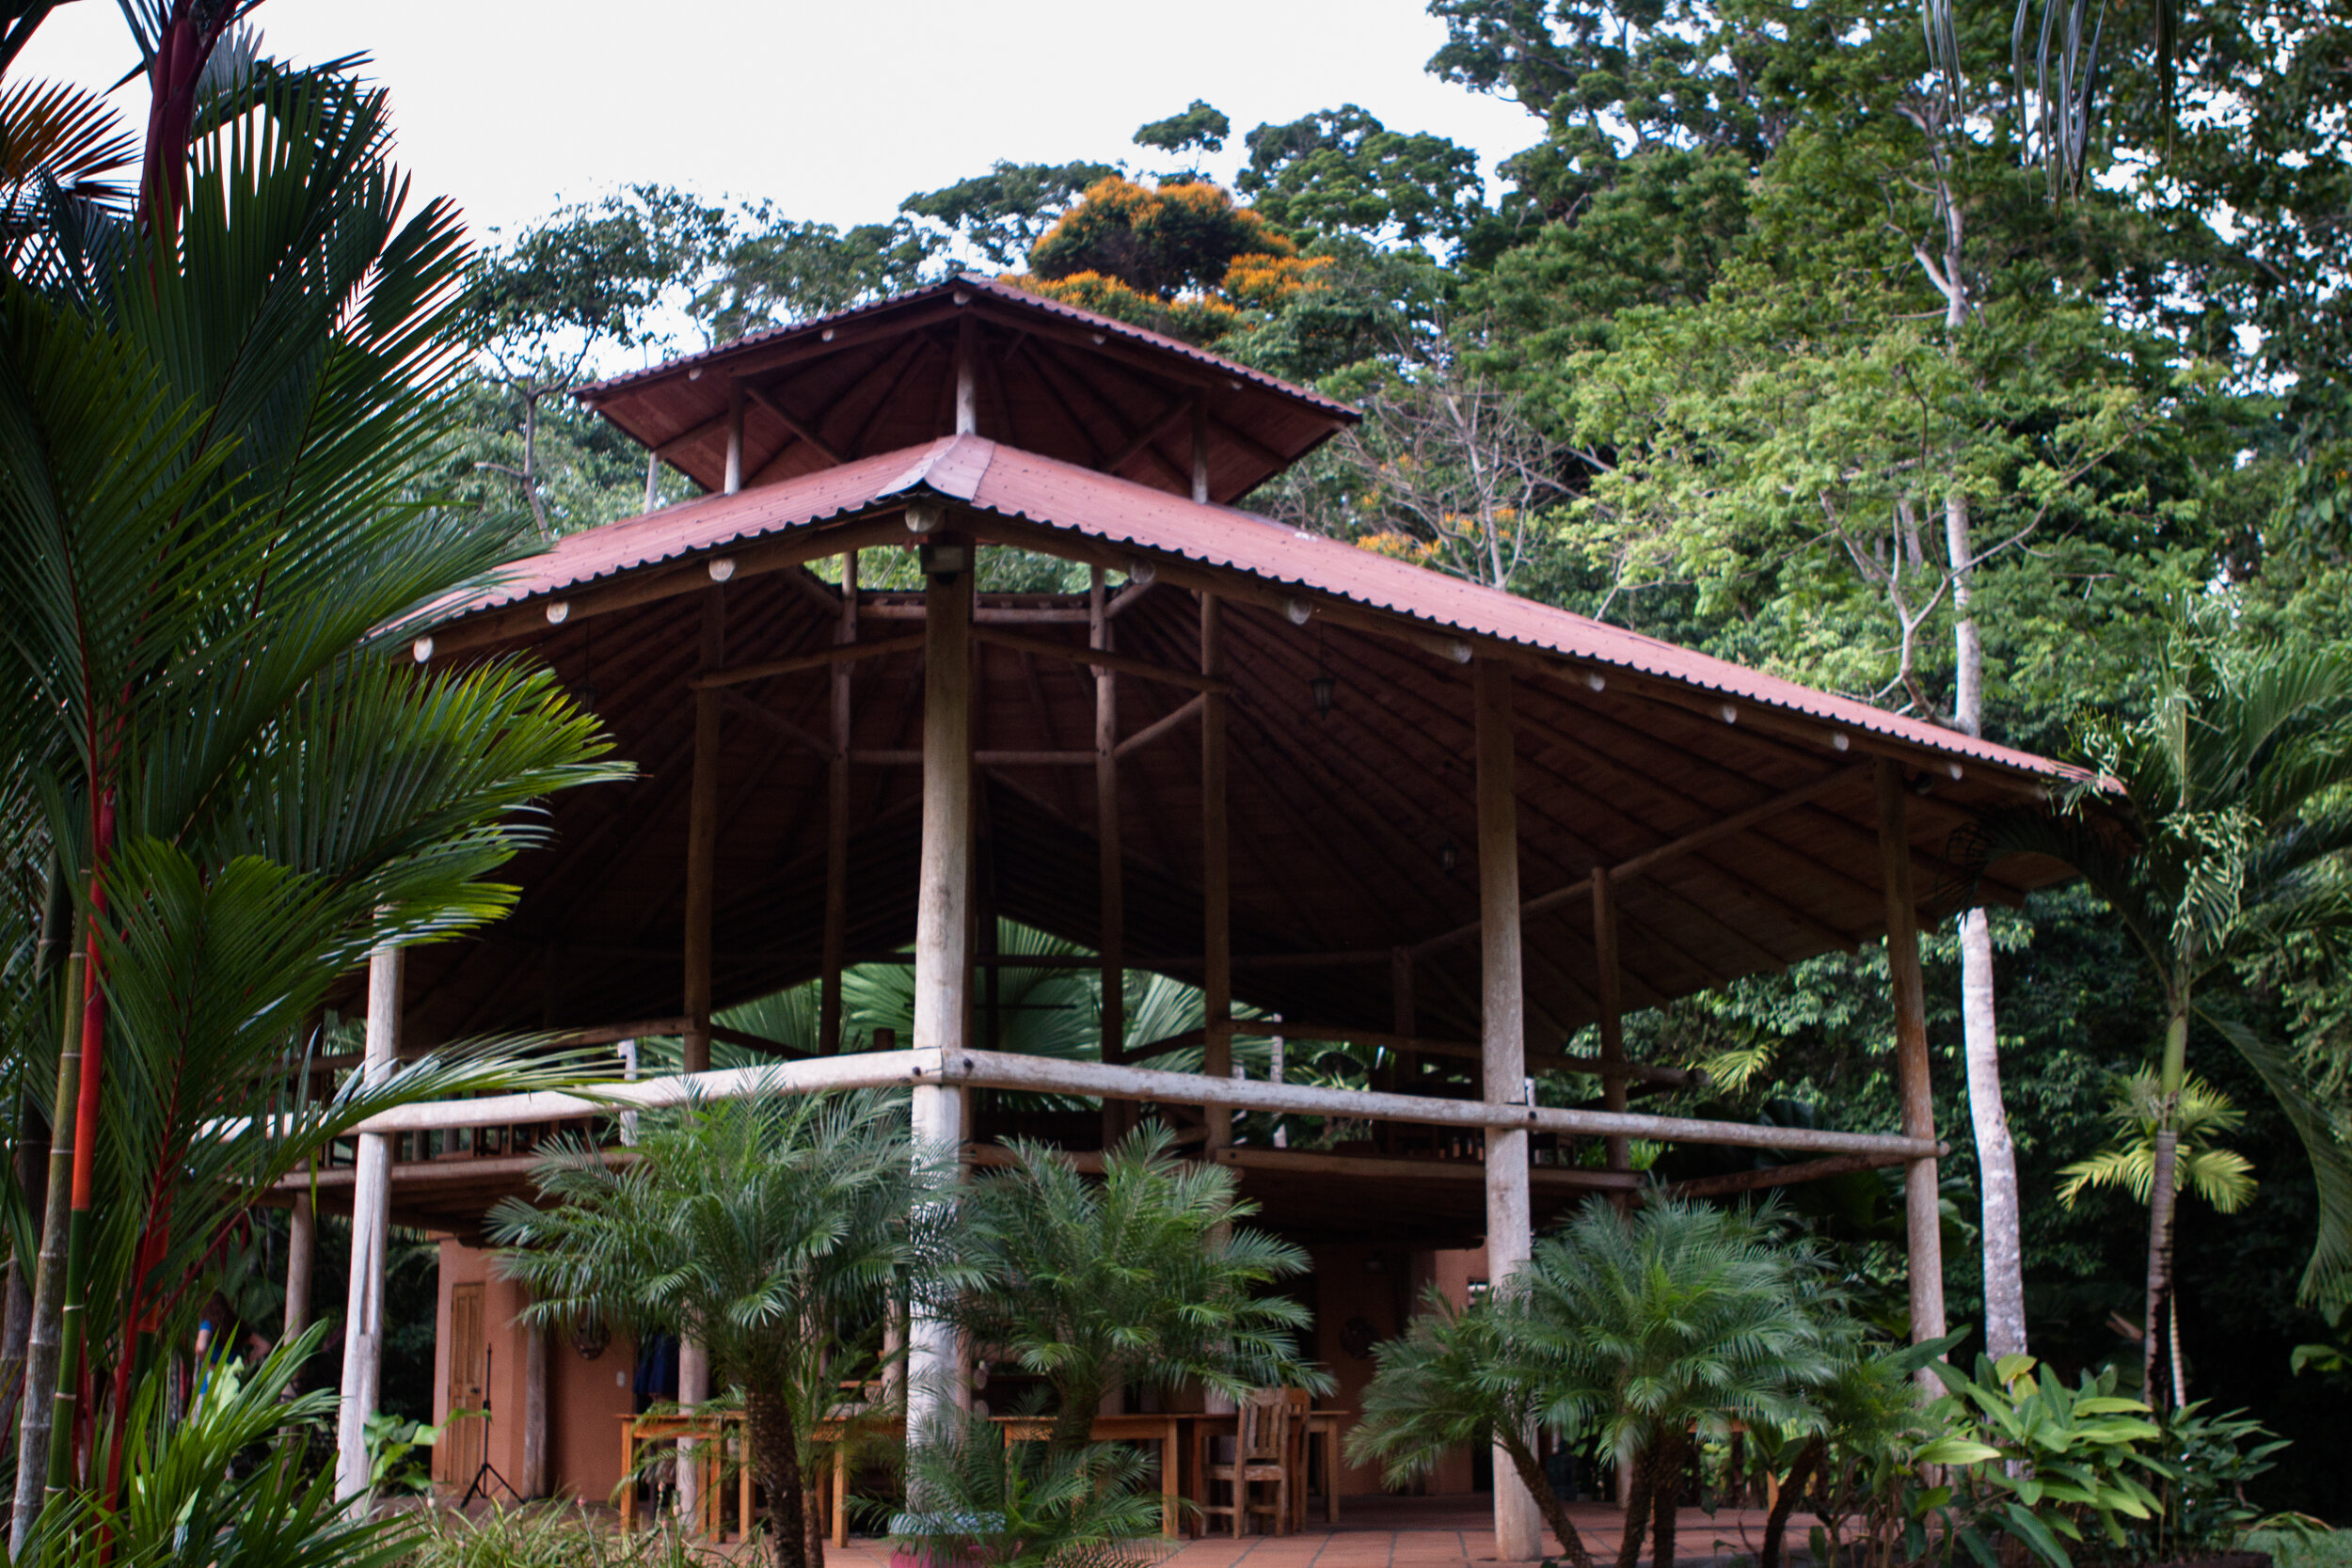
Common area, kitchen and dining. Everything outdoors, but the chef they had brought in made every stop here worth while.
Salwa had found this location through some boating friends whose kids had built the lodge. It came highly recommended and the first sight of this place was special. While not a typical 5 star hotel, this Eco Lodge had excellent amenities. The juxtaposition of luxury and back woods was in-line with our ambitions.

Luxury in the rainforest with a view that can’t be beat.
The Lodge is on the Southwest corner of the Osa Peninsula and has more than 700 acres of rainforest to explore. Our first night we splurged and stayed on the ocean view cabin that had to be pretty much the most beautiful view from a bed that we have ever seen. Looking over a 500 foot cliff onto the Pacific Ocean, we were greeted with beautiful sunrise and sunset along with the sight of Scarlet Macaw flying below us.

The view from our pacific view cabin. A glass of wine or beer and we could sit here for hours watching time pass us by.
The rest of the week we stayed in the garden cabins located a few hundred yards into the rainforest in a 10 acre garden with each cabin facing directly into the rainforest where we would watch the monkeys swing by our room. The cabins were set up with one wall, a bathroom in the back and open view on the other three sides. The bed was sitting in the middle with a large bug net over it that Salwa insisted I inspect for ‘critters’ before she sealed herself in by tucking the bug net under the mattress. You might say this was open air camping but definitely a very luxurious form - glamping before that was even a thing.

Garden view cabin with outdoor shower and views in almost any direction.
Nature Photography 101 - What I Wish I Knew Then
The trip itself was a huge learning experience for me in terms of nature photography. We were still in the early days of digital SLRs and I had just gotten a new Canon 100-400L lens to put on my Canon T1i with a whole 15 Megapixels of crop sensor goodness. This was also the trip that I learned a lesson about backing up your pictures…but I’ll get to that later.

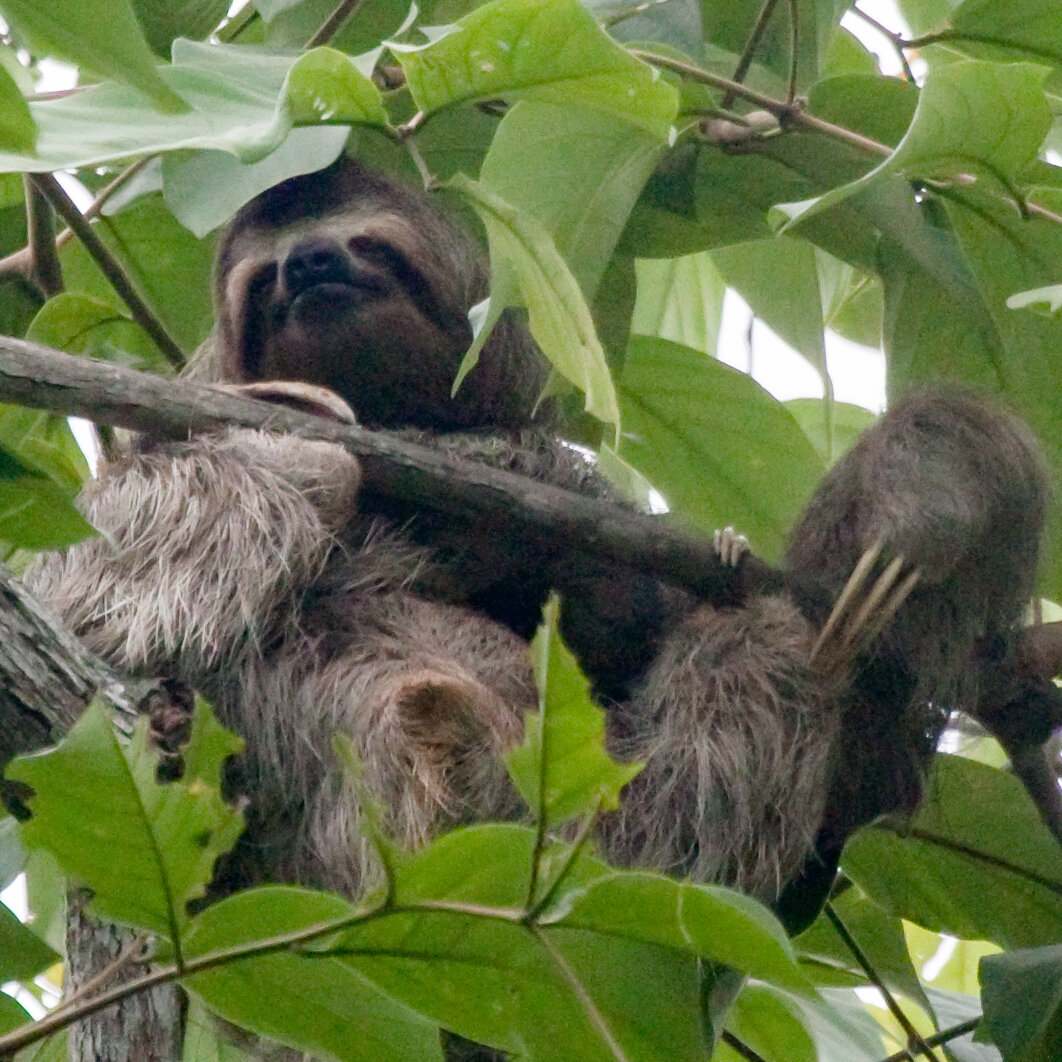
Howler monkey, one of many that we heard that morning in the distance.
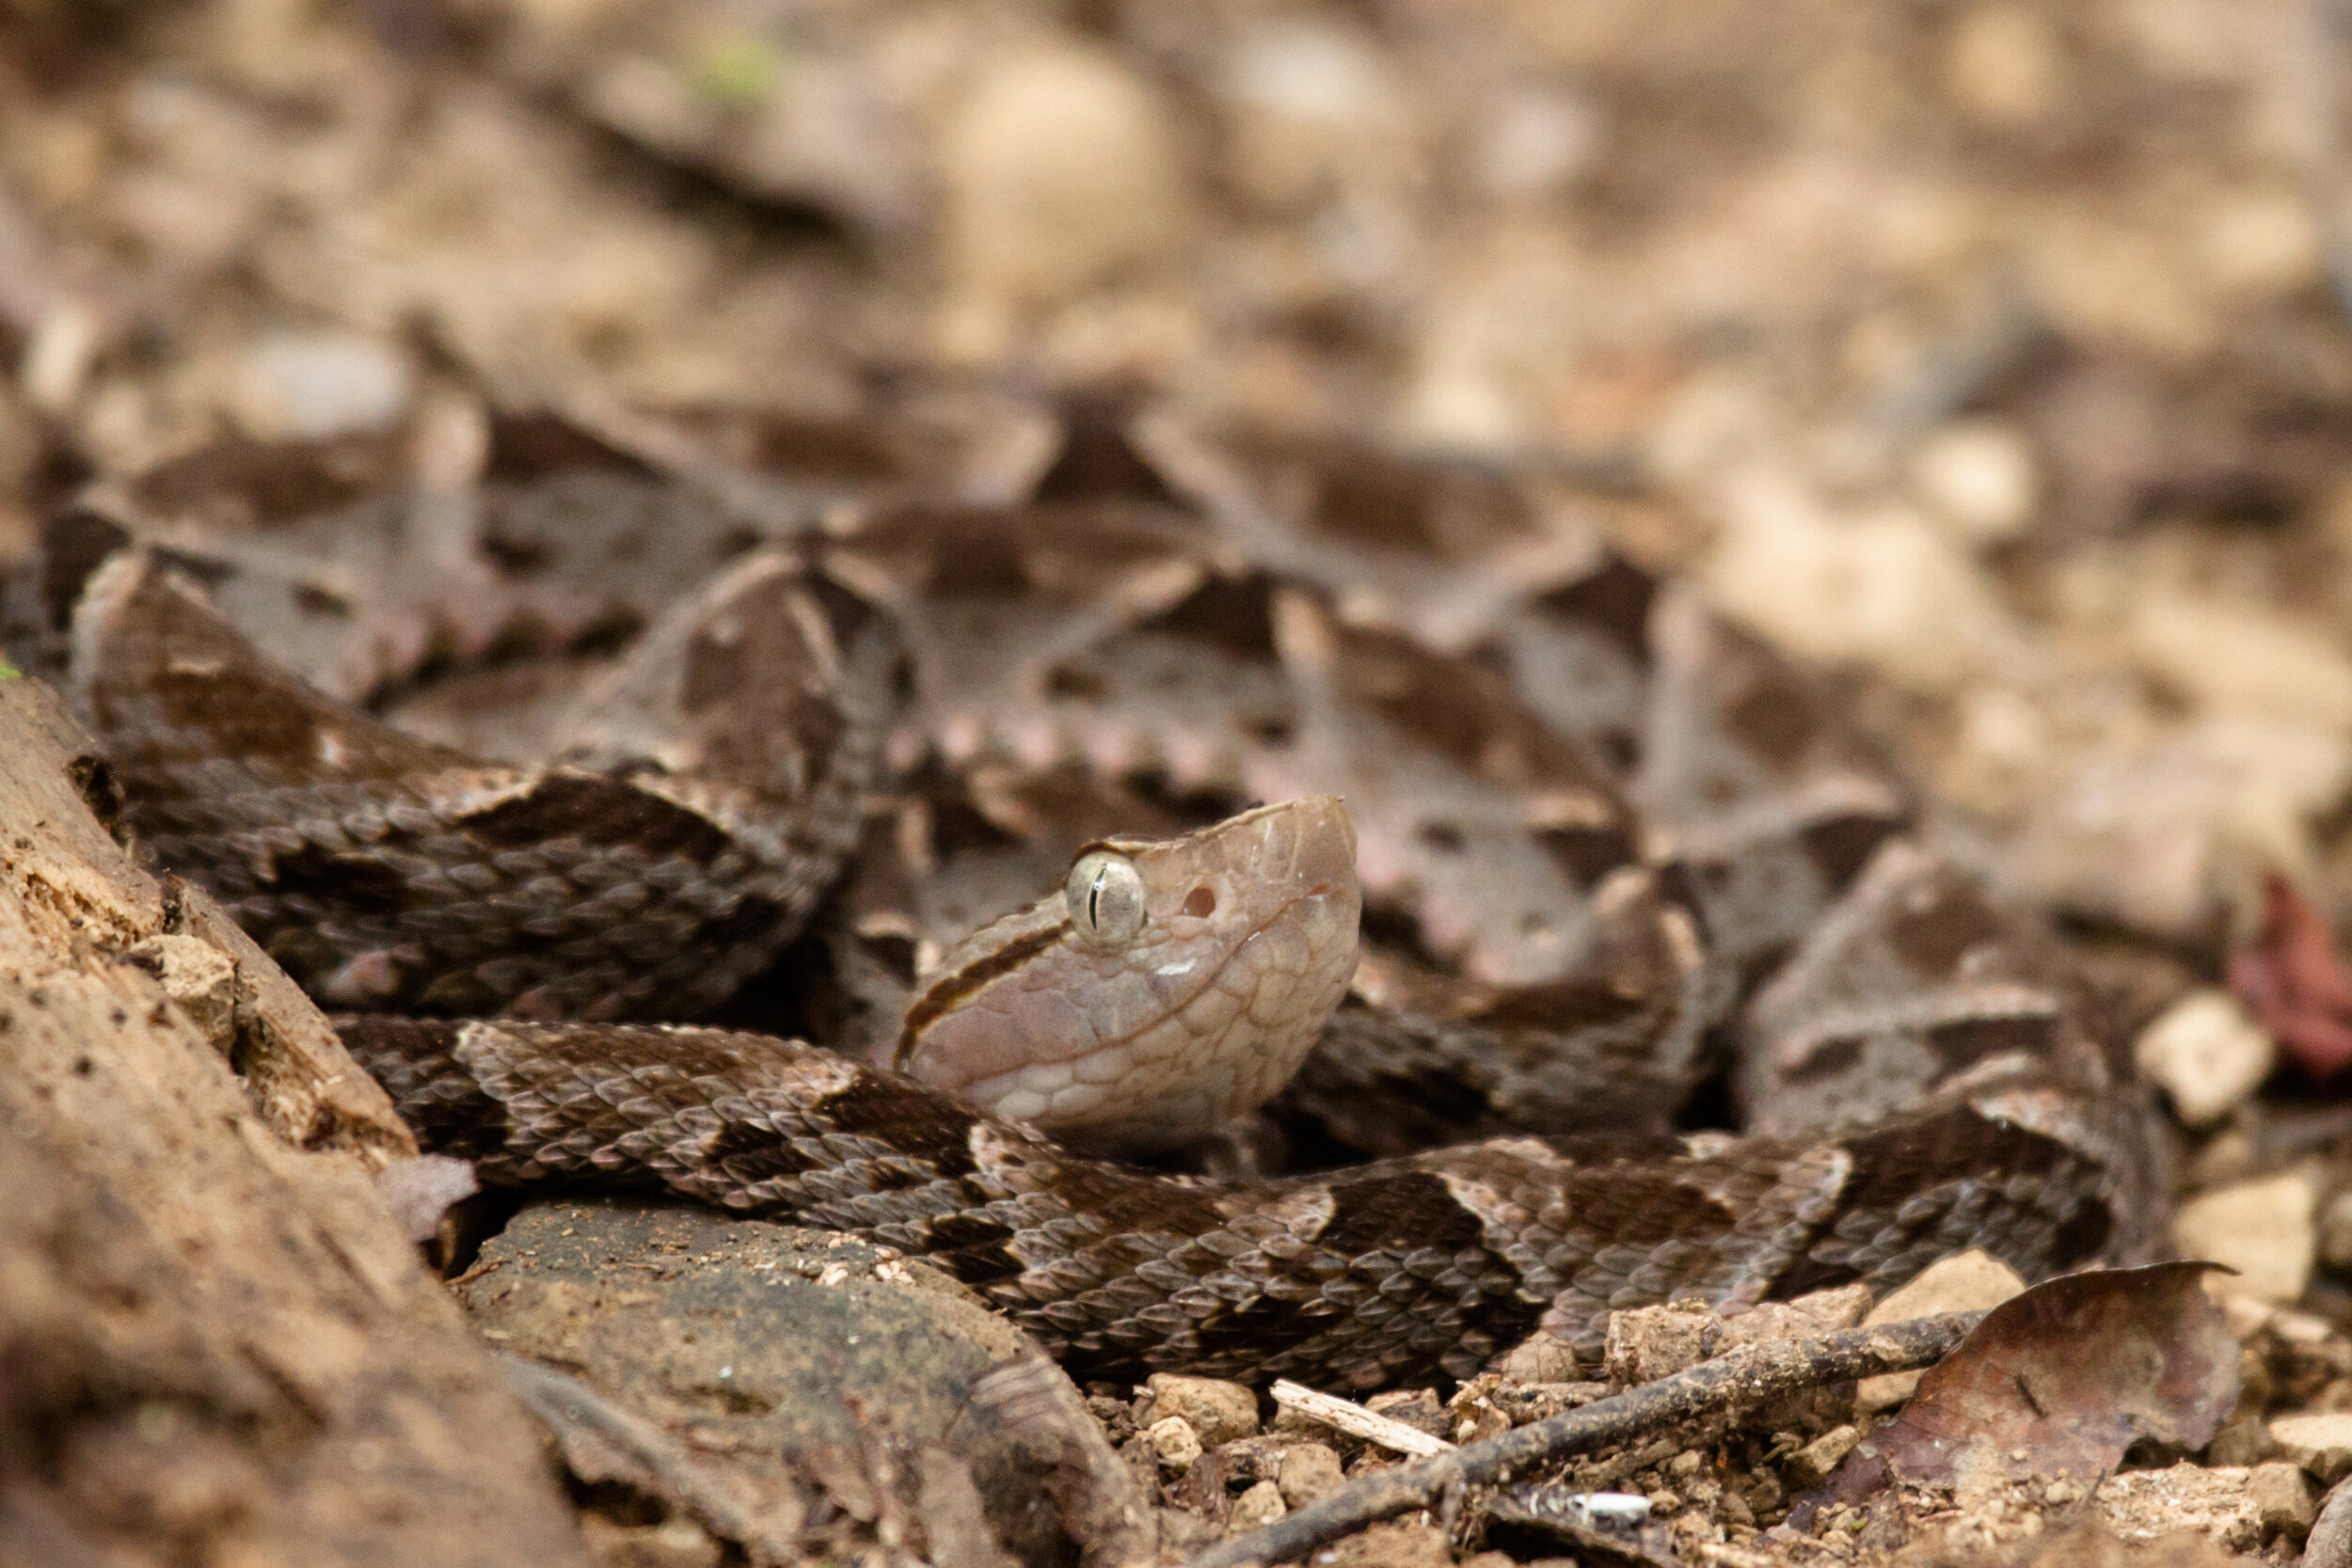
Every morning after a hearty breakfast at the common hall we would grab our cameras and head on on a hike either through the jungle trails or down to the coastline. We could last about 3 hours in the heat on these hikes before we needed to be back to grab more water and food. At 35 degrees and 100% humidity we were constantly wet and would just replace our current sweaty cloths with ones that we had hung up earlier that were slightly less hot and wet. Each hike took us to a different area, sometime we would be wandering towards howler monkeys, other times we would be looking for poison dart frogs in the undergrowth or whatever birds were passing through.

Roadside hawk no where near a road at this point.
Looking back to the things we learned there, both Salwa and I see so much in our photography that we didn’t do well. Composition was lacking, tracking our subjects was difficult with the equipment we had and our lack of experience. Taking shots in the undergrowth of a jungle is difficult even now with cameras that can deal with much less light, but reviewing these shots just makes me want to go back and do it again. Part of looking back on these trips in nostalgia, part is looking forward to what we would do next in our travels.

The long hike down to the coast was well worth the climb back in the hot sun. We explored the tidal pools until we could go no further.
We also look now to see what shots we took and what ones we missed. On that note, I can tell you about one of the biggest lessons I had to learn the hard way on this trip. To start off, because the location was remote, we didn’t bring any laptops which I would normally download the day’s pictures onto. My camera only had one card slot and, of course, with the high humidity the one thing that could go wrong, did. Into day three I started to take some pictures and was presented with an error stating “could not write to card”. I tried to look at the pictures on the card but nothing showed up. I quickly put a new card in the camera and continued on with the hope that I would be able to recover the data once we got back to a computer. Unfortunately this was not going to be the case, even the forensic tools I had from work were unable to recover the data and I lost two full days of the trip. Lesson learned, dual card slots became one of the most important things to look for in a camera. The sad part was the loss of some shots that would have been some great memories and at the time shots I thought were going to be amazing wildlife shots. The Toucan and Scarlet Macaw in flight were ones that come to mind but also some great shots of Salwa that I miss now.

White face capuchin monkey family, tough shooting up into the canopy to get good exposure. Definitely a challenge for the dynamic range of cameras back in 2010…maybe even still now.
So what did we learn on the Wayback Wednesday?
Dual card slots good, heat and humidity are not my friend.
Costa Rica is a treasure and well worth going back to enjoy nature again and to maybe get some of those shots I lost or missed the first time.
Memories from these trips are worth looking back on once in a while, another reason to make a hardcopy travel book from each of these trips.
I can see the improvements that we have made in our photography and continue to look at what things I would like to improve as I compare shots from 10 years ago to ones from today.
We both really miss traveling and as soon as we can, we’ll plan our next trip according to the type of photography we’d like to explore.
New technology may not be everything, but you can really see the difference and I can tell how much easier it is to get the shot now as compared to then.
Thanks for joining me on this look back, let me know if you liked it and I might make Wayback Wednesday more often. If you are interested in the Eco Lodge please take a look at http://www.bosquedelcabo.com/


Tripods - A Long Journey towards Stability
For the last couple of months I have been doing a lot of research on better tripod solutions for what we do. I don’t tend to use a tripod often when doing nature/bird photography but I have been trying to slow down and concentrate a bit more when I’m doing landscape work. What I have been trying to do is find a good main tripod system that can easily go from video to landscape to wildlife use.

Out shooting the Lunar Eclipse with an assortment of cameras and tripods.
For the last couple of months I have been doing a lot of research on better tripod solutions for what we do. I don’t tend to use a tripod often when doing nature/bird photography but I have been trying to slow down and concentrate a bit more when I’m doing landscape work. We travel a lot, mostly by car these days and we hike out to most of the locations. What I have been trying to do is find a good main tripod system that can easily go from video to landscape to wildlife use. Once I have that I will take what I have now and make them more adaptable so that we can have multiple camera/video setups available quickly and easily.
A little History first
We own a few tripods, my first was an adequate aluminum tripod with a ball head by Vanguard (Alta pro 264AT) that we picked up at a photography show in Toronto probably close to fifteen year ago. At a little over $200 this was definitely better than the cheap tripods that were in all the camera stores at the time but not one of the expensive brand names of the time.
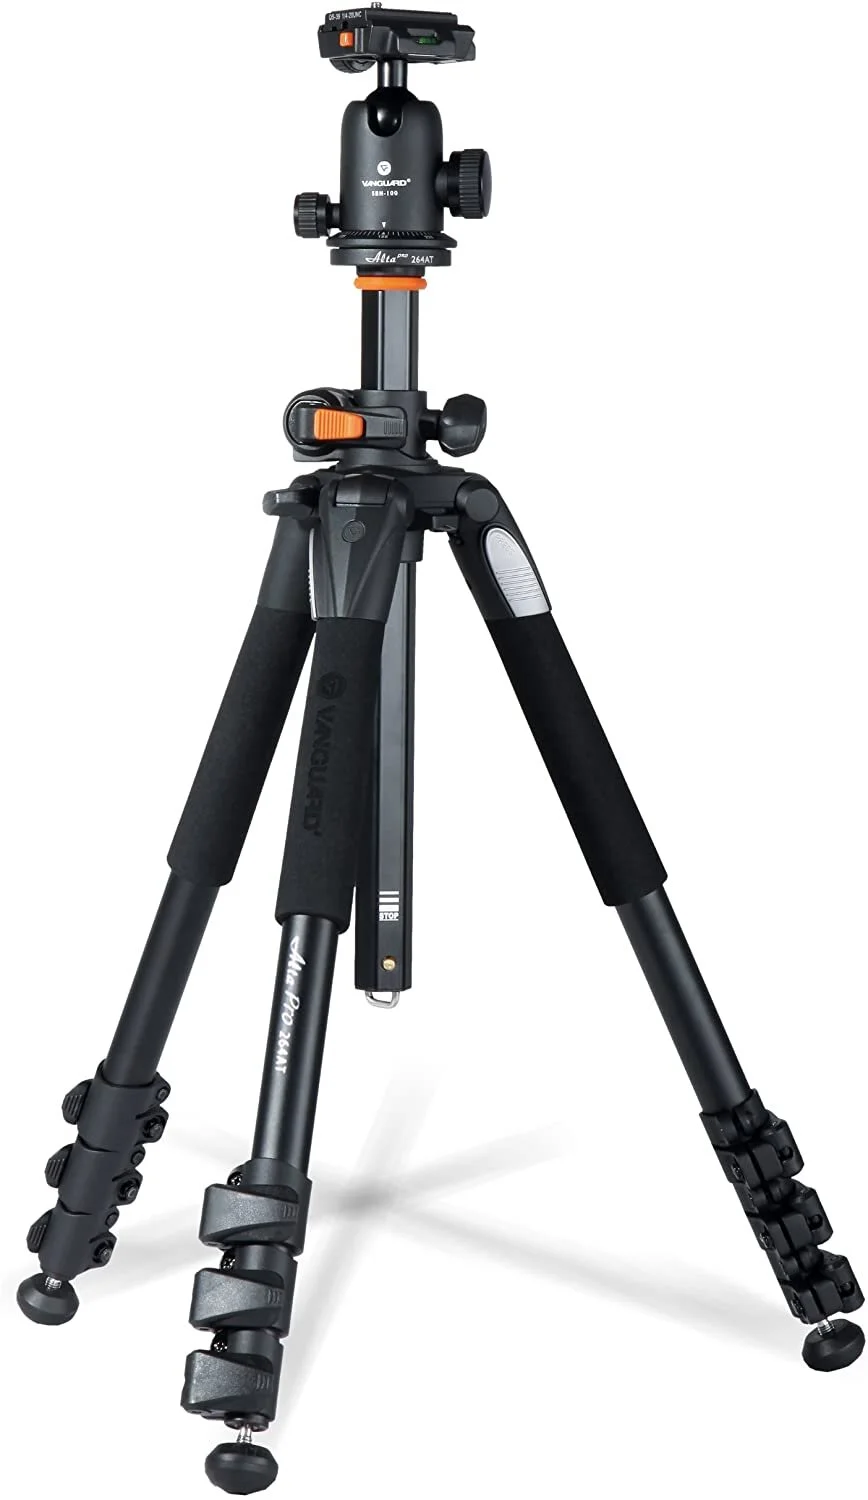
My first tripod purchase, and still a sturdy tripod although I have switched up the head and legs with other options now.
As I moved more and more to longer lenses and nature in action, I found that a ball head was not the optimal design for following any motion. I had bought a Sigma 120-300 f/2.8 lens which was hand holdable for a few minutes but really was the cause of many sore neck and backs while trying to wait for owls to hunt in the cold Ontario winters. I picked up a Jobu jr. gimbal head and for a number of years kept that head on the Vanguard tripod.

Jobu Jr. Gimbal style head. I have used this for years with the Sigma 120-300 and then later the Canon 500mm f/4 II. Great for those times that you are waiting for action and hand holding is just not going to do the job.
As my photography started taking me on longer and longer hikes, weight became more of a deciding factor in whether I would take a tripod on a given day. I found a carbon fiber tripod on sale that cut a pound or two off the carry weight of the Vanguard and now had 2 tripods. As so many stories go for me, this was just the start of trying to find the best tripod for what I wanted….almost like the game of trying to find the right camera bag, a seemingly never ending search for that “perfect” single setup that is never likely to exist.

First video head, did the job but I really did not like the quick release plate.
On that route, as we started to do some video work, I picked up a Manfrotto MHX-PRO Video head with the rc2 quick release plate, and then a Sirui monopod and Sirui two way head. Salwa also got a travel tripod by meFoto that is quite small and packable but not sturdy enough for many uses.
These purchases were over a 15 year period and each one we found useful at the time and then found that they were all limiting or not working well in one way or another. The video head was ok, but I really disliked the rc2 quick release plate. The ball head was adequate for holding the camera steady but it wasn’t ARCA-SWISS compatible and was not able to hold an L bracket. I started to hate the center columns on both tripods, as they weren’t very tall without raising the column and then they were not steady enough once the column was up.

Sirui monopod. Another good tool for when the big lenses get a bit to heavy.
This brings me back to a few months ago, I decided to start looking for a better solution as we were doing more video, more landscapes and since we were starting to film ourselves we needed to have a few tripods out with multiple cameras. I know, just another excuse to buy something new. I think it was a pretty good excuse.
So what were the things I was looking for in a new tripod?
Sturdy, tall, relatively light weight sticks.
No center column.
Half ball for leveling
Easily removable heads so that I can change from a video head to a lighter ball head quickly.
A sturdy video head that can handle up to my 500mm f/4 with extras like a monitor.
A lighter weight but very solid head for landscape that is arca-swiss compatible.
Both head should be capable of panning for easy multi-shot panoramas
Seems easy enough, right? Now we go down the rabbit hole of tripod reviews on web sites and youtube.

Manfrotto 504HD Video tripod head with 75mm half bowl
I first started looking at video tripods and heads. I reviewed fluid heads by Manfrotto, Benro, Sirui, 3 legged Thing, Sachtler, Miller, and Cartoni. I looked for anything between $300 and $1000 and then started to look for reviews of each. There are many reviews of “top 10” video heads out there, some are quite good. In the end I narrowed the search down to the Cartoni Focus 8 Fluid Head ($675), the Sachtler Ace XL ($546), the Benro BV6 ($355) or BV8 ($589), Manfrotto 504HD ($363), 502A ($208), or 608 Nitrotech ($577), and the 3 Legged Thing AirHed Cine-S ($350).
The Cartoni and Sachtler heads were the cheapest in the line for those brands, and they go up quickly for the more professional models. I read a few comparisons between those two and the manfrotto 504 and the benro BV8 and in most cases the less expensive heads kept up with the manfrotto, seeming to get consistent reviews of great value for the money. The BV8 also got a number of good reviews in terms of capabilities but in each one they always had something that was holding it back in terms of quality control.

Side view of the Manfrotto 504HD Video Head, it is bigger than you think when looking at it on the web sites.
Comparisons of the different Manfrotto heads always seemed to come back to the 504 as the sweet spot for capability compared to price.
The one odd ball was the 3 Legged Thing head. It peaked my interest because it was quite a bit lighter than the other options, but I had a hard time finding reviews that compared it to any of the other heads. I had heard really good things about the company, but had no experience myself with any of their products.
Since the video head is not what I will be using on long hikes, weight was less of an issue as I felt was the ability to manage the long lenses smoothly. In the end, I ended up picking up the Manfrotto 504HD.

top view into the 75mm half bowl
What about those legs?
Stage 2 was to look for tripod legs. This one turned out to be a bit easier as I had been watching a number of landscape photographers on YouTube to get ideas for a trip out west (Canada and U.S.) and came across Nick Page and later a post he did on Tripods. Not only did I really like his photography, he did a video on the tripods that he uses. Pretty much everything Nick was looking for matched up to my needs so when he landed on the FLM legs, I decided to go take a look. In the end we (actually Salwa bought me this for my birthday) picked up the CP34-L4 II carbon fiber legs at $683 which was higher than I was originally wanting to go but I think these will easily last me 10-15 years.
The final component was to get a tripod head that I could switch up easily with the video head for those times that I would be doing pure landscape work. Since the Manfrotto head was quite a beast coming in around 5 pounds, I was also looking for something a little lighter to hike with.
The problem here is that I want something sturdy, with an Arca-Swiss plate, that is easy to use and easy to get that precise positioning. Leveling was not going to be a problem since I have the 75mm half bowl adapter . This also meant I can change heads in about 20 seconds without any tools.

Full height of the FLM 34-L4 II tripod.
So what kind of head do I get for Landscape?
Going back to a bunch of the landscape photographers I was watching, almost everyone was using ReallyRightStuff heads. For a ball head the BH55 is a beast and seemed to be the one to beat, but the price was significant and I have been disappointed by ball heads in the past. I started looking at alternatives both in price and in functionality. Ball heads that seemed to compete well with the Really Right Stuff (and are not quite so expensive) are out there and there are many reviews and comparisons both on the web and on YouTube. I narrowed down the search again to some similar brands to when I was searching for fluid heads and one other. Benro, Sirui, 3 Legged Thing, had good options and Acratech caught my eye with their open ball head design. The reviews of Benro all seemed good again except they always found one or two things that were lacking. Sirui had a very good option at an excellent price and most people had no complaints as it was often labelled as the best value for the money. 3 Legged Thing again had people who really seemed to like it, but for some reason none of the models appealed to me. The Acratech models were very intriguing but a number of reviews seemed to find issues in build quality. It seemed like they were addressed but in the end I went with the cheaper option with the Sirui K-40X ball head and have attached it to a 75mm half ball adapter.

Sirui K-40X attached to a 75mm half bowl found on Amazon
The great thing is that we now have 4 usable tripods, 2 for each of us to shoot and two others for capturing videos as we learn to take videos of what we are doing and seeing. Plenty to learn before we head out on what we are hoping will be a bit of a life-altering photo road trip. More to come on that as we start to document our preparations and then the trip itself.

Sirui K-40X attached to the FLM 34-L4 II tripod
I bought the stuff, so am I done?
Once I start researching things I often find options I never new existed. One of those things that I have found are 3 way geared heads. These heads are precision oriented heads that you can turn in each of three directions. A tilt forward/backwards, tilt side to side and pan horizontally. At the moment I’m going to see if the ball head allows me to be precise enough in positioning the camera for those landscape compositions. If I find I’m struggling to get the camera to stay in that one spot or if fine adjustments become a major challenge, I think I will take a look at one of the more affordable options in this class. Benro seems to have a great option at a price point (GD3WH 3-Way Geared Head at $210) that may be worth trying out and most reviews are very positive. The downside is that these heads are not very compact for hiking but at least they are not very heavy.
I have managed to get 2 new quick-release plates by Andoer. I have replaced the plate on the Vanguard ball head with one of these so that I now have an Arca-Swiss compatible plate there. These have a lever clamp which is very quick.

Andoer quick release plate on the old Vanguard ball head. Giving new life to this tripod head.
I attached the second one directly to a Manfrotto rc2 plate so that I can continue to use the same Arca-Swiss plates on all cameras and switch quickly between all the tripods (except the big video head that uses a bigger Manfrotto plate).

Manfrotto MHX-PRO Video head with the rc2 plate and Andoer Arca-Swiss plate on top.
Last, I took the old Jobu Jr. and attached it to an Arca-Swiss plate. I got this idea from another company on the web who is starting to sell a gimbal head that can be attached to the top of a ball head. With the strength of the Sirui Head I can attach the gimbal directly to the ball head and continue to use the big lenses in seconds rather that needing to attach it directly to the tripod. This gives me 3 different combos that I can use on the new FLM tripod that I can change in the field with no tools. I also now have four different tripods all with Arca-Swiss plates that we can switch cameras on and off for video or photo work. We have 2 L brackets and a couple of standard plates for all of our cameras now.

Jobu Jr, on top of Sirui Ball head. Once locked in this is very stable, and means I can use the gimbal head within a few seconds with no need to remove the ball head.
Give me a few months to get some good use out of my new tripod combos. I’ll either do a review here on the blog or try to do a video review.

This is where we ended up. 4 tripods plus 2 extra head set ups for the new FLM tripod that can be changed in the field quickly. Notice that just about everything has ACRA-SWISS compatibility so that we can switch any camera onto any tripod (except when using the big Manfrotto 504).
Canon EOS R5 and R6 - Are these cameras for nature photographers too?
For a good 6 months or so we have been spoon fed little niblets of information on Canon’s proper entry into the mirrorless market. Sure we have 2 mirrorless cameras as a stop gap, but for anyone who already had significant investment in the 5D series level cameras the EOS R and RP left many of us wanting.
For a good 6 months or so we have been spoon fed little niblets of information on Canon’s proper entry into the mirrorless market. Sure we have 2 mirrorless cameras as a stop gap, but for anyone who already had significant investment in the 5D series level cameras the EOS R and RP left many of us wanting.
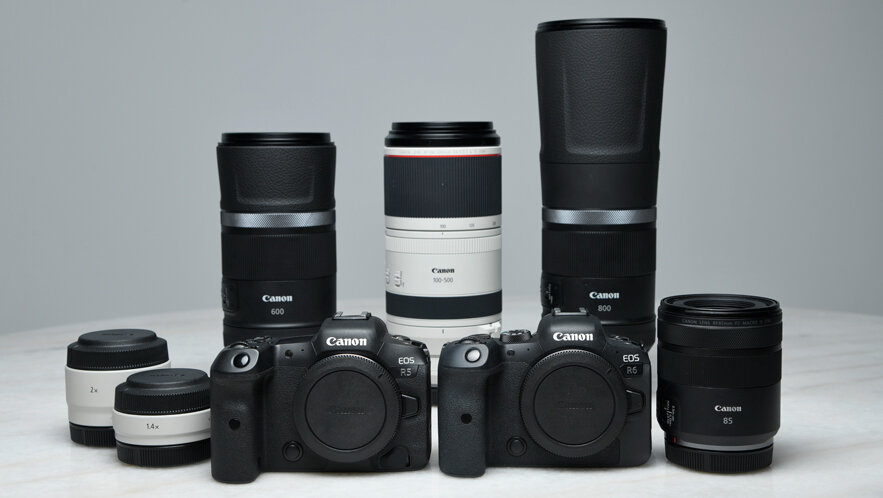
Currently I have a Canon 5DS and Salwa (WanderingPhocus) has a 5DIII. They have both been great cameras and we both have a long history with Canon. Many lenses from 8 mm out to 500mm, primes and zooms. Since Salwa’s 5DIII started acting up during servo AF, she has taken over my 5DS and I am now using my Sony gear exclusively. This has meant that I haven’t used my 500 f/4 much and have been really looking forward to a replacement that was a worthy upgrade.
On the 9th of July Canon had their big official announcement with the new EOS R5 and EOS R6, along with a bunch of other new stuff. I have been sifting through all the announcements and previews from Canon ambassadors since the announcement, piecing together what I can to determine if this is a camera for people who are primarily photographers. Let’s do a quick walk through of what is coming and when.
The EOS R5
Let’s start with the one I have been thinking will be my next camera. The Canon EOS R5 is a 45 MPixel camera that can shoot at 12 frames per second with the mechanical shutter and 20 fps electronic shutter. It has dual card slots (CFExpress and SD), a buffer for around 90 raw shots and dual pixel auto focus covering the entire sensor that is the latest from Canon. Not a lot of details have come out about using the camera so far except from people who are paid by Canon as ambassadors. Their reviews are gushing, of course, and they are making things look pretty amazing but really these are more adverts than reviews.
From a replacement for the 5DS, the spec seem pretty much what I was hoping for. Similar resolution and faster shutter and better buffer. We shall see how the autofocus works once it gets in the hands of more reviewers soon. I can’t wait to see how it stands up to the Sony A7RIV from a stills photography point of view. These specs alone are pretty much enough for me to make this my next Canon camera.
The EOS R5 ( USD $3899, CAD $4 billion) is suppose to start shipping at the beginning of August. While this is great, I am a bit surprised that Canon hasn’t allowed more independent reviews of the camera as it pretty much must be finalized and shipping now to be available in 3 weeks. This alone has me waiting instead of preordering a camera I have been hoping would come out for a couple of years. Canon usually puts out a camera that is underwhelming but stable and usable…except for when they came out with the 5D2 which was exciting and perfectly usable.
What about the other camera?
The second camera, the EOS R6 (USD $2499, CAD $still too much plus more tax) is a very interesting camera. It seems almost like a cross between the Canon 6DII and the 7DII. It has the speed and resolution of the 7D type cameras at 20 MP, but loses that 1.6 crop that some nature photographers enjoy. It has a body similar to the 6D II, not quite as resilient as the 5 series with a few things left out but at a price point that is more likely to entice a good number of photographers. Speed wise this camera loses nothing to the R5 with the same 12 and 20 fps and the same tracking autofocus system at least from the specs. The resolution though is interesting. The current 6DII is 28 MP and the 5DIV is 30, this is a significant drop back down to a bit less resolution than the 5DIII. This could be very good news for low light shooting as the sensor is rumored to be the same as that in the 1DIII. For me, now that I have both resolution and speed in the Sony A7RIV it is difficult to go back to the lower resolutions. This is mostly due to the fact that I am most often distance challenged when shooting birds and animals. Cropping is my friend, since I can not often get as close as I would prefer to my subject without either having it spook or change its behavior. For landscape work, I just like more resolution. This may not be a factor for many other photographers, and I suspect this camera will sell well as long as it is more responsive than the current EOS R and RP.

The EOS R6 will have 2 SD card slots. I would imagine this will be completely sufficient from a photography point of view and significantly cheaper as CFExpress may not come down in price for a few years yet.
ViewFinder and LCD screen
The viewfinders have 5.x MP resolution in the R5 and 3.6MP in the R6 with up to 120Hz refresh rates. Not much has been said about blackout time while shooting so we will need to wait for those independent reviews again. It is highly likely that the viewfinder in the R5 is the same one in the A7RIV. If so, and if implemented similarly it will be excellent to use in real life. The lower resolution of the R6 is expected but still will likely be better than the current Sony A7III (which is rather horrible but still usable) and likely on par with the A7RIII which was also very usable.
The LCD panels are the latest of the '“pull out to the side” style from Canon. With touch screen and useful variable angle tilt this will be pretty fantastic for those of us who would love to be able to get those different perspective shots. I almost never shoot birds or animals without my eye to the view finder but often have the camera in very awkward positions when doing landscapes…sometimes just inches above the water or way above my head.
A new Image File option
One of the new things that may be interesting to some photographers is the inclusion of HEIC files. These are what I’m hoping will be the replacements for JPEGs on the Net within the next year or two. HEIC files can be a higher bit depth lossy compression file (up to 16bit). Their adoption on the web is limited at the moment but for those times you need to shoot with something that has much smaller file sizes this is another great option while still having some leeway to edit the shots and retain the integrity of the image. Looks like Canon will include support for 10 bit HEIC which should be better than 8 bit JPEG while still about the same size.
Shooting speed
Let’s get back to the shooting speed. 12 fps with a mechanical shutter is pretty amazing and is in the realm of past 1D cameras. This is one of the things I have been looking for in a Canon camera for years - relatively high resolution and high fps with a reasonable buffer. I’m hoping that the CFExpress card will clear that buffer quickly as well. This is a huge step-up for Canon and looks to have gotten ahead of Sony as well. I’m very happy with the 10 fps and 61 MP of the Sony A7RIV and look forward to getting to use the same capabilities on my big white Canon lenses. The silent shutter is going to be the bigger unknown. On the Sony A7RIV the silent shutter is great for getting shots of a bird that might spook but motion in shots can have some really odd results. The Sony A9 series takes the data off the sensor quickly enough that it is relatively close to a global shutter. This is not the case with the A7 series and I haven’t seen any details for the Canon yet but suspect it will be similar to the A7RIV (I would love to be wrong on this). This is not unexpected, but is something you need to be aware of when shooting anything moving, especially anything rotating within the frame. For the same reason, anyone shooting in artificial lighting may also see issues as the light changes within the exposure of the image. This can result in banding as the read out of the sensor often skips lines as it progresses through.
Speaking of artificial light, I haven’t yet heard much about flash sync or whether it can be used with the electronic shutter. Since the max shutter speed is the same for this camera at 1/8000s in both electronic and mechanical shutter being able to shoot at really high shutter speeds with a high speed sync is not an option.
IBIS
Now this is a new one for Canon. They have stated over and over again that lens based image stabilization was better than sensor based. Finally they are coming to the game and they are making claims to have better stabilization than anyone out there with an estimated 8 stops. The one downside so far came from a site I read that stated EF lens stabilization would not communicate with the sensor based stabilization. This did not mean they would work at the same time, but would not necessarily be as good as with an RF lens. I will wait to see the reviews to see if this means that they lose a stop and still work amazingly well or if that means we might see issues when using both together. Worst case is that we turn off one and get the same image stabilization we had before which was pretty good for stills anyways.
Lenses and EF lens compatibility
Canon RF lenses have been highly rated so far, the canon ambassadors are gushing about the new 100-500 F/4.5-7.1 and as an owner of the current 100-400 I expect it will be pretty great. I do find it interesting that many people who thought the Sony 200-600 at F/6.3 was unusable except at high noon are now accepting of these slower lenses when they come from Canon. I have found the 200-600 to be fantastic for birds in flight and expect the new Canon to be equally great. If the EF lenses work well enough on the new R series cameras, I may hold off on getting any white lenses as the ones I have (70-300L, 100-400IIL and 500IIL) are fantastically sharp. Where I’m likely to venture is in the wider angle lenses as my 17-40L is getting a little long in the tooth and Salwa pretty much lives with the 16-35 f/4 when hiking and traveling.

I think I will cover the other lens announcements in a separate post as some are really new concepts.
There seems to be some language from Canon stating that the best performance will come with RF lenses, the question is going to be how good will the autofocus tracking and IBIS be with EF lenses. Since there aren’t going to be any big whites on the RF side of the world for a while I’m hoping that Canon has ensured that the performance will be good. From what I have seen, autofocus in live view mode on the 1DXIII with EF lenses is up to the task so I still have pretty high expectations.
Dual Pixel II - autofocus enhancements
This is the big question for me. Dual Pixel autofocus is pretty good for video but I really want to see how the improvements are with subject tracking for stills. The Sony A7III and A7RIV are really just so good that when I go back to my current Canon cameras I now feel like I’m missing something. My expectations are high, with face detect, eye autofocus and animal eye focus I’m really hoping that these cameras can meet my current expectations. It did take Sony a long time to get to the level they are now, many iterations with some pain along the way. Canon skipped much of that by not having a horse in the mirrorless race, now we see if they can catch up or even pull ahead within just 2 product cycles. The EOS R really didn’t match up in that sense, although there were many other reasons I didn’t find it worth picking up.
Button Layout - Touch Screen
Canon tried some interesting things with the EOS R in terms of button layout and ergonomics. Compared to the 5D series I never felt like the EOS R felt natural in my hands and getting things done felt more difficult switching between the 5D and EOS R than it was switching between 5D and A7 series. For what I regularly use on the back of a camera, the changes Canon made for the EOS R5 (and R6) bring everything back to where I like to have them. The joystick I find to be the most useful, as I find using the screen a pain when the camera is up to my eye. I also find that I change settings on the camera by accident continuously with the touch screen. It is a great tool for when you have the camera on a tripod but I really like to have the buttons available for that control as a second option. Bringing back the scroll wheel is also great although now that I have gotten used to the scroll wheel on the Sonys with the four corners as buttons I think I would have liked Canon to add that for some extra buttons on the back. Still, I can at least use the camera as I would have with the 5D easily with this layout. Back to the touch screen. I may complain about it but as long as I can turn it on and off when I want to it is still the best implementation of a touch screen I have seen on a camera. Sony needs to learn from this.

image from apotelyt.com
The top of the R5 is going to be the harder part for me, but in the end it will just mean learning a new way of doing things. I do wish the video record button was on the back like the Sony and would love to have the AF On button bigger like the Sony but in the end these are small things that will become normal with usage.
Battery life
First estimates seem low even with the new battery announced. The good news is that the new battery is backwards compatible with current Canon batteries and chargers that we have a good number of here at home. We shall see if Canon is being conservative with battery usage estimates or if we are going to be in a similar situation as we were with the second generation and prior Sony Cameras before they moved to the new and much better battery.
Video
This has been where most of the excitement has been over the last few months. We do shoot a bit of video, and are trying to do more as we continue to evaluate how to tell the Phocus stories. The specs looks fabulous, and the limitations that have now been circulating concerning heat will affect many video people but for the most part are not going to make or break our decision to buy these cameras. Sure, 4K at 120 fps would be really nice for some nature action slowed down, and I would love to experiment with grabbing frames from 8K footage (using it with a high shutter speed instead of twice the frame rate) to see what you can achieve. It would still be the most capable video camera we have so no complaints if it works to spec.
What to do, where to find more info
Currently it is hard to draw many conclusions other than that I’m ready to put money down unless early reviews show some major issues or flaws. Would love to get one in my hands to compare to the A7RIV but I imagine I will have to wait like everyone else. Would be fun to have it for fall migration, let’s hope it lives up to the hype.
Much of the information I have gotten is found at CanonRumors.com, a great site with a pretty good (at least most of the time) group of users and topics in the comment sections. DPReview.com is another great resource to see previews, reviews, and great videos by Chris and Jordan. Some other good resources and often just interesting videos can be found on YouTube with people like Tony and Chelsea Northrup, Jared Polin, and Max Yureyev. For a great video using the R5 from a Canadian Canon Ambassador take a look at Peter McKinnon’s channel.
Woodpeckers - A nature photographers guide for getting the shots you want
Whenever you go into the woods, at some point you will hear that knocking sound. From the tiny downy woodpeckers that you find almost everywhere, to the beautiful Pileated woodpecker, you will always see something worth taking a shot of and often get an interesting glimpse into their behavior.

Pair of Northern Flickers on a cedar tree on the north shore of Lake Ontario. Taken on a Canon 1DIV with a sigma 120-300 and 2x teleconverter. f/5.6, 1/1600s, ISO1600 at 600mm.
Whenever you go into the woods, at some point you will hear that knocking sound. Sometimes distant and not loud other times like a hammer on a tin roof. This is a sound that always take me off-trail to find out what is making the sound. From the tiny downy woodpeckers that you find almost everywhere, to the beautiful Pileated woodpecker, you will always see something worth taking a shot of and often get an interesting glimpse into their behavior.
Where to look?
In the woods of course - but I have found the best places to be in wooded areas near marshes where you will have many dead trees. If you see holes in trees, then it is mostly likely that a woodpecker made that hole. Other birds and squirrels may now be living in that hole but there is a good chance it was originally made by a woodpecker.

Red headed woodpecker on the edge of a marsh in Spartanburg, SC. Taken on a Canon 1DIV with 100-400 lens and 1.4x teleconverter. F/8, 1/800s, ISO400 at 560mm
I often look for fresh wood chips at the bottom of a tree for signs of nesting.
One caveat when looking in the woods is that flickers will often be found on the grass along with robins searching for bugs and worms.

Two Red-bellied woodpeckers active on a fall day in Spartanburg, SC. Taken in the late afternoon light on a Canon 1DIV with a 100-400 lens and 1.4x teleconverter. f/8, 1/1600s, ISO1600 at 560mm.
When to go?
As with most birds, the most active time is in the morning. In the woods and under the tree canopy, woodpeckers can stay active all day. Spring time is the best time of the year as they start nesting. Not only are they more easy to find, they are often very vocal in the spring.

Yellow-bellied sapsucker on a cool spring day in Haliburton, ON. Taken with a Canon 1DIV and sigma 120-300 lens and 2x teleconverter. F/5.6, 1/800s, ISO 800 at 600mm
What should you bring?
Most of these birds are relatively small, fast and tend to live in the woods which all tend to mean you are going to want to have a long, fast and stable lens and a camera that can handle high ISO well so that you can keep your shutter speed up as much as possible. Currently I have the Sony A7III for lower light situations and the A7RIV for slightly better light or birds that are much further away since I can crop a considerable amount with that sensor. If you can afford a long prime you will be rewarded with the best results, but a good long zoom will get the results as well although likely with a bit more noise. I use the Canon 500mm f/4 (sometimes with a 1.4 teleconverter) on my Canon cameras and have been using the Sony 200-600 on the Sony cameras. If you are hiking in to the spot, the Sony zoom will save your neck and back and you will still get the shot - the equivalent Sigma or Tamron 150-600 can also be a great choice as there are few other choices to get to that 600mm without breaking the bank.

Pileated Woodpecker in Edwin M. Griffin Nature Preserve along the Cottonwood trail in Spartanburg, SC. Taken on a Canon 1DIV with 100-400 and 1.4 teleconverter. F/9, 1/250s, ISO 400 at 476mm.
Even though you will be shooting in lower light I would still suggest that hand-held will yield better shots mostly because you will need to move around quickly to get a good angle and the birds rarely stay still for long. If you can watch at a nest for parents to come back and forth with food, then setting up a tripod is well worth it as you may wait for a considerable time between birds returning with food.
Bring bug repellent. You may be standing for some time and the mosquitos will find you sooner or later here in Ontario in spring or summer.

female hairy woodpecker on an old fence post in Whitby, ON. Taken on a Canon 1DIV with Sigma 120-300 lens. F/4, 1/800s, ISO100 at 300mm
Shooting techniques
Since you are shooting small, fast moving birds usually in the low light of the forest, good technique is crucial. For me, there are two main things that help me get the sho - this is assuming that you are already relatively good at getting clear shots with a long lens. The first is using your autofocus to good advantage.
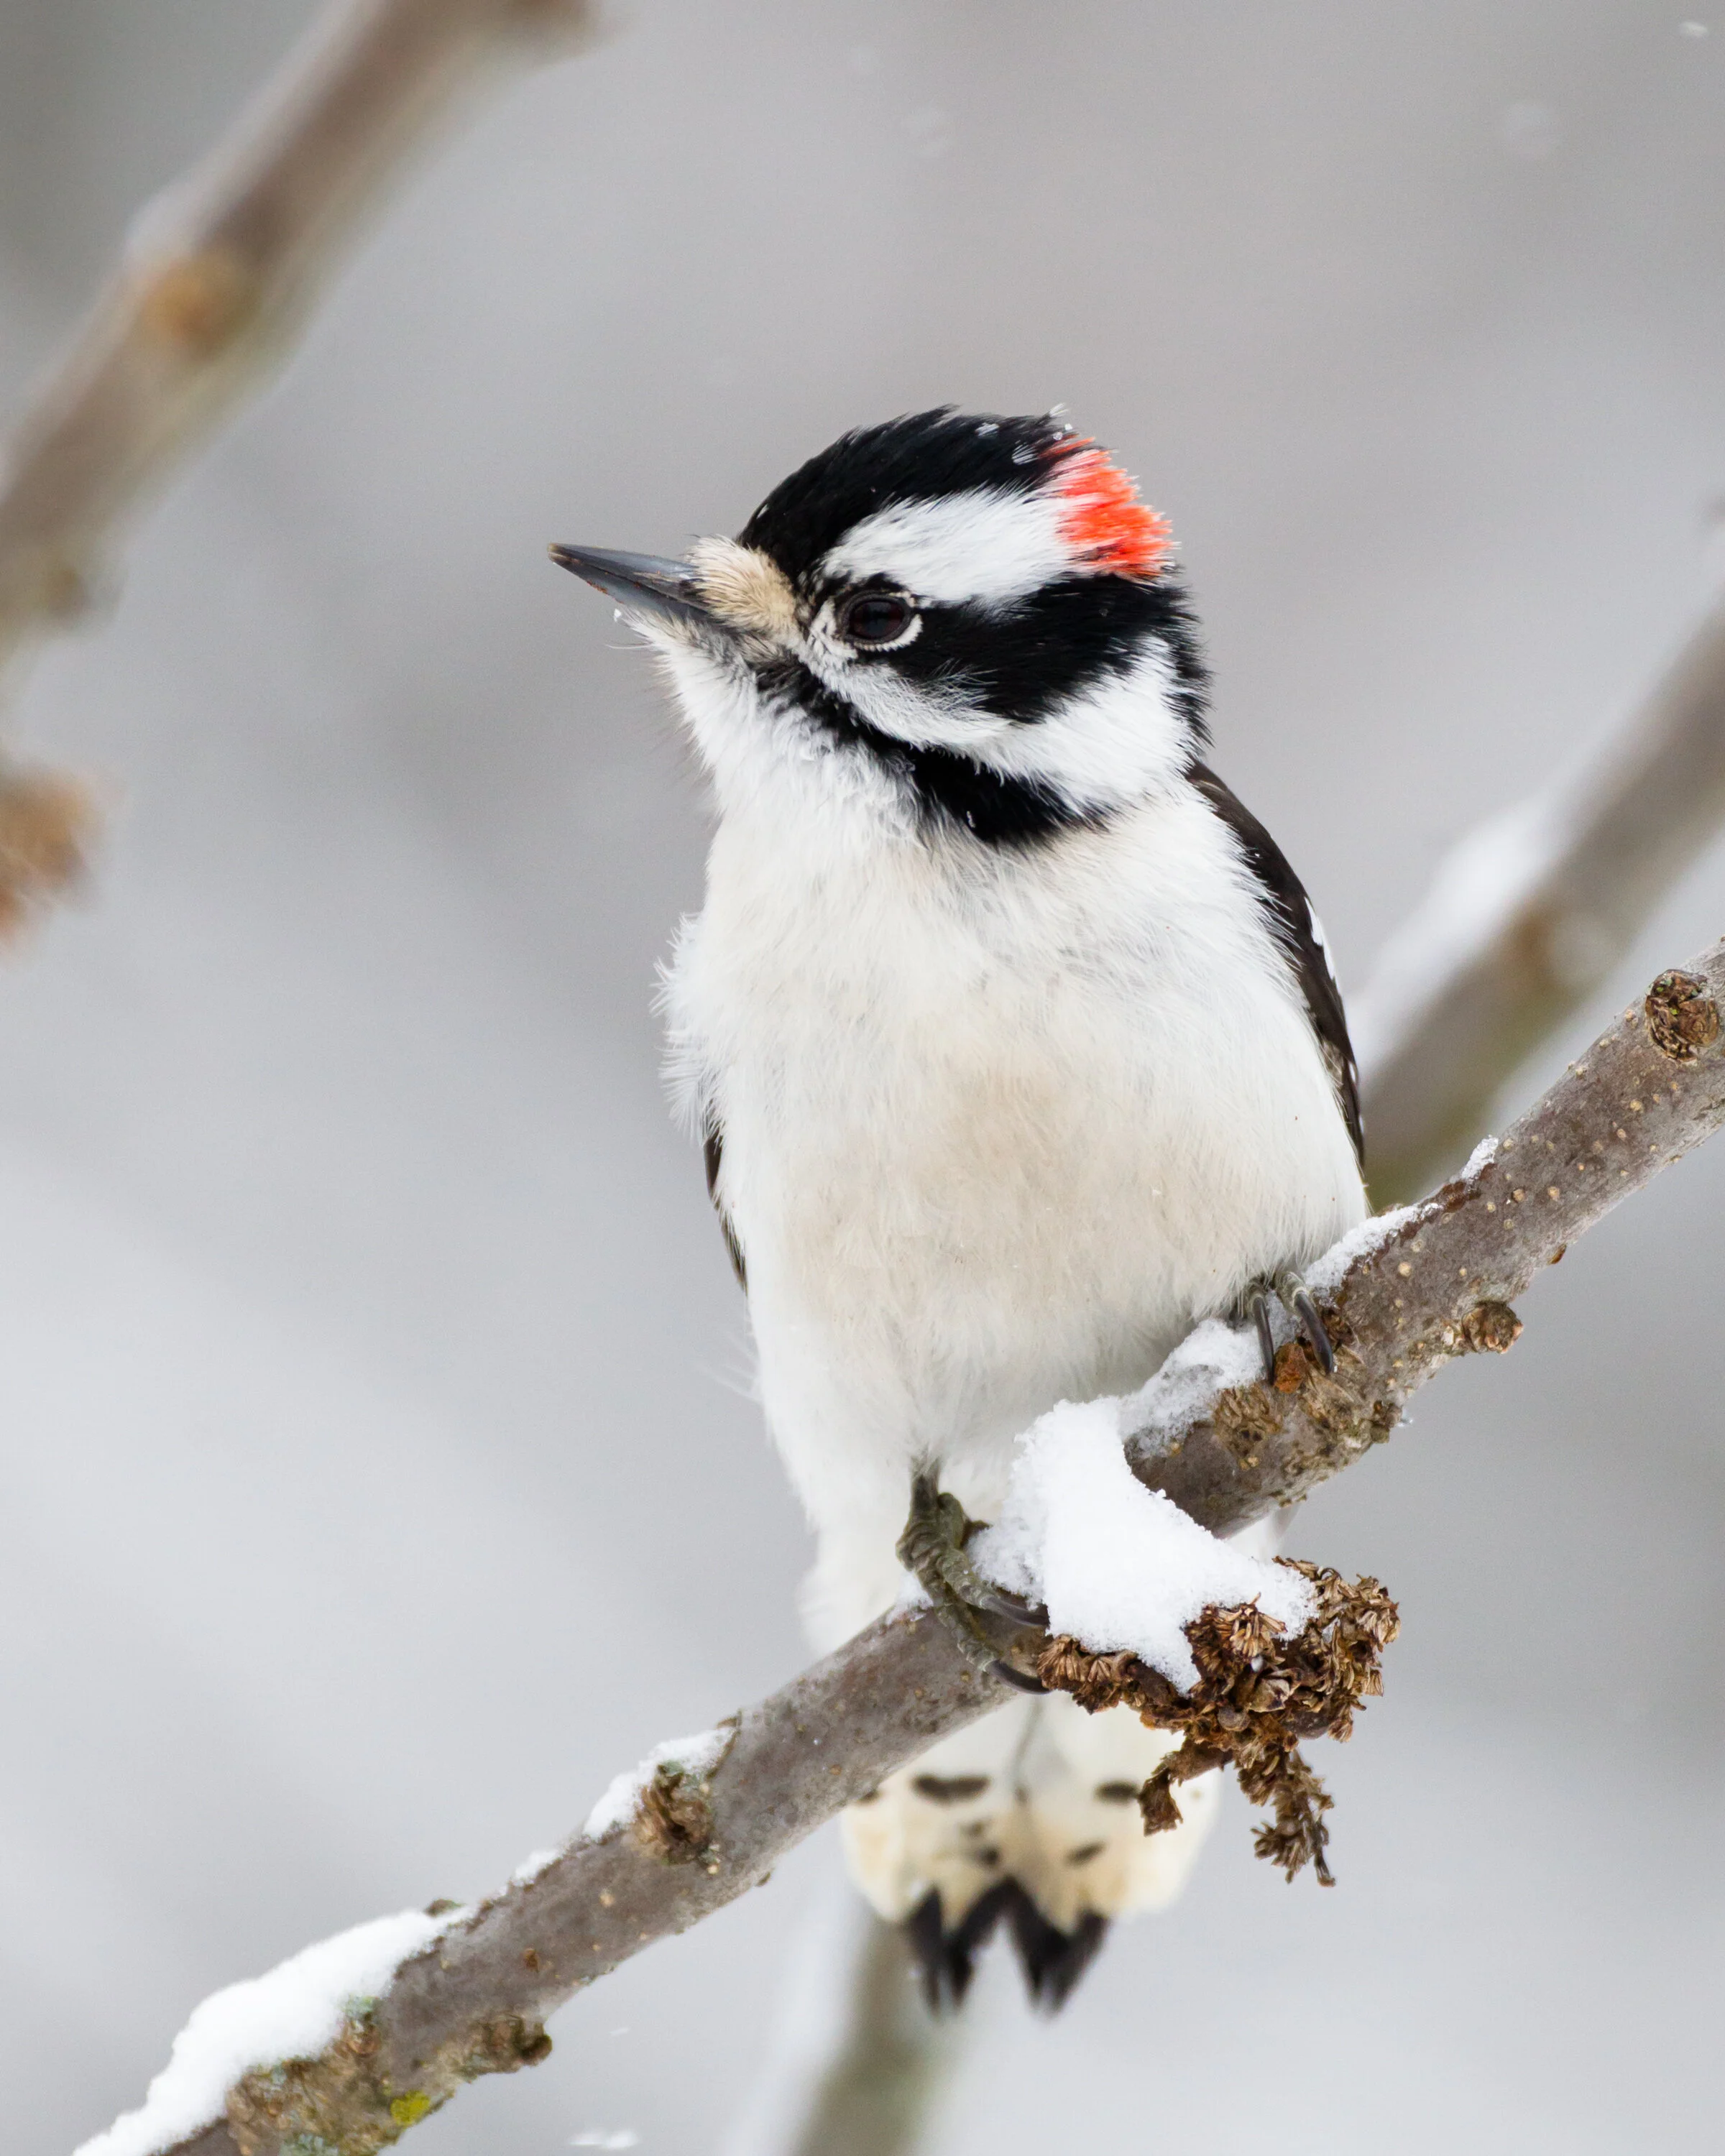
Downy woodpecker in Cranberry marsh on a cold winter day in Ontario. Taken on a Canon 1DIV with Sigma 120-300 lens and 2x teleconverter. F/5.6, 1/1000s, ISO 1600 at 493mm.
In the woods, single point or a small group of focus points will tend to get the best results as the background and lower light will often confuse the autofocus systems if you try to use wide area tracking. I have found great results with mirrorless cameras using single point with object tracking. You can adjust where the point is for initially getting the subject but once you have object tracking you can move with the bird or adjust your composition without losing focus. On my Canon cameras I will tend to use either single point or group of 9 in the center. Without the object tracking I usually have to crop later to get the composition I want since I can’t move the points manually that quickly as these fast little birds change location and direction.

Pair of Pileated woodpeckers at the nest on the north Shore of Lake Erie. Taken on Canon 5DS with 100-400 lens. F/5.6, 1/2500s, ISO 1600 at 400mm
The second item has to do with the shooting mode. I have found that shooting in manual mode with auto ISO gives the best results in the woods. This really isn’t manual at all and that is a good thing since the exposure can change easily by more that 5 stops as the woodpecker moves from branch to branch and tree to tree. If you want to catch the moment the bird is doing something interesting then letting the camera determine the final exposure is much quicker than I can do in that situation. Exposure compensation and choosing a metering method that works for you is also pretty crucial. I will most often leave the metering in multi on the Sony or evaluative on the Canon and adjust exposure compensation based on the general background. In more harsh situations I will change to spot metering if I have one subject only.
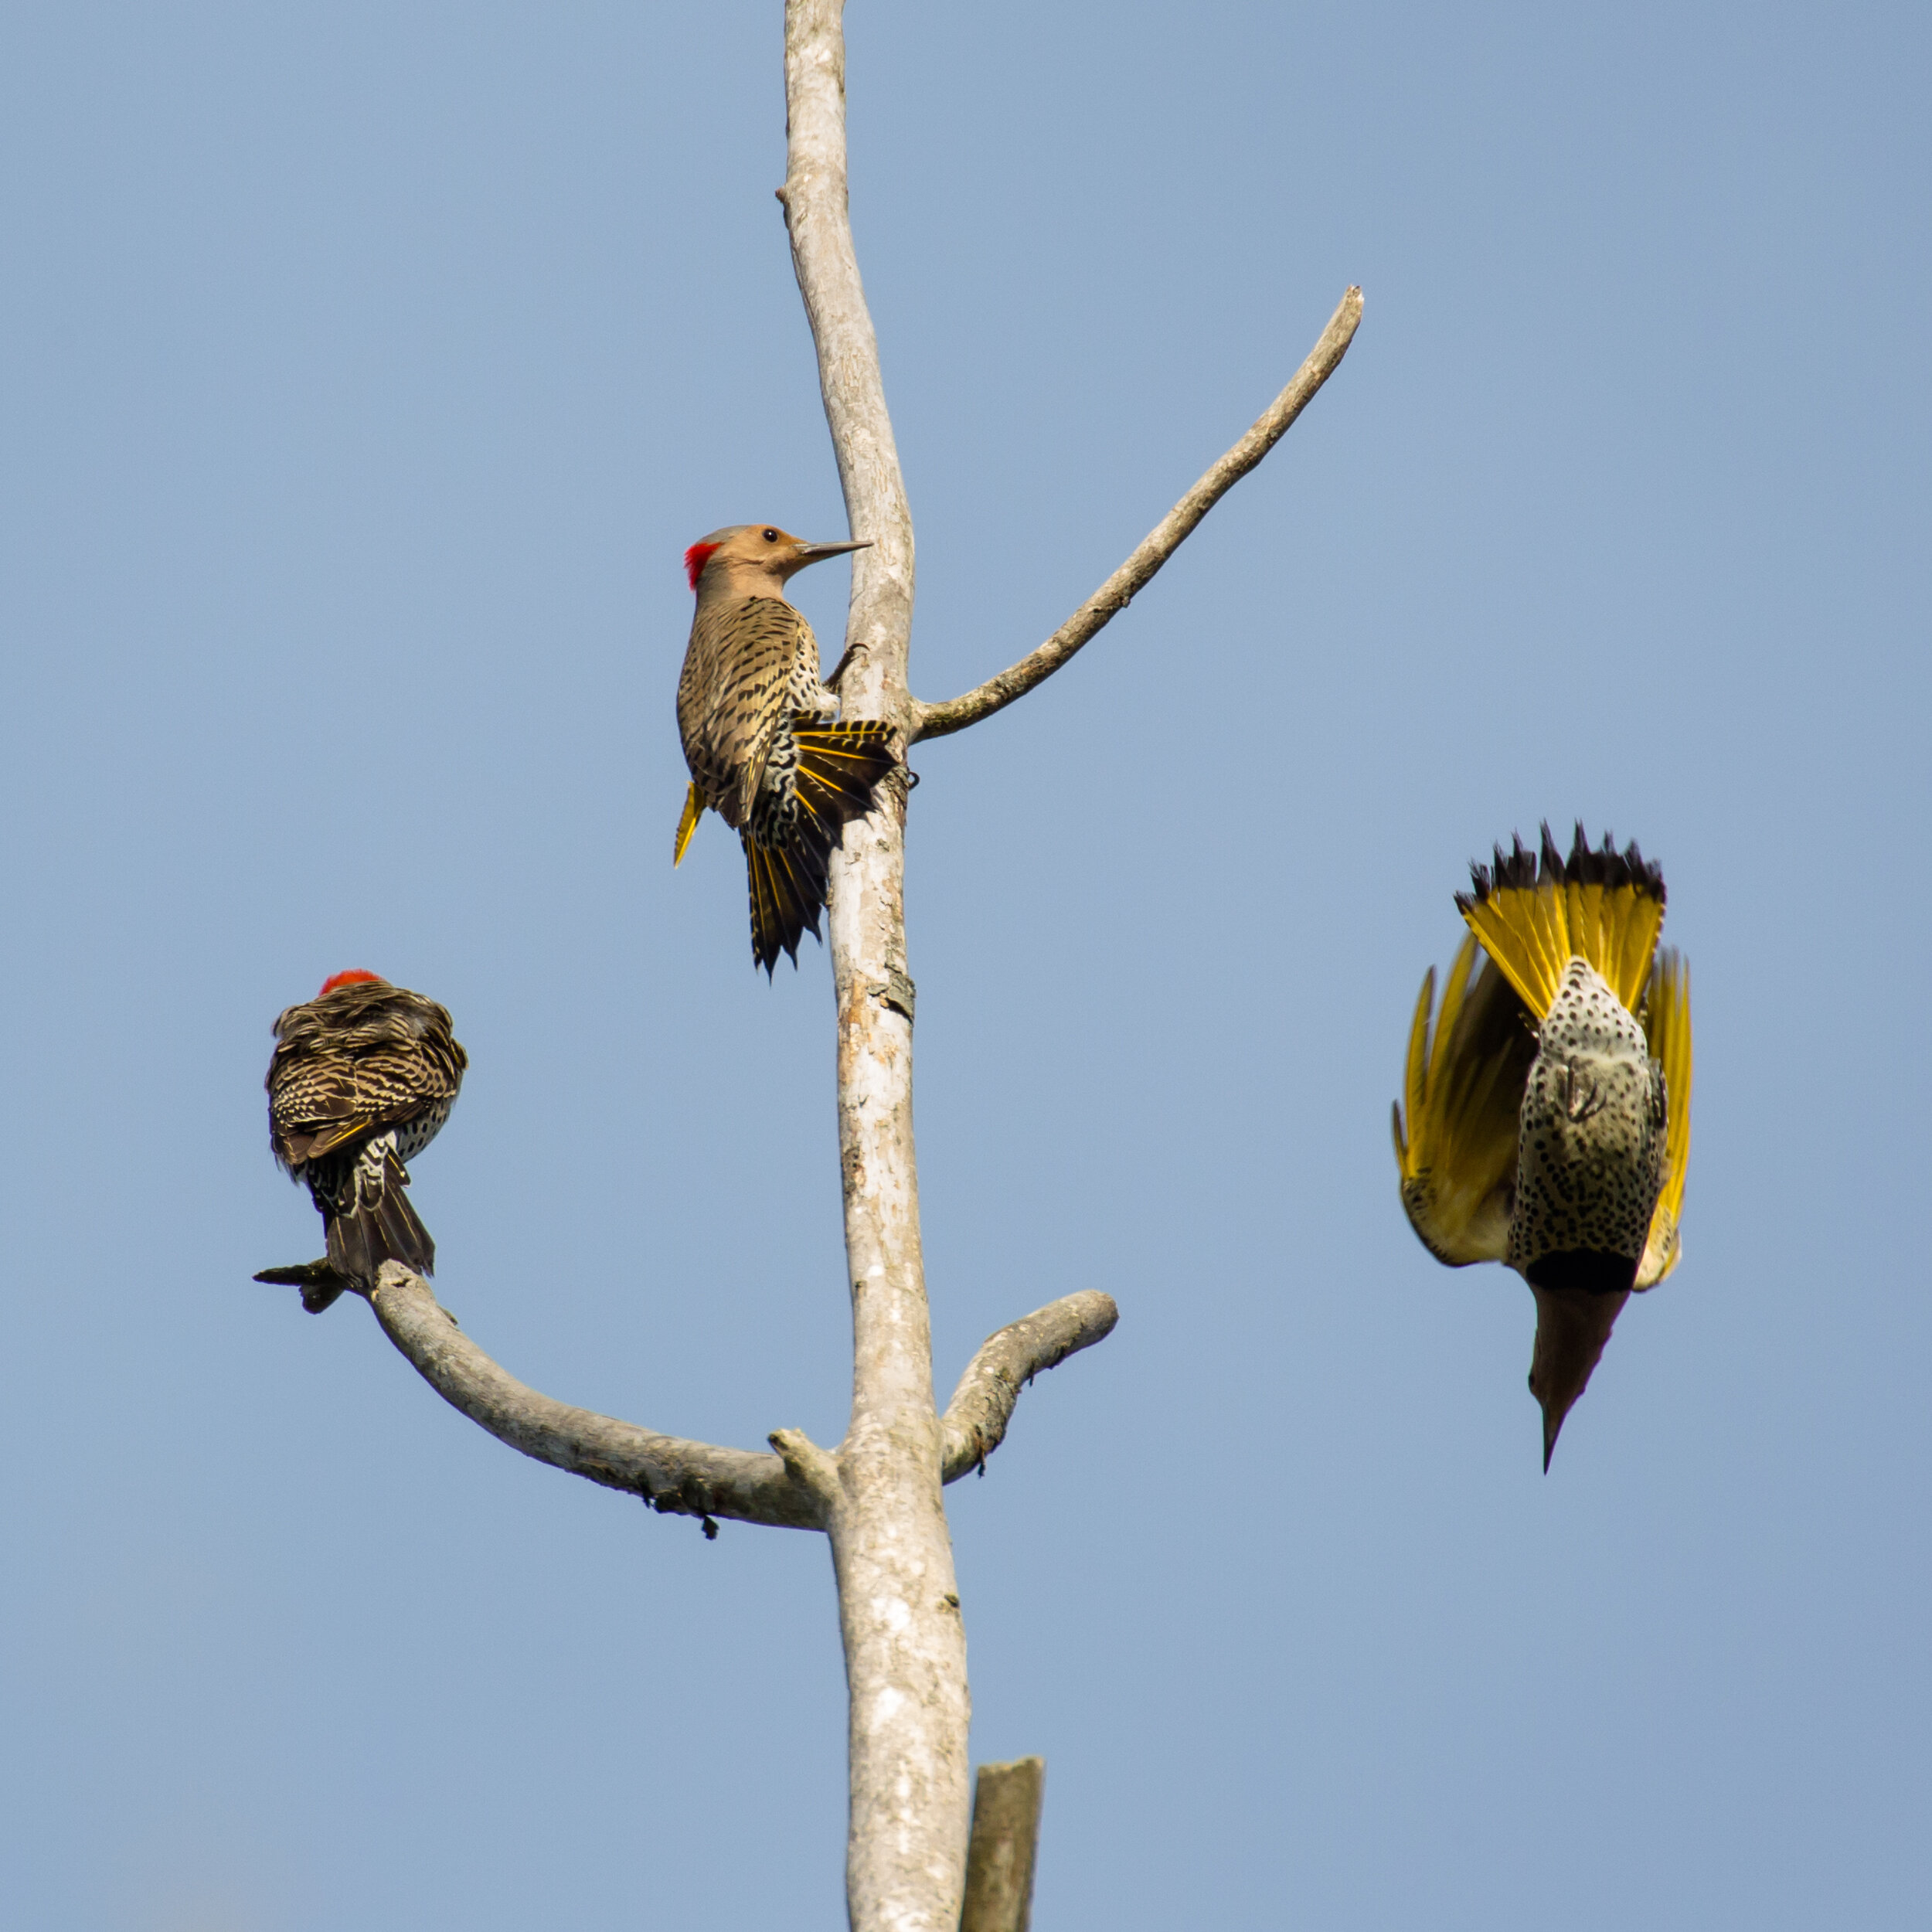
Three Norther Flickers dancing around the top of a dead tree in a marsh in Spartanburg, SC. Taken with Canon 1DIV and 100-400 lens with 1.4x teleconverter. F/8, 1/1250s, ISO 1600 at 560mm.
In Manual mode I start with my shutter speed at 1/2000s and my aperture as big as my lens will allow. Usually the birds are far enough away that I can get the entire bird in focus but I will shut down the aperture as the bird come closer. I start with the high shutter speed to ensure that I’m not surprised by interesting interactions and find that I wasn’t prepared and end up with shots that have motion blur. Once I have assessed what the bird is doing I often bring the shutter speed down for some cleaner shots while the bird is not moving but try to remember to put it back up before I move on to the next bird. This is a technique that works for me most of the time, try it if you like but there are many ways to accomplish similar results.

Red-headed woodpecker taking off with an acorn. Taken using a Canon 1DIV with 100-400 lens and 1.4 teleconverter. F/8, 1/4000s, ISO 1600 at 560mm.
What shots to get?
As in most nature photography you will often want to get the portrait shot with the soft background. This is the “I got it” shot when you see your first one. Of course there are times that you will just be happy to get a clear shot of any sort if it is a rare sighting. Once you have this in your bag, then you can start looking at the behavioral shots and the interaction shots. Whether it is mating dances, nesting, feeding, in-flights or hiding nuts, there are many interesting things to try to capture with woodpeckers since they don’t tend to be too interested in us as long as we stay relatively still.

Red-bellied woodpecker posing on a fence post in Lynde Shores Conservation area near Whitby ON. Taken using Canon 1DIV and Sigma 120-300 with 2x teleconverter. F/5.6, 1/640s, ISO 400 at 600mm.
Birds I have found and the ones I haven’t yet.
On the eastern side of North America, where I have lived most of my life, we have a decent number of species of woodpeckers. Commonly I see downy and hairy woodpeckers along with red-bellied woodpeckers and northern flickers. A little less often I get to see yellow-bellied sapsuckers, pileated woodpeckers and red-headed woodpeckers. All of these I have been able to get shots of over the years and still enjoy capturing them as I see them.

Pair of Northern Flickers facing off. Taken using Canon 1DIV and Sigma 120-300 with 2x teleconverter. F/8, 1/640s, ISO 1600 at 526mm.
There are a few species in the Carolinas and in northern Ontario that I have not yet had a chance to get good pictures of. We did go searching a few times for red-cockaded Woodpecker that still has a small presence in South Carolina but we were pretty unsuccessful on those trips - another excuse to head back down to that area.
There are many good reasons to head up into northern Ontario for birds that live in the boreal forest. Three-toed and black-backed woodpeckers can be found in these forests and are on my list for some boreal forest trips in the future. Once I have found these I guess we will need to head out west to start finding new and more interesting species ( I say that a lot, and it is part of the nature focus long term plan). Until then, we shall continue to enjoy the nature we see around us now.

Red-headed woodpecker trying to find a good location to store an acorn. Taken using Canon 1DIV and 100-400 lens with 1.4x teleconverter. F/8, 1/4000s, ISO 1600 at 560mm.
Spring migration - short post for an odd spring.
We had a very odd spring this year, cold and wet until the last couple of weeks of May and then 30 degrees Celsius immediately afterwards. No transition, and due to that the spring migration of birds felt kind of abbreviated.

Common Loon fishing on the Niagara River on a rather cold and dreary day. Since there wasn’t much colour anyways I made this Black and White to focus a bit more on the Loon’s feather textures.
We had a very odd spring this year, cold and wet until the last couple of weeks of May and then 30 degrees Celsius immediately afterwards. No transition, and due to that the spring migration of birds felt kind of abbreviated.
The ducks and loons came through and stopped on Lake Erie and the Niagara River for a few days before heading north towards their summer haunts anywhere from southern Ontario all the way up into the arctic.

Bald eagle returning to the nest with a decent sized fish on another grey day. High key images can be a challenge with the contrasting white and black of the eagle.
Osprey and Eagles came back into the area and started setting up nests quickly. Many of these nests are located on the US side of the river but we do get to see these birds fishing along the edge of the river. If/when the borders open back up it will be nice to get over to see some of the nature areas around Buffalo again to see what has returned.

Female purple martin taking off from the martin condos on the Lake Erie shoreline.
The next thing we tend to see just as the swarming bugs emerge are the swallows, Martins and swifts. There are plenty of houses that people put up along the shore for these birds along with bridges for many swallows to build their nests. It can be quite the scene in the mornings and evenings when there are hundreds of these birds doing aerial acrobatics lunging after tiny bug clouds up and down the shoreline.

Wilson's warbler stopping for just a second beside a wiggly branch
Usually a big thing, but this year not so much. The warblers come through and if we are lucky stay a few days in the small woods nearby getting back energy by eating the bugs in the trees. There are years that I have seen more that 30 different species of warbler, this was not one of them. I did get to see a few very pretty warblers and a couple that I have never seen before this year. Now that spring migration is mostly over, it is time to get out in the kayaks and canoe to see what we have in and around the lakes of Ontario…I guess that will be another story depending on where we can venture off to on this odd 2020.

Magnolia warbler down low in the thick of the bushes.
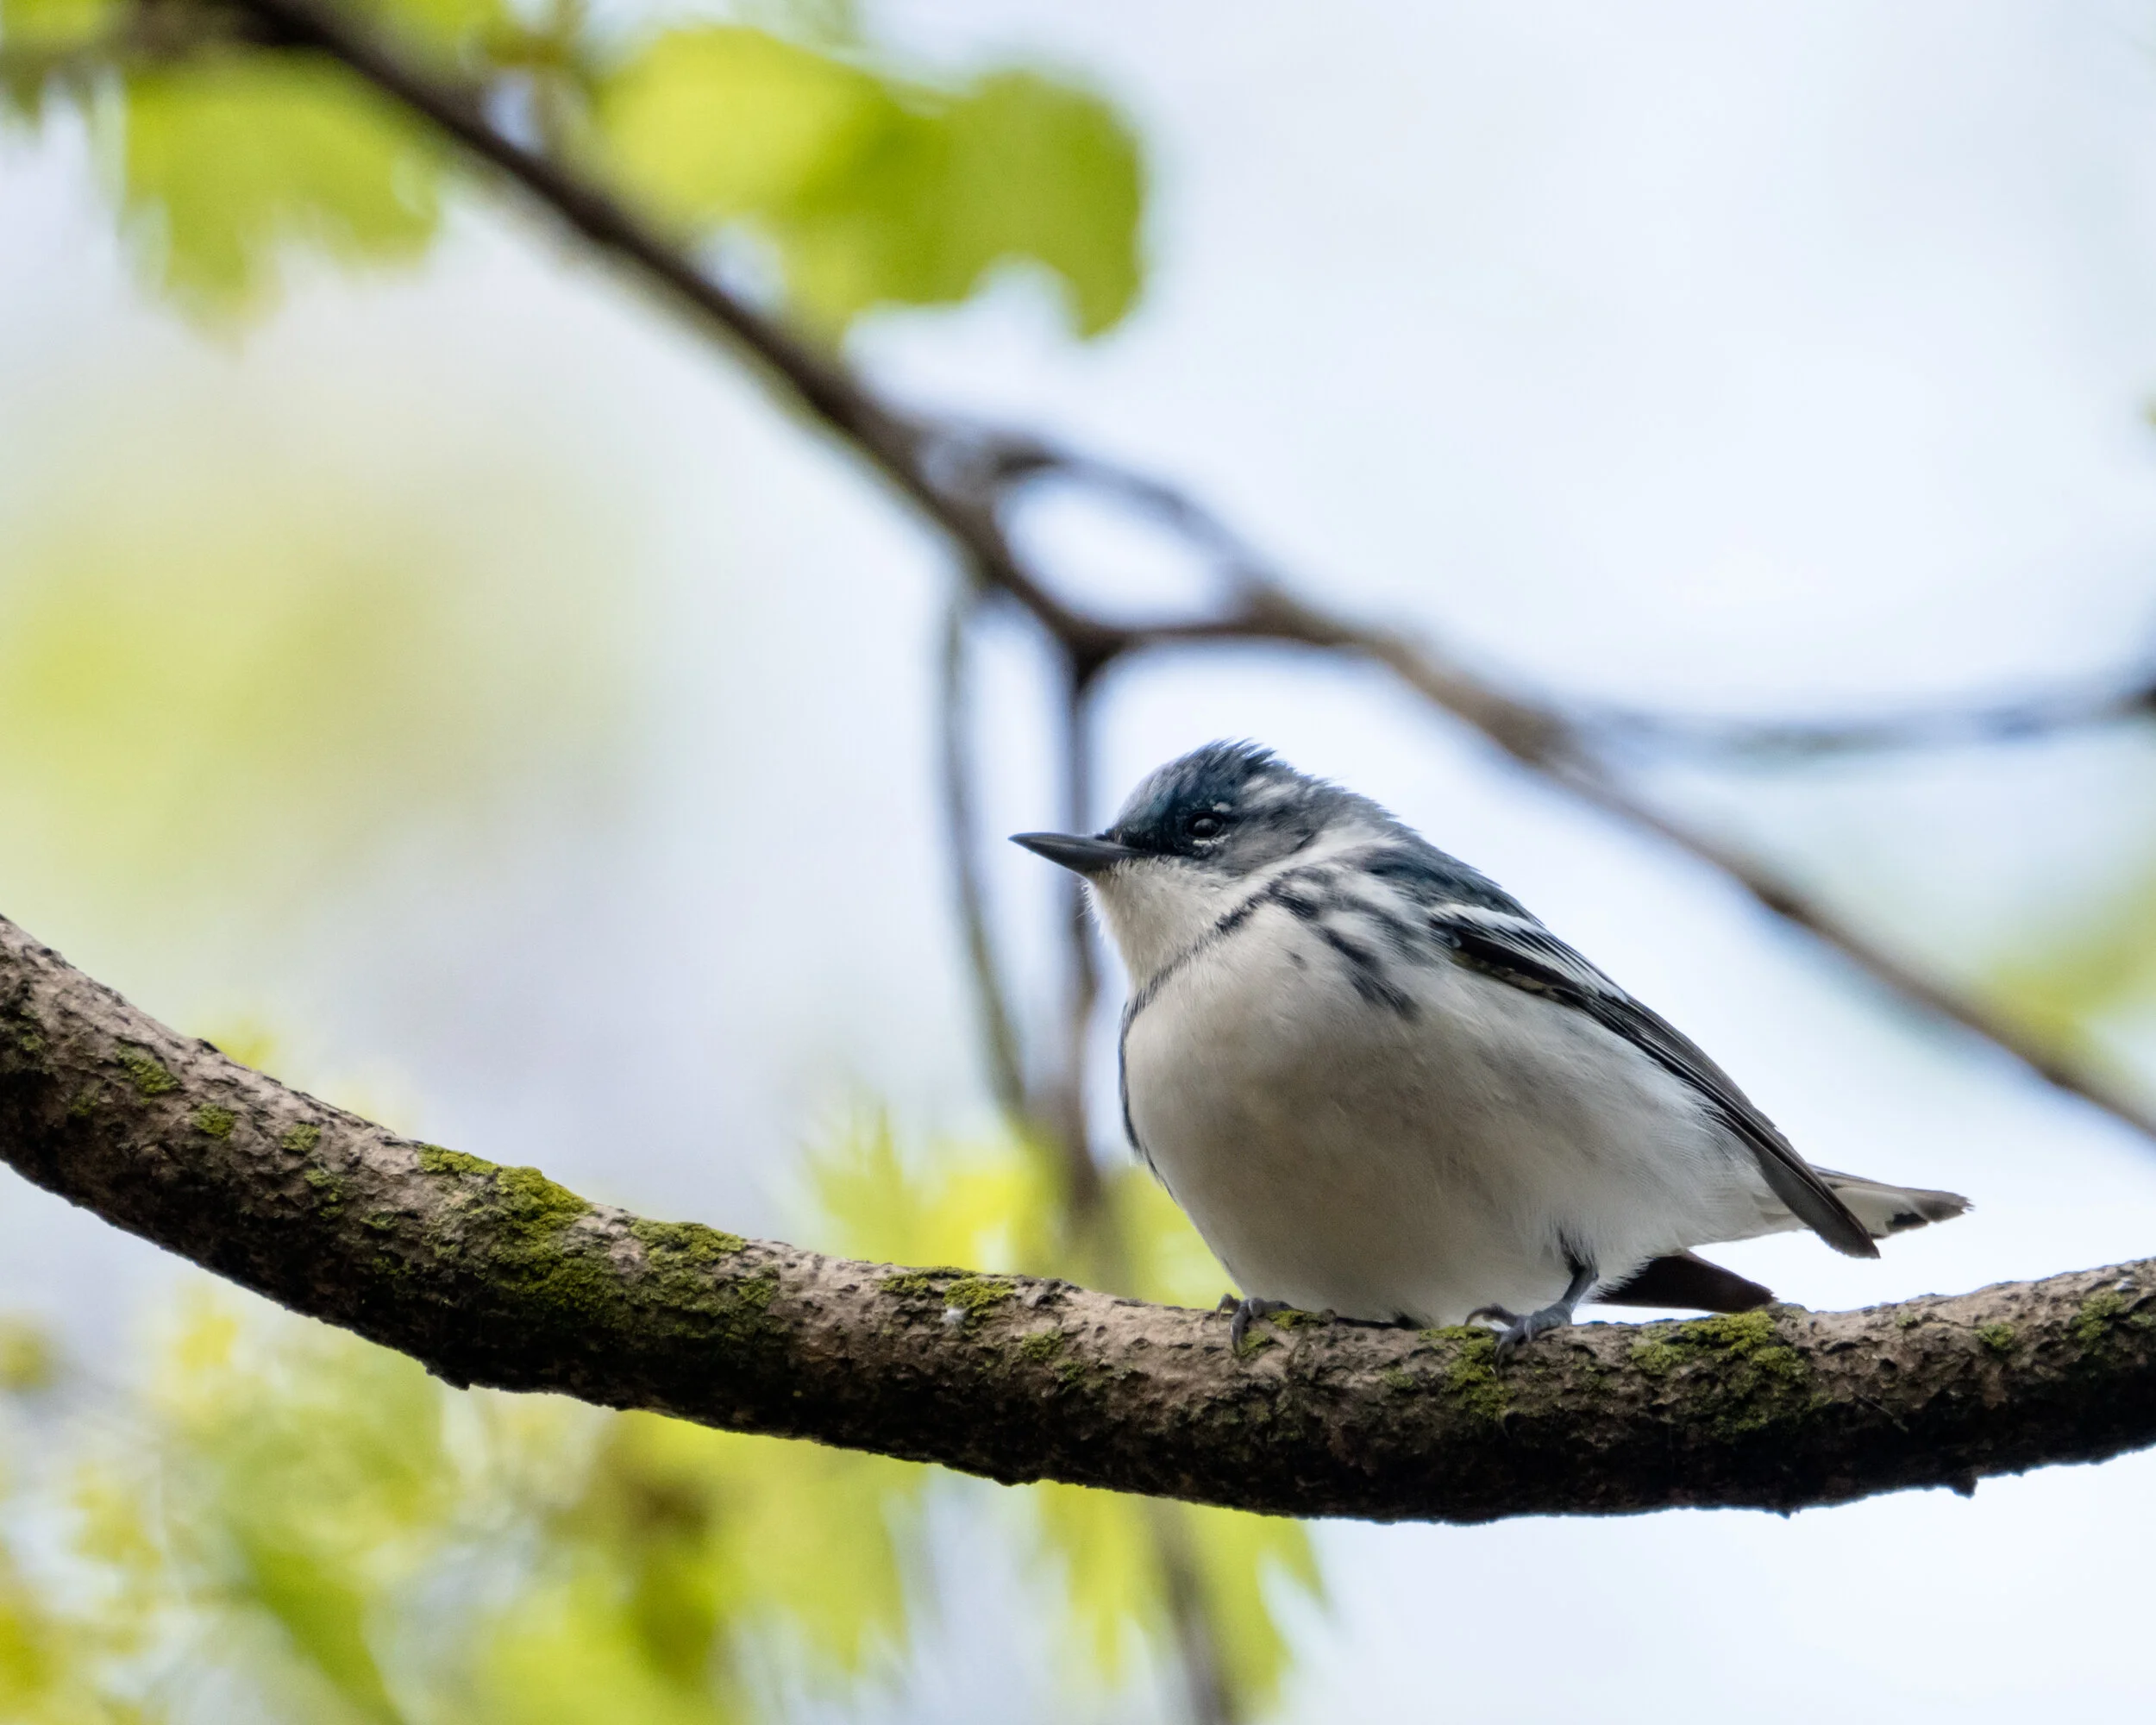
New bird for me, Cerulean Warbler.
Short eared owls in Shortyville (or how I learned to stop worrying and love my 200-600)
Short Eared Owls are not a particularly rare owl, but up until this year I have had little success in getting to know them. Near the end of this winter I got a call from another nature photographer with some local knowledge of a great location to be able to shoot Short Eared Owls…not owl…owls.
Short eared owl banking a turn while hunting. So cool to watch the head stay perfectly stable as the body turns through the corner.
I have been observing owls and photographing them for nearly 20 years in North America. There are now only a few of the more common species that I haven’t been able to get to know and don’t have good photographs of. Short Eared Owls are not a particularly rare owl, but up until this year I have had little success in getting to know them. A couple of trips to Amherst Island years ago gave me some quick glimpses of them as they took off before I could raise a camera. Near the end of this winter I got a call from another nature photographer with some local knowledge of a great location to be able to shoot Short Eared Owls…not owl…owls.
This area has been locally referred to as Shortyville, and the locals know where to go and when to be there. They stick around this farming area for a few weeks before dispersing to their summer haunts and during that time they will hunt just before dusk over the farmer’s fields in some of the nicest light.

Searching the ground, eyes on a target.
On our first trip down there we got to the location at around 2pm. Thinking we were early, I was surprised to see a good number of cars with people standing around with tripods on the edge of the road. Seems this was the hot spot from the day before. Nothing was around at the time, it was still a bit early even though the sun was not going to be high in the sky for long.

Short eared owl on the hunt over the farmers field.
We decided to drive around a bit as the owls were known to hunt in a number of the fields in the area. We got pretty lucky, seeing first a northern harrier and then in the same field a short eared owl, both searching over the field. Within a few minutes there were two more owls and we started to have our choice of what to try to shoot. By the time we had seen the owls, the clouds had come in and the light was not the beautiful golden hour that seemed to be promised an hour earlier. We did make the best of it, with the owl circling the field for about 45 minutes before heading off to a field that we couldn’t get close to.

Beautiful short eared owl in flight. I had no idea that the underside of the wings were so white.
For this trip I was using the Sony A7RIV and the 200-600 G lens with the 1.4 teleconverter. To say that this combination was not the optimal set up is an understatement. A slow (f/6.3) lens with a teleconverter for f/9 aperture was a challenge…would have loved to have had a 600 f4 instead. The teleconverter was necessary due to the distance these birds were from the road. The Sony A7RIVs high megapixel sensor would not normally be considered the best choice in a low light situation but again the cropping capability was pretty important for this shoot due to the distance from the subject. I have to admit, with all that I have said above I was really impressed with what I was able to get with that combination.

I really had no idea how light the underside of a short eared owls wings were....such a contrast to the top side.
First, the autofocus is amazing. I had never, before the Sony A7III had a camera that could track focus with all focus points at f/9 with such speed. The A7RIV is actually better, not as good I’ve heard as the A9 series but better by far than I had expected. It was able to attain and keep focus even after I could barely see the subject. The other thing that amazed me was the view finder. My A7III has a very low resolution view finder and can be seen as “just usable” but the view finder on the A7RIV is brilliant, really a pleasure to use.

I love the difference in the colours on the back of the wing to the lighter shades underneath.
All that being said, if the pictures aren’t good was any of it worth it? From my perspective, shooting at ISO3200 I was very happy with the results. Yes, at the pixel level the noise was higher than the A7III but there wasn’t that much difference if I downsized the shot to match the A7III pixel count. Not quite as good but pretty close and I really needed those extra pixels that day.

As this short eared owl locked in on a target those wings and tail feathers spread until it was nearly a hover.
One nice thing about short eared owls is that they are not too difficult to keep your lens on. This was a good thing as I was learning the capabilities of the camera and lens combo. Trying to keep a bird in the shot at 840mm when you can predict its flight path is still hard enough when you aren’t used to the length or weight of the lens. Since I shoot mostly hand held, getting to know the camera like it is an extension of my arm is pretty important.

Those beautiful big eyes are busy. Short eared owl on the hunt.
The shots ranged from cloudy background to a background of tree branches at the edge of the field. The fields were partially snow covered. This combination meant that exposure was going to be pretty unpredictable, so I used aperture mode to keep the depth of field I needed to get most of the bird in focus and adjusted the iso up to keep the shutter speed around 1/1000s as much as possible.

Short eared owl hunting over a field in shortyville beke behind a barn.
The highlight was watching the owls hunt. Circling the field over and over, hovering almost like a kestrel over any noise they heard on the ground. These owls are absolutely beautiful to watch with an almost white belly and amazing coloration on the back and wings.

Marsh Hawk (Northern Harrier) competing with a short eared owl for food.
I had two more chances to get out to see these owls in February and March, the second time was mostly a bust but the third trip gave some great views and a good chance for Salwa to see the owls with me.
Short eared owl sweeping across the field, looking for anything that moves or makes a sound.
This was a great winter for owls, Great Horned, Barred, Snowy, Long Eared, Eastern Screech followed by the Northern Hawk Owl, and Short Eared and finally a Saw-whet. I still have a few in North America that I want to shoot. I have yet to see a Boreal Owl, or get shots in the wild of a Barn owl or Burrowing owl. Once I get back out west there will be a chance to get a few new ones there as well. Then I have the rest of the world to try to find them all. Hopefully I can do it in the next 20 years or so.
Winter wonderland - Wandering through some of Ontario’s Parks and conservation areas.
On our first winter back in Canada after 5 years down in South Carolina we were not really looking forward to the prospect of weeks of below -30 degrees Celsius, but we were looking forward to some hikes in the parks… hopefully after a big snowfall.

Once winter starts, the snowy owls come down regularly to the Holland marsh area with what I assume is abundant food around the carrot farms in the area.
On our first winter back in Canada after 5 years down in South Carolina we were not really looking forward to the prospect of weeks of below -30 degrees Celsius, but we were looking forward to some hikes in the parks… hopefully after a big snowfall.
Our worries about the cold were mostly unrealized this year, but that also meant that there were few good snowfalls for us to get out hiking with the cameras. We managed to get out a few times looking for snowy owls and got to see a northern hawk owl for the first time.
This northern hawk owl was a real winter treat, pretty unusual for this far south in Ontario. It did keep birders happy for a couple of months feeding in a local marshy area close to a small town.
For hiking close to home we found that Short Hills provincial park was good for a morning hike with a couple of pretty creeks and a very pretty waterfall.

A very icy version of the falls in Short Hills provincial park on a rather nippy day.
The hiking trails in the park are pleasant but the views of the waterfall from the trail are certainly underwhelming. If you get down into the valley the view is so much more interesting.

Walking up the valley through the creek is much easier when mostly frozen.
My Christmas present to myself this year was the new DJI mavic mini. We did get one chance to learn a bit how to fly it on a rather cold day in an old quarry that is now a conservation area near Port Colborne. I can’t wait to get some more experience with it, the perspective of some of the shots is quite interesting…much learning to do both in the flight part and in producing some interesting footage. I will explore this in another post, likely because it is going to take me a while to get good enough at using the drone to make an article worth reading and hopefully some footage worth seeing.

Hiking along the edge of the quarry on a very cold, windy and snowy day.
That quarry did give us some pretty fun shots on a very cold and windy day hike. This is an old limestone quarry with a couple of huge ponds in the middle. Everywhere you go you can see fossils in the rocks along the paths and on the edges of the ponds.

Pond in the midst of freezing. With only a few cold snaps even these ponds didn’t freeze over for long this year.
We did manage to get up north to Algonquin once this winter. A hike along the Oxtongue river at Ragged Falls gave us some of the most beautiful winter river and waterfall scenes I have ever witnessed. An afternoon hike in Algonquin on Mizzy Lake trail was interesting, but we definitely over-dressed for that hike and came back rather sweaty and with no interesting nature sightings. Still hoping for a winter encounter with a Pine Martin.

serene winter scene along the Oxtongue river just above Ragged Falls. On a cloudy day with little colour anywhere I thought this looked more appealing in black and white.
We did get a few bird sightings out at the Spruce Bog trail. A spruce grouse was resting in a tree just a few steps from the parking lot. While we waited for it to wake up and get more active a group of Canada jays came by looking for a few handouts. Also known as Grey jays, they can be quite the little thieves and are very curious.

Spruce grouse tugging at some needles in Algonquin Park

Grey Jay (Canada Jay), always a little mischievous but still rather cute.
Funny enough a little red squirrel that we came across near the end of the trail held our attention darting back and forth across branches and finally enticing us to drop a few seeds for it to collect and hide.

cute little red squirrel with little red mittens
Our first winter is now over, it definitely was not a harsh one. Our last couple of weekend road trips before the corona virus lockdown were spent in what is locally referred to as Shortyville. A group of farmers fields where there is a good chance to see short eared owls hunting just before the sun goes down. These shoots gave me a great chance to get used to the new camera and lens combo for in flight action shots. This will likely be the subject of my next article. Both the owls and the camera gear as I get used to using the new Sony A7RIV with the 200-600 for in flight shots.
This hasn’t been the winter we thought we were going to have, it has been consistently warmer and wetter than expected, but I think we have managed to take advantage of the interesting moments we could. Now that we are not going far for our nature shoots, at least until the world gets back to something that seems more normal, I’m going to have to get a little more consistent with these posts.
A tiny haven for nature
One small wooded area on the beach near where we live that can still be a resting and replenishing area for migrating birds. Located near Waverly Beach, this small plot was the sight of the Erie Beach Amusement Park nearly ninety years ago.

Entrance to the tiny woods nearly Waverly Beach. An old sidewalk can still be seen, remnants of the Erie Beach Amusement Park from early in the 1900s
We moved back to Canada a year ago after living near the Blue Ridge Mountains in the Carolinas where there were stretches of uninterrupted nature and wildlife corridors. We now live in Fort Erie, Ontario, across the Niagara River looking toward Buffalo, NY where I am currently working. This town is a combination of retirement residences, renovated cottages, typical subdivisions, a scattering of farmland and a good number waterfront properties occupied by people from the Upstate who have probably been vacationing here for generations.

The view of Buffalo skyline from Fort Erie. The shoreline may look industrial but there are numerous pockets of green space for nature.
Although the town isn’t densely populated, there still isn’t much in the way of natural areas along this portion of Lake Erie, a noted bird migration route. On the other hand, over the bridge and relatively close to Buffalo, there are a good number of natural reserves and wetlands where bald eagles and migratory birds can take refuge.

One of few stopping points at this end of Lake Erie for warblers migrating back into Ontario in the spring. This Cape May Warbler is just one of a number of types of small migrating birds that stop to replenish themselves after the longer stages of their migration.
The exception is one small wooded area on the beach near where we live that can still be a resting and replenishing area for migrating birds. Located near Waverly Beach, this small plot was the sight of the Erie Beach Amusement Park nearly ninety years ago. It is filled with large old trees that have outgrown their concrete barriers, and remnants of stairs and paths lead to the foundation of concession stands and rides. This is still private land but hasn’t been touched in many years. Sadly, this last tiny bit of woodland is on the chopping block for a new set of McMansions, the horror of urban sprawl that will finally decimate the last of what nature has to offer.

Holes in older trees make fantastic homes for woodpeckers, squirrels, owls and pretty much any other creature in the area that is looking for some shelter and protection. A family of Pileated Woodpeckers made this hole their home last spring, hopefully they will be back this year.
In these woods, there are dozens of holes in old trees where woodpeckers, owls, and squirrels make their homes. The fallen trees litter the forest act as shelter for chipmunks and other little critters. Deer prints are all over, and a family of foxes has been seen in the area. Of course, it is also a good spot for some birds of prey to get a good meal as well.

Grey morph Eastern Screech owl getting a bit of the midday sun. This is one of the natural homes that will be such a sad thing to lose…and is one of my favourite things to find.
As spring comes, we are watching the changes daily. A pair of Cooper’s hawks are calling regularly looking for a good nesting spot. A beautiful little grey morph screech owl has found a hole in a tall stump that seems to be a good safe spot. Downy, hairy and pileated woodpeckers are seen and heard regularly. A few red-bellied woodpeckers and even a red-headed woodpecker were seen last year, and we are hoping they will be back. Once the spring migration starts in earnest this is a great spot for warblers heading north.

One of a pair of Cooper’s hawks in the woods this spring. This one is calling to its mate that is sitting with its back to this one just a few meters away.
Although there isn’t really much hope for this last area along the Fort Erie beaches, what I do hope to do is to document what nature is here in the hopes that some of that knowledge will help people to see what they are losing. Maybe this will help slow down or stop the next areas slated for urbanization. These nature corridors and hotspots are so important for making sure migration paths stay viable. It is one of the few things I can do as a nature photographer, show people what they might lose.

Sony A7RIV and FE 200-600…on to the next level
I really have most of what I need for the types of shooting I regularly do. In fact I have most of it in both Canon and Sony. At this point I don’t “need” anything, but that doesn’t mean I still don’t keep an eye on what is coming out that might make it easier to do the photography that I like.
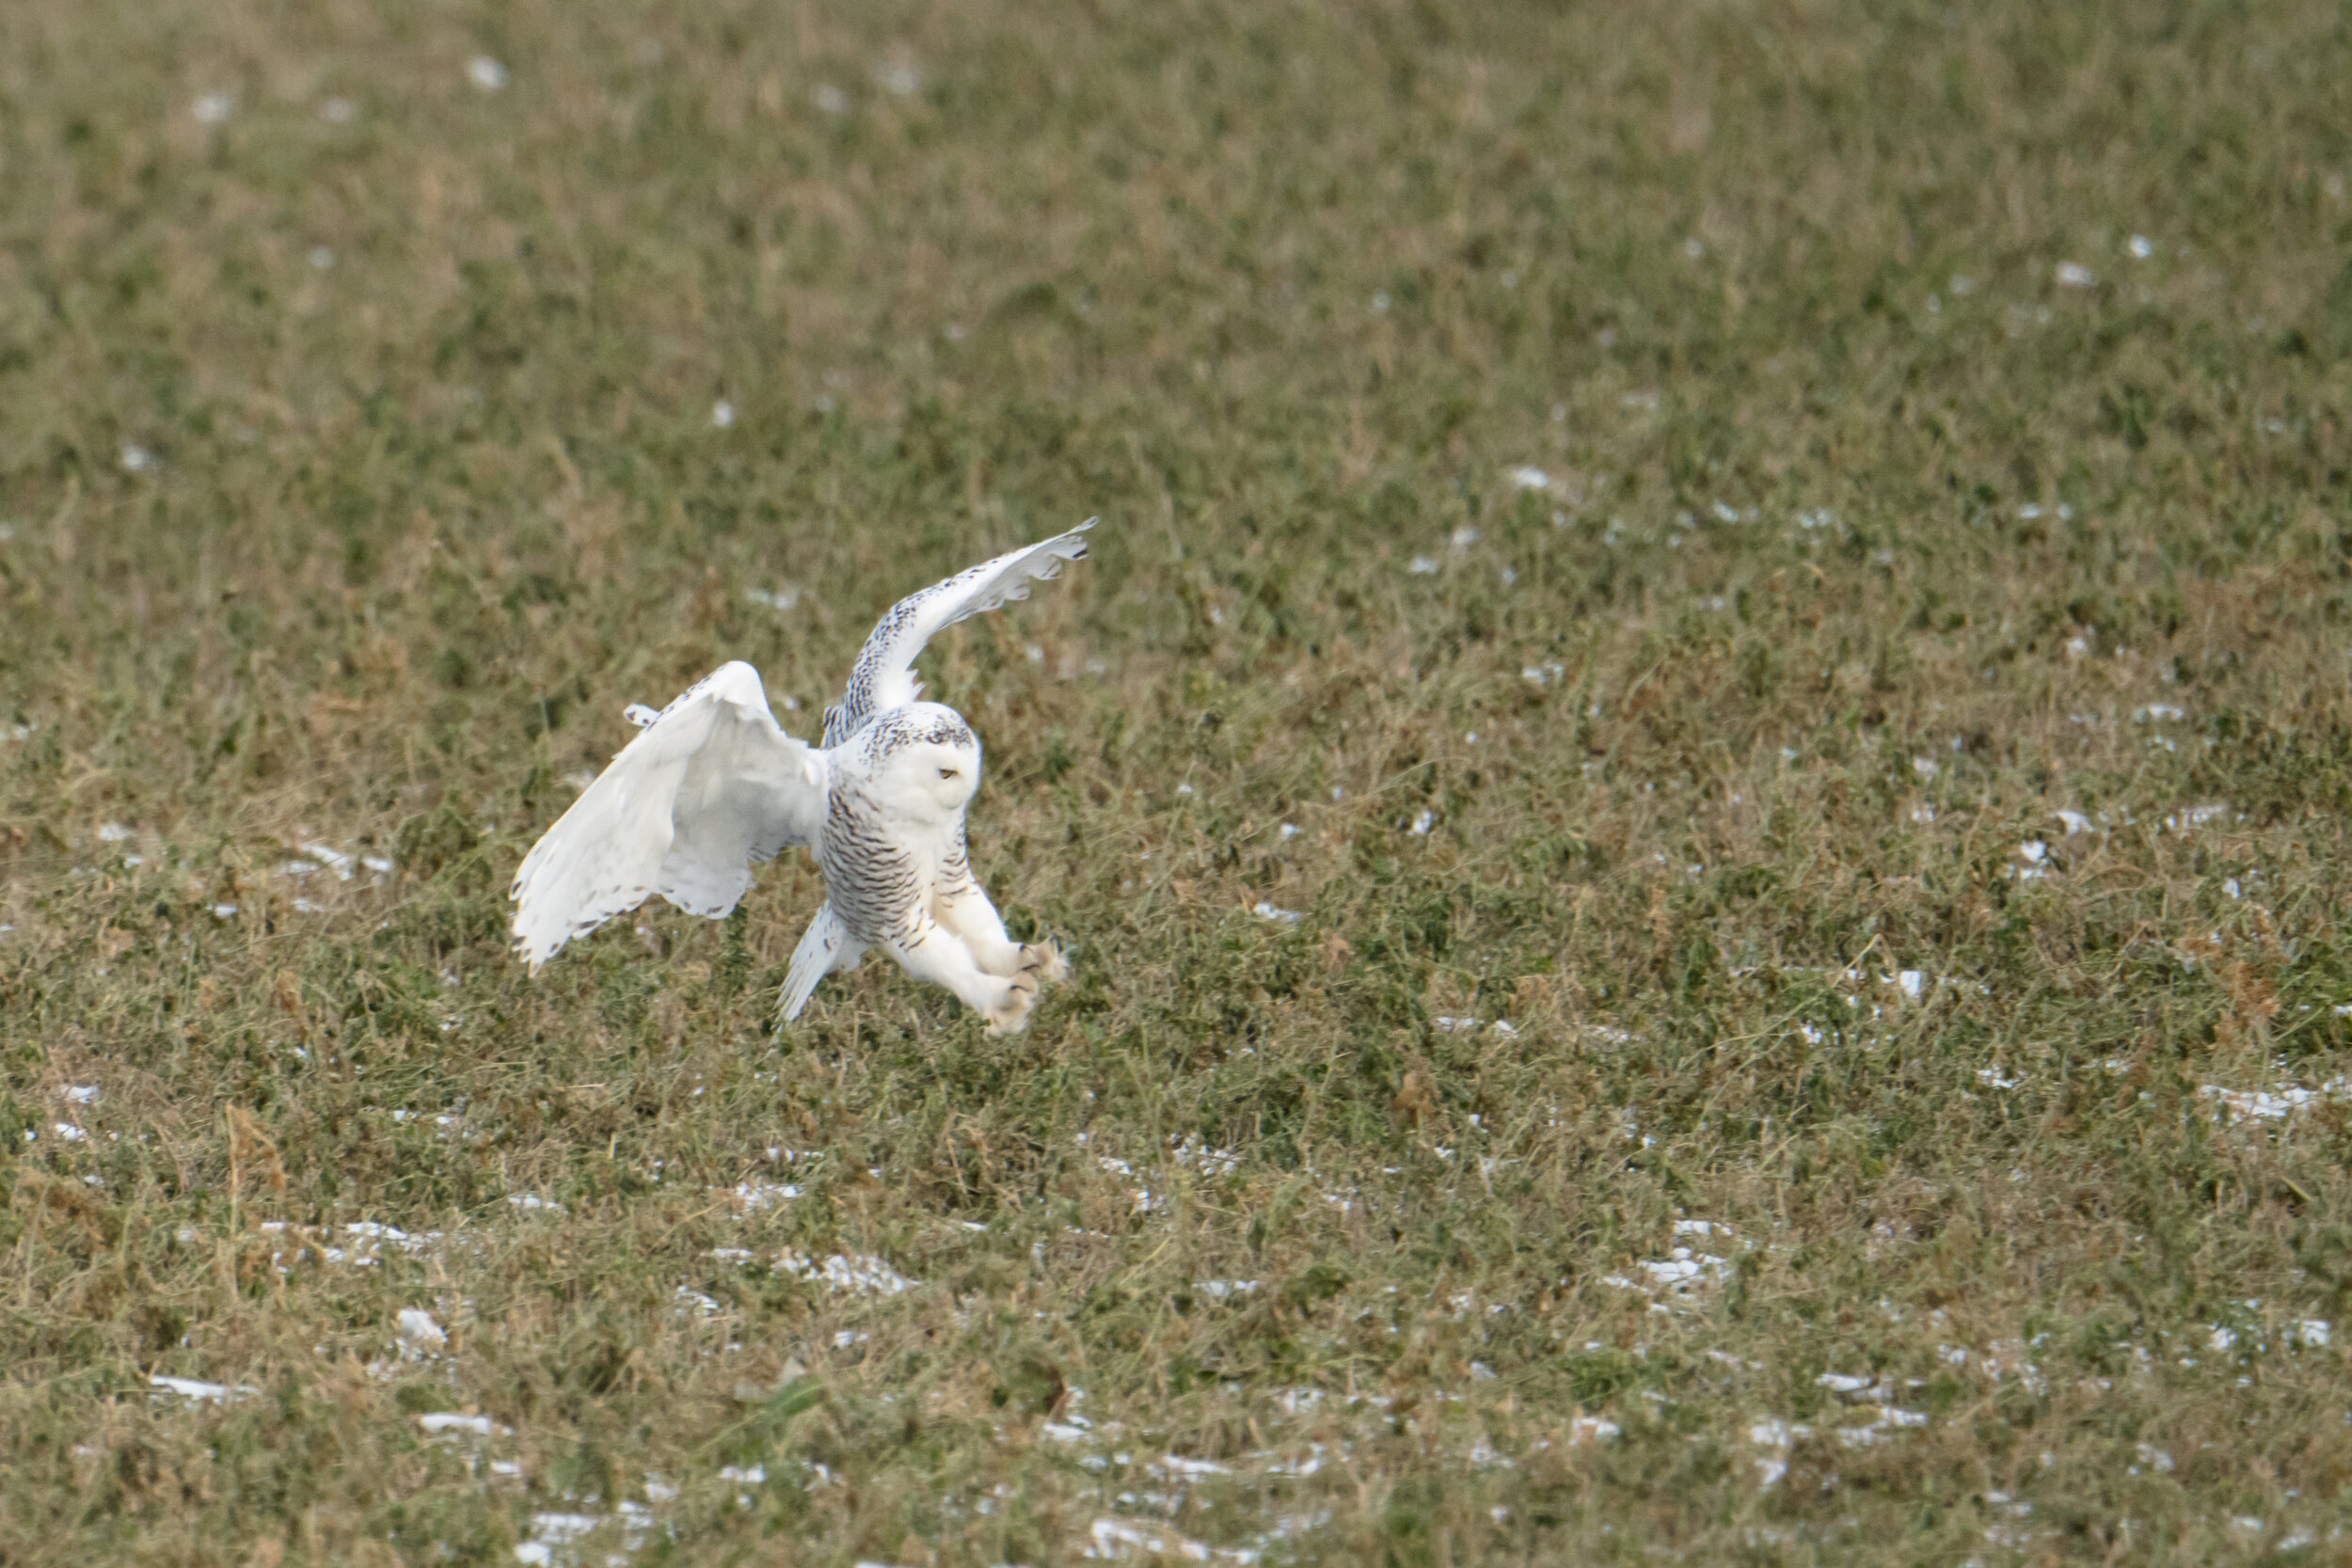
I haven’t really purchased a lot of camera gear in the last year, mostly due to two factors.
First, I really have most of what I need for the types of shooting I regularly do. In fact I have most of it in both Canon and Sony. At this point I don’t “need” anything, but that doesn’t mean I still don’t keep an eye on what is coming out that might make it easier to do the photography that I like.

Shooting with the new Sony 200-600 on Malcolm Island, BC. Picture credit to Salwa Farah (WanderingPhocus.com)
Second, there hasn’t been much interesting new gear in the last year for me. On the Canon side, they haven’t come out with anything that would make me want to replace my 5DS, and the lenses I have are exactly what I need from 8mm all the way to 1000mm (500 f/4 and 2x). That may change if Canon finally starts to catch up to Sony in the mirrorless market but I can wait until they do. On the Sony side of the world, things have gotten a little slower or the stuff coming out is either out of my price range or not really the type of gear that I need at the moment.
There were, however, two exceptions and although I didn’t “need” them, I really did think they would be useful additions to my kit.

Sony A7RIV and FE 200-600 f/5.6-6.3
The Lens
First up was the Sony FE 200-600 G f5.6-6.3. I picked this lens up in the fall just in time for a trip out to Vancouver Island and it pretty quickly became my go to lens for nearly any nature shooting. Although this lens was not quite as sharp as the FE 100-400 GM, I almost never used that lens without the 1.4 teleconverter giving me a 140-560 but since I use it at 560 most of the time I was always at f/8 or slower. That lens is still very sharp with the teleconverter but not as sharp as the native 200-600. Like most nature photographers I rarely have enough length so this has been a fantastic addition to my gear bag.

thinkTANK backpack with Nature Quaternity - FE 16-35 f/4, Sony A7III with FE 24-104 f/4, FE 70-200 f/4, and Sony A7RIV with FE 200-600 f/5.6-6.3….1.4 teleconverter underneath for a travel kit from 16-840mm.
With this lens I went from the nature Trinity (16-35 f/4, 24-105 f/4, and 100-400 f/4-5.6) in my bag to now carrying more of a nature Quaternity in which I now carry the 70-200 f/4 that I often use for video work and the 200-600 in place of the 100-400. This now gives me a range of 16-840mm (since I do still carry a 1.4 teleconverter in the bag) all in one thinkTANK bag that I can carry on a plane and actually hike with….pretty useful.
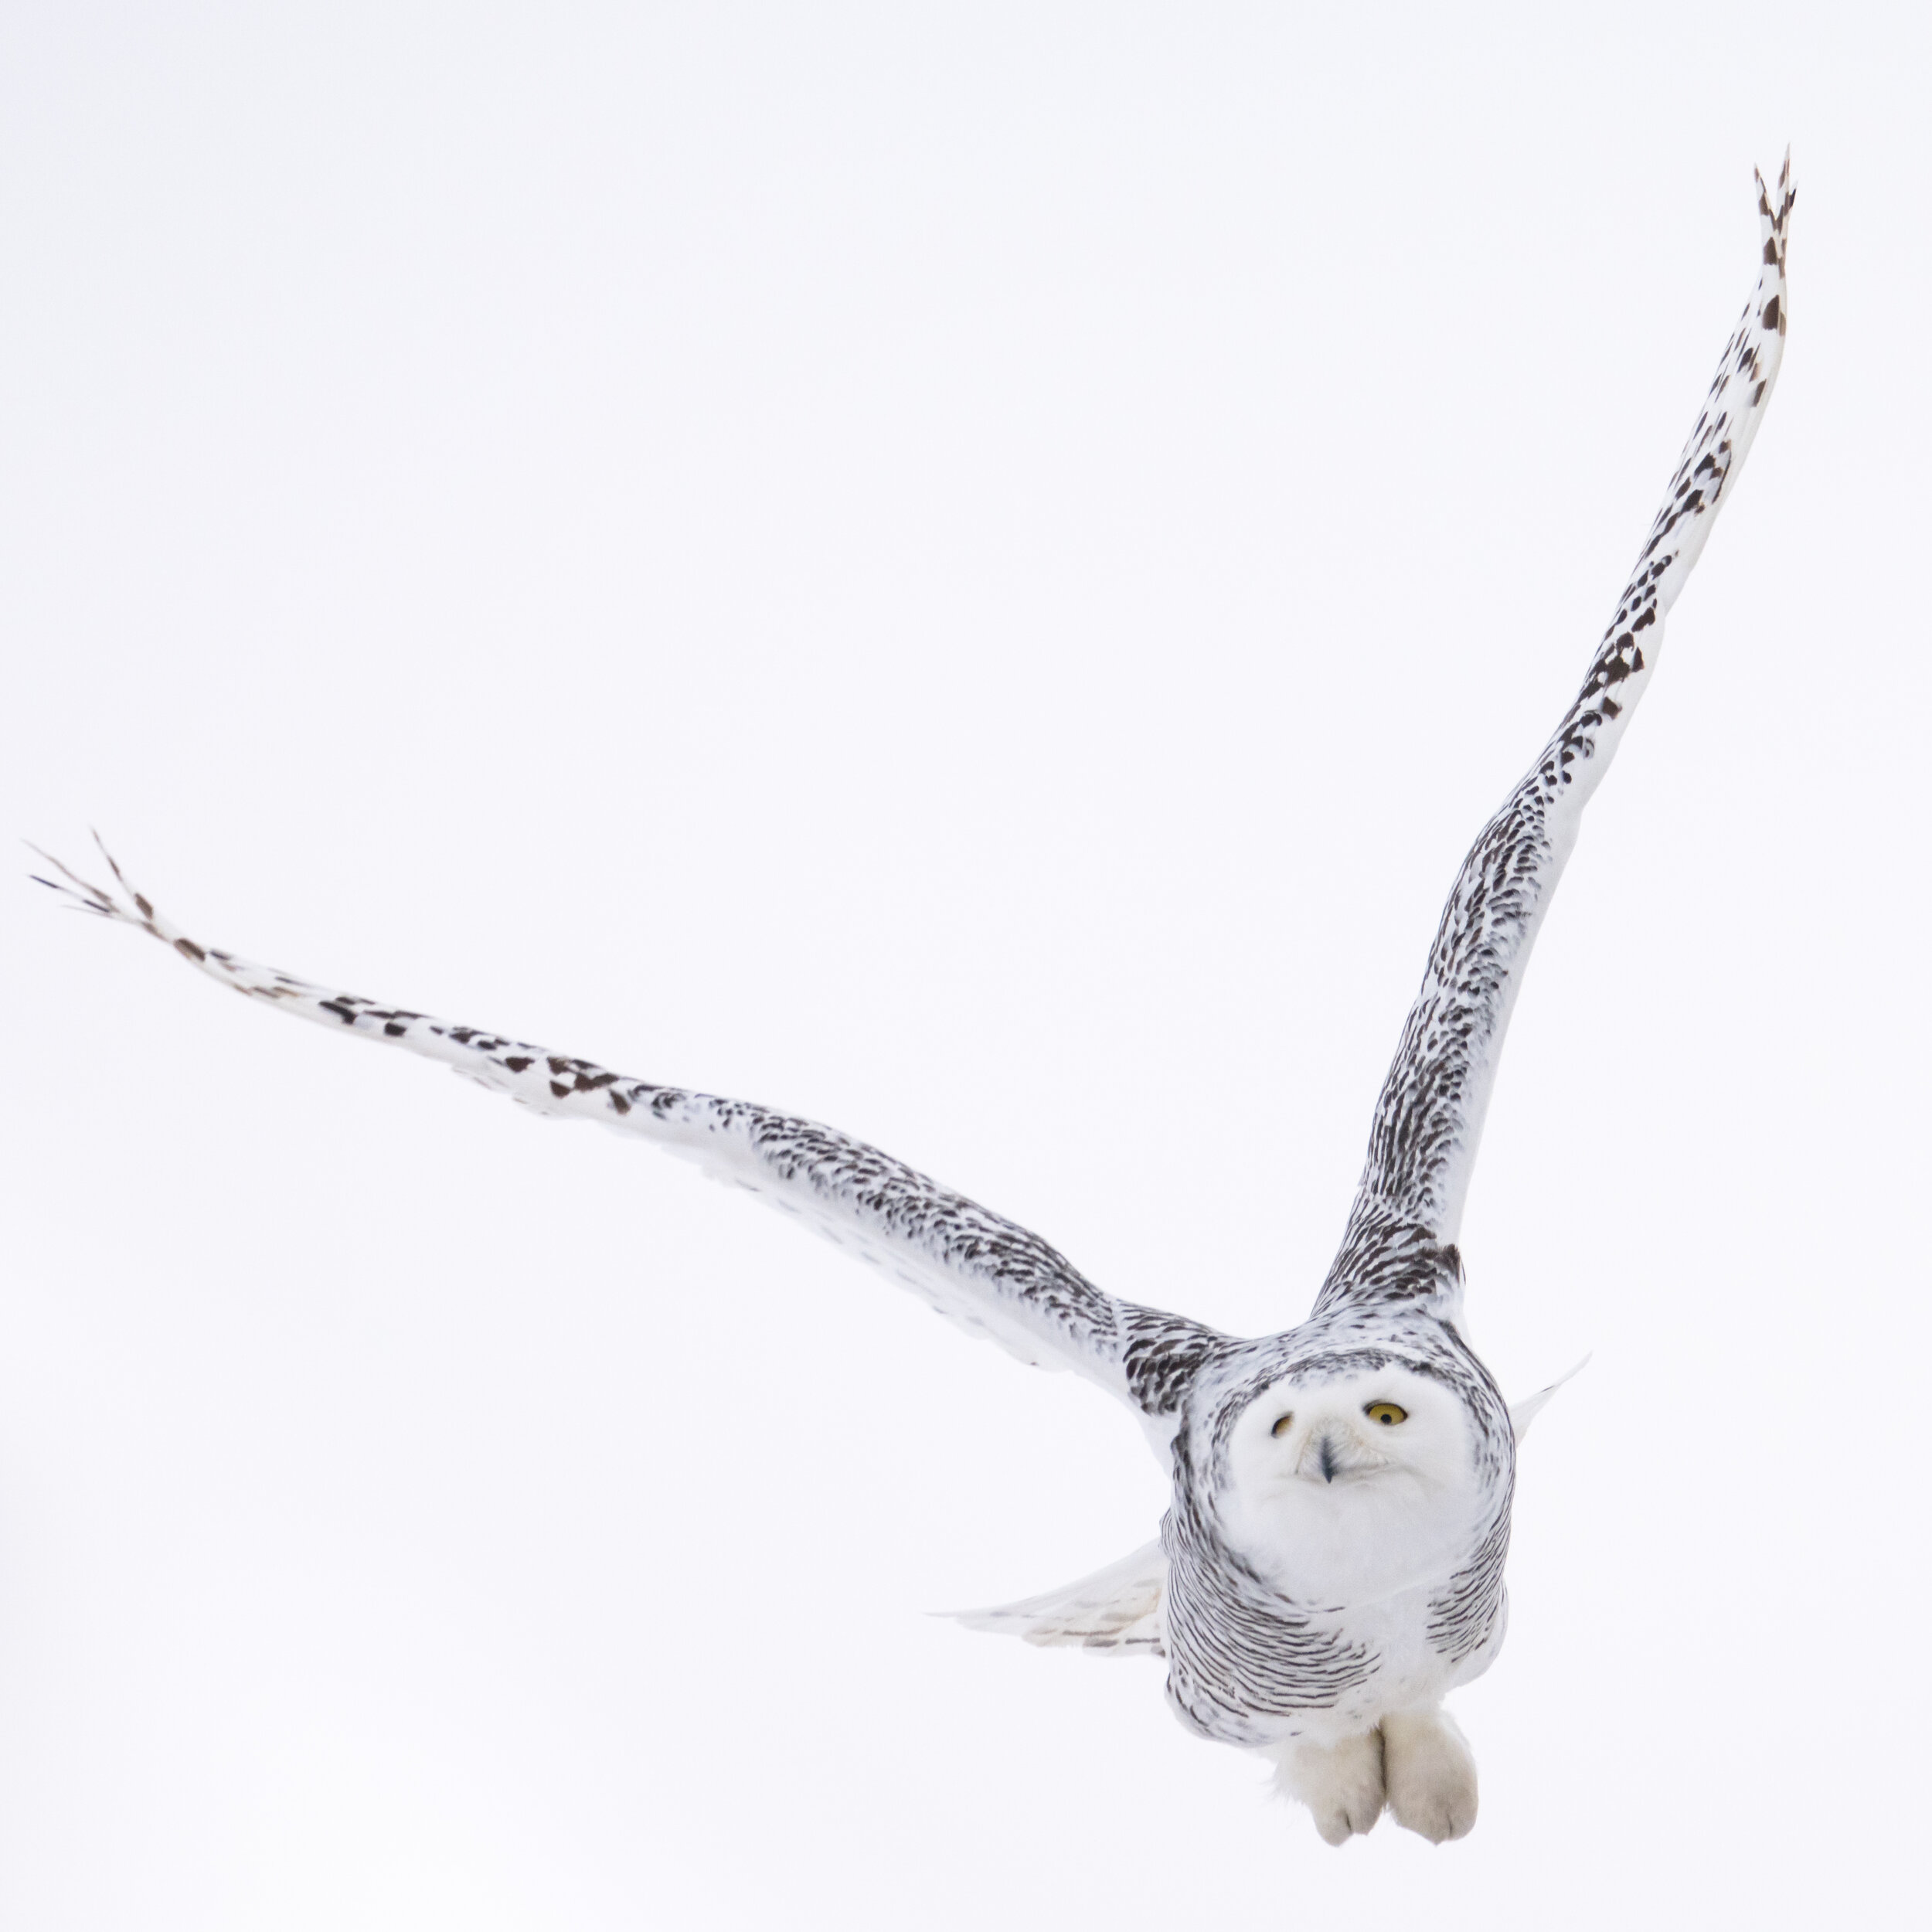
Snowy Owl taking flight on a very cloudy day. Sony A7RIV and 200-600 + 1.4 teleconverter. 840mm, f/9, 1/3200s ISO800
I used this new lens mostly on the A7III, with the A7RII usually on the 16-35 for landscape shots. Great combo, 10 frames per second for fast moving subjects and nice resolution for things that weren’t moving quickly…or at all. Now what if I could have both of those in one camera? Never happen, you would think, or at least not with a good buffer. Well, Sony basically said “wait, hold my beer” and then popped back late in the year with the new A7RIV.

Snowy Owl landing in a grassy field. Sony A7RIV and 200-600 + 1.4 teleconverter. 840mm, f/9, 1/1000s ISO1600
The Camera
Now this may not be the dream camera for all nature photographers, but it has been what I have been looking for pretty much since I got hooked on the resolutions of both the A7RII and the Canon 5DS. Give me high resolution, the ability to crop in and still have enough for a relatively large print and also the ability to shoot fast burst with a pretty good buffer. At this point really the only thing missing is the A9 silent shooting (stacked sensor) and 20 or more fps on one of these high resolution machines….still something to look forward to in a couple of years.
So, just before the holidays I picked up the Sony A7RIV and actually got a break in the horrible weather to see a few owls. And as an added bonus, there was a sighting of a rare-to-the-area Northern Hawk Owl that was a particularly great test subject. With Salwa out with the 5DS and 500f/4 with teleconverter, we were able to check out both the quality of the two combos and compare the usability.
If you have read this far you will likely be interested in my impressions of this combo and comparisons with previous Sony gear that I currently have.

Snowy Owl resting on a weedy knoll. Sony A7RIV and 200-600 + 1.4 teleconverter. 840mm, f/9, 1/1000s ISO1600
Internally zooming lens
The 200-600 is a relatively slow lens with a maximum aperture of 5.6 at 200 to 6.3 at 600. This was a design choice made to allow for a relatively small and light zoom lens. The fact that they made this an internally zooming lens is one of my favorite features. The weight distribution doesn’t change noticeably as you zoom, and since the zoom throw is only about a quarter turn, the entire range of this lens is accessible with only a small wrist movement.

Portrait of a Northern Hawk Owl. Sony A7RIV and 200-600 + 1.4 teleconverter. 840mm, f/9, 1/2500s ISO800
The length and weight of this lens is easy to hand-hold (assuming you are used to using long telephoto lenses). It is definitely heavier than the 100-400 but still very manageable.
This lens is really sharp, not quite as sharp as the 100-400 but sharper than the 100-400 with the 1.4 teleconverter. The other bonus is that it is also pretty sharp at 840mm with the 1.4 teleconverter although you are now at f/9.

High Key image of a Northern Hawk Owl in flight. Sony A7RIV and 200-600 + 1.4 teleconverter. 370mm, f/8, 1/4000s ISO1600
Autofocus and Tracking
Autofocus on mirrorless cameras with long telephoto lenses was, up until very recently, not very good. The 100-400 on the third generation A7 cameras was really good, even in relatively low light. The A7RIV is even better and the 200-600 is also really quite fast. Tracking birds in flight on either of these lenses and the A7III or A7RIV is actually faster than any setup I have used…Sony or Canon. The biggest surprise is how well the autofocus works with the teleconverter. I really don’t feel much difference in speed or tracking even at low light and relatively low contrast. This was definitely where the A7RII was lacking with or without the teleconverter.

Young Male Snowy Owl. Sony A7RIV and 200-600 + 1.4 teleconverter. 840mm, f/9, 1/1250s ISO2000
The high resolution and telephoto power combo
The last big benefit of the high resolution/long telephoto combo is in the cropping. It doesn’t matter how much lens I have, I still cannot….or sometimes should not get closer to my subjects. With the A7III I can crop down for instagram or the web reasonably far and still have a usable image….although the noise becomes more noticeable with increased ISO. On the A7RIV a similar crop is still printable and I can now crop in considerably more….or just improve how the shot looks as I don’t always get the perfect framing on fast moving birds. Nice to be able to reframe and still have a shot that I can put on the wall. The other bonus is that a landscape shot can be made vertical or vice versa and still have enough resolution to print.

Cropped in on a Northern Hawk Owl trying to stash a vole in a tree. Sony A7RIV and 200-600 + 1.4 teleconverter. 840mm, f/9, 1/3200s ISO800
The A7RIV itself is another really good step in the evolution of these cameras. The grip is a bit more substantial. It feels a bit different from the third generation but I really don’t find one better or worse…just a bit different. The buttons are much better, easier to touch. The joystick is easy to use even with gloves on.

Snowy owl take off. Sony A7RIV and 200-600 + 1.4 teleconverter. 840mm, f/9, 1/1250s ISO2000
The resolution and speed of this camera are the real reasons I wanted it. They are also the real reason that it is the best camera I have ever used. In a previous article I pretty much asked for everything that I now have. I do find it interesting that Sony is the company that has produced it. As a long-time Canon user, I thought Canon would not only be the first to do many of these things. I thought they would be the ones innovating like they did when they came out with the 5D and 5DII. Let’s see how they respond as a new decade starts.
A quick tour of Vancouver Island (first big trip with only Sony gear)
Got a new toy and places to go. I picked up the Sony 200-600 and was able to test it out on Osprey before the start of our one week trip around Vancouver Island. This is the first big trip I have done leaving my Canon gear at home and only going with Sony.

Got a new toy and places to go. There was a lot of talk about new gear in the last couple of posts, and since then there was an actual purchase and a lot of shooting. I picked up the Sony 200-600 and was able to test it out on Osprey before the start of our one week trip around Vancouver Island. This is the first big trip I have done leaving my Canon gear at home and only going with Sony. On this trip I had the Sony A7RII and A7III with 16-35 f/4, 24-105 f/4, and 200-600 f/5.6-6.3. A pretty comprehensive set of focal lengths to hopefully capture anything that we came across.

One of the first days out with the new Sony 200-600 lens. A few Osprey have been hanging around the Niagara river grabbing catfish and coming back to these perches.
Our trip to the west coast had two main purposes, and the one standard side purpose which was to get out and shoot nature as much as I could. The two main reasons for the trip were a wedding in Vancouver and a tour of Vancouver Island to see if we could find some property to build on in a few years.

On our way from Ontario to Vancouver with a blanket of clouds below us.
Our first day was in Vancouver, we stayed at UBC which allowed me to see an old friend from university that has been a professor there for most of his career. This brought back a lot of memories of a time that sadly I have no photographic record of. It was a great wedding, one of Salwa’s friends from UVic had found a wonderful companion.

OK, there is a third reason to go out west….some of the best Sushi we have had in years.
The next morning we started the road trip, heading to Horseshoe Bay to take the ferry over to the Sunshine Coast. We headed to a tiny little “town” called Egmont for a hike at Skookumchuck….yes, skookumchuck or big water. This is a unique area in which the tides move in and out of a very long bay causing significant rapids that are often surfed by kayakers.

Kayaker surfing the waves at Skookumchuck
We stayed in a little lodge in Egmont that night near the mouth of the bay and just as we were about to go into the restaurant at the local marina we saw a couple of Orca hunting in the narrows. Although we only got to watch them at a long distance it was still amazing to watch these whales in action. Seeing killer whales this soon in the trip gave us some hope that we might get more time with them that week as we would be on a number of ferries and staying in good locations for more sightings….a little false hope it turned out, but this really just made us more eager to get back out there again soon.

Our one and only encounter on this trip with Killer Whales. Fascinating mammals to watch and a beautiful area to find them.
The next day took us on three ferries, up the east coast of Vancouver Island and onto Malcolm Island where another of Salwa’s university friends has a cottage.

The sun rises as we depart from Earl’s Cove on the Sunshine Coast of British Columbia, just the first of three ferry rides on this day as we head to Malcolm Island.
This was the first area that we got to really see the nature on the tidal pools. On this little coastline we saw many Bald Eagles, shore birds, some river otters and a very fat looking seal resting on a rock. Although there is a small town on the island, this was a pretty sparsely populated area with plenty of space for nature.
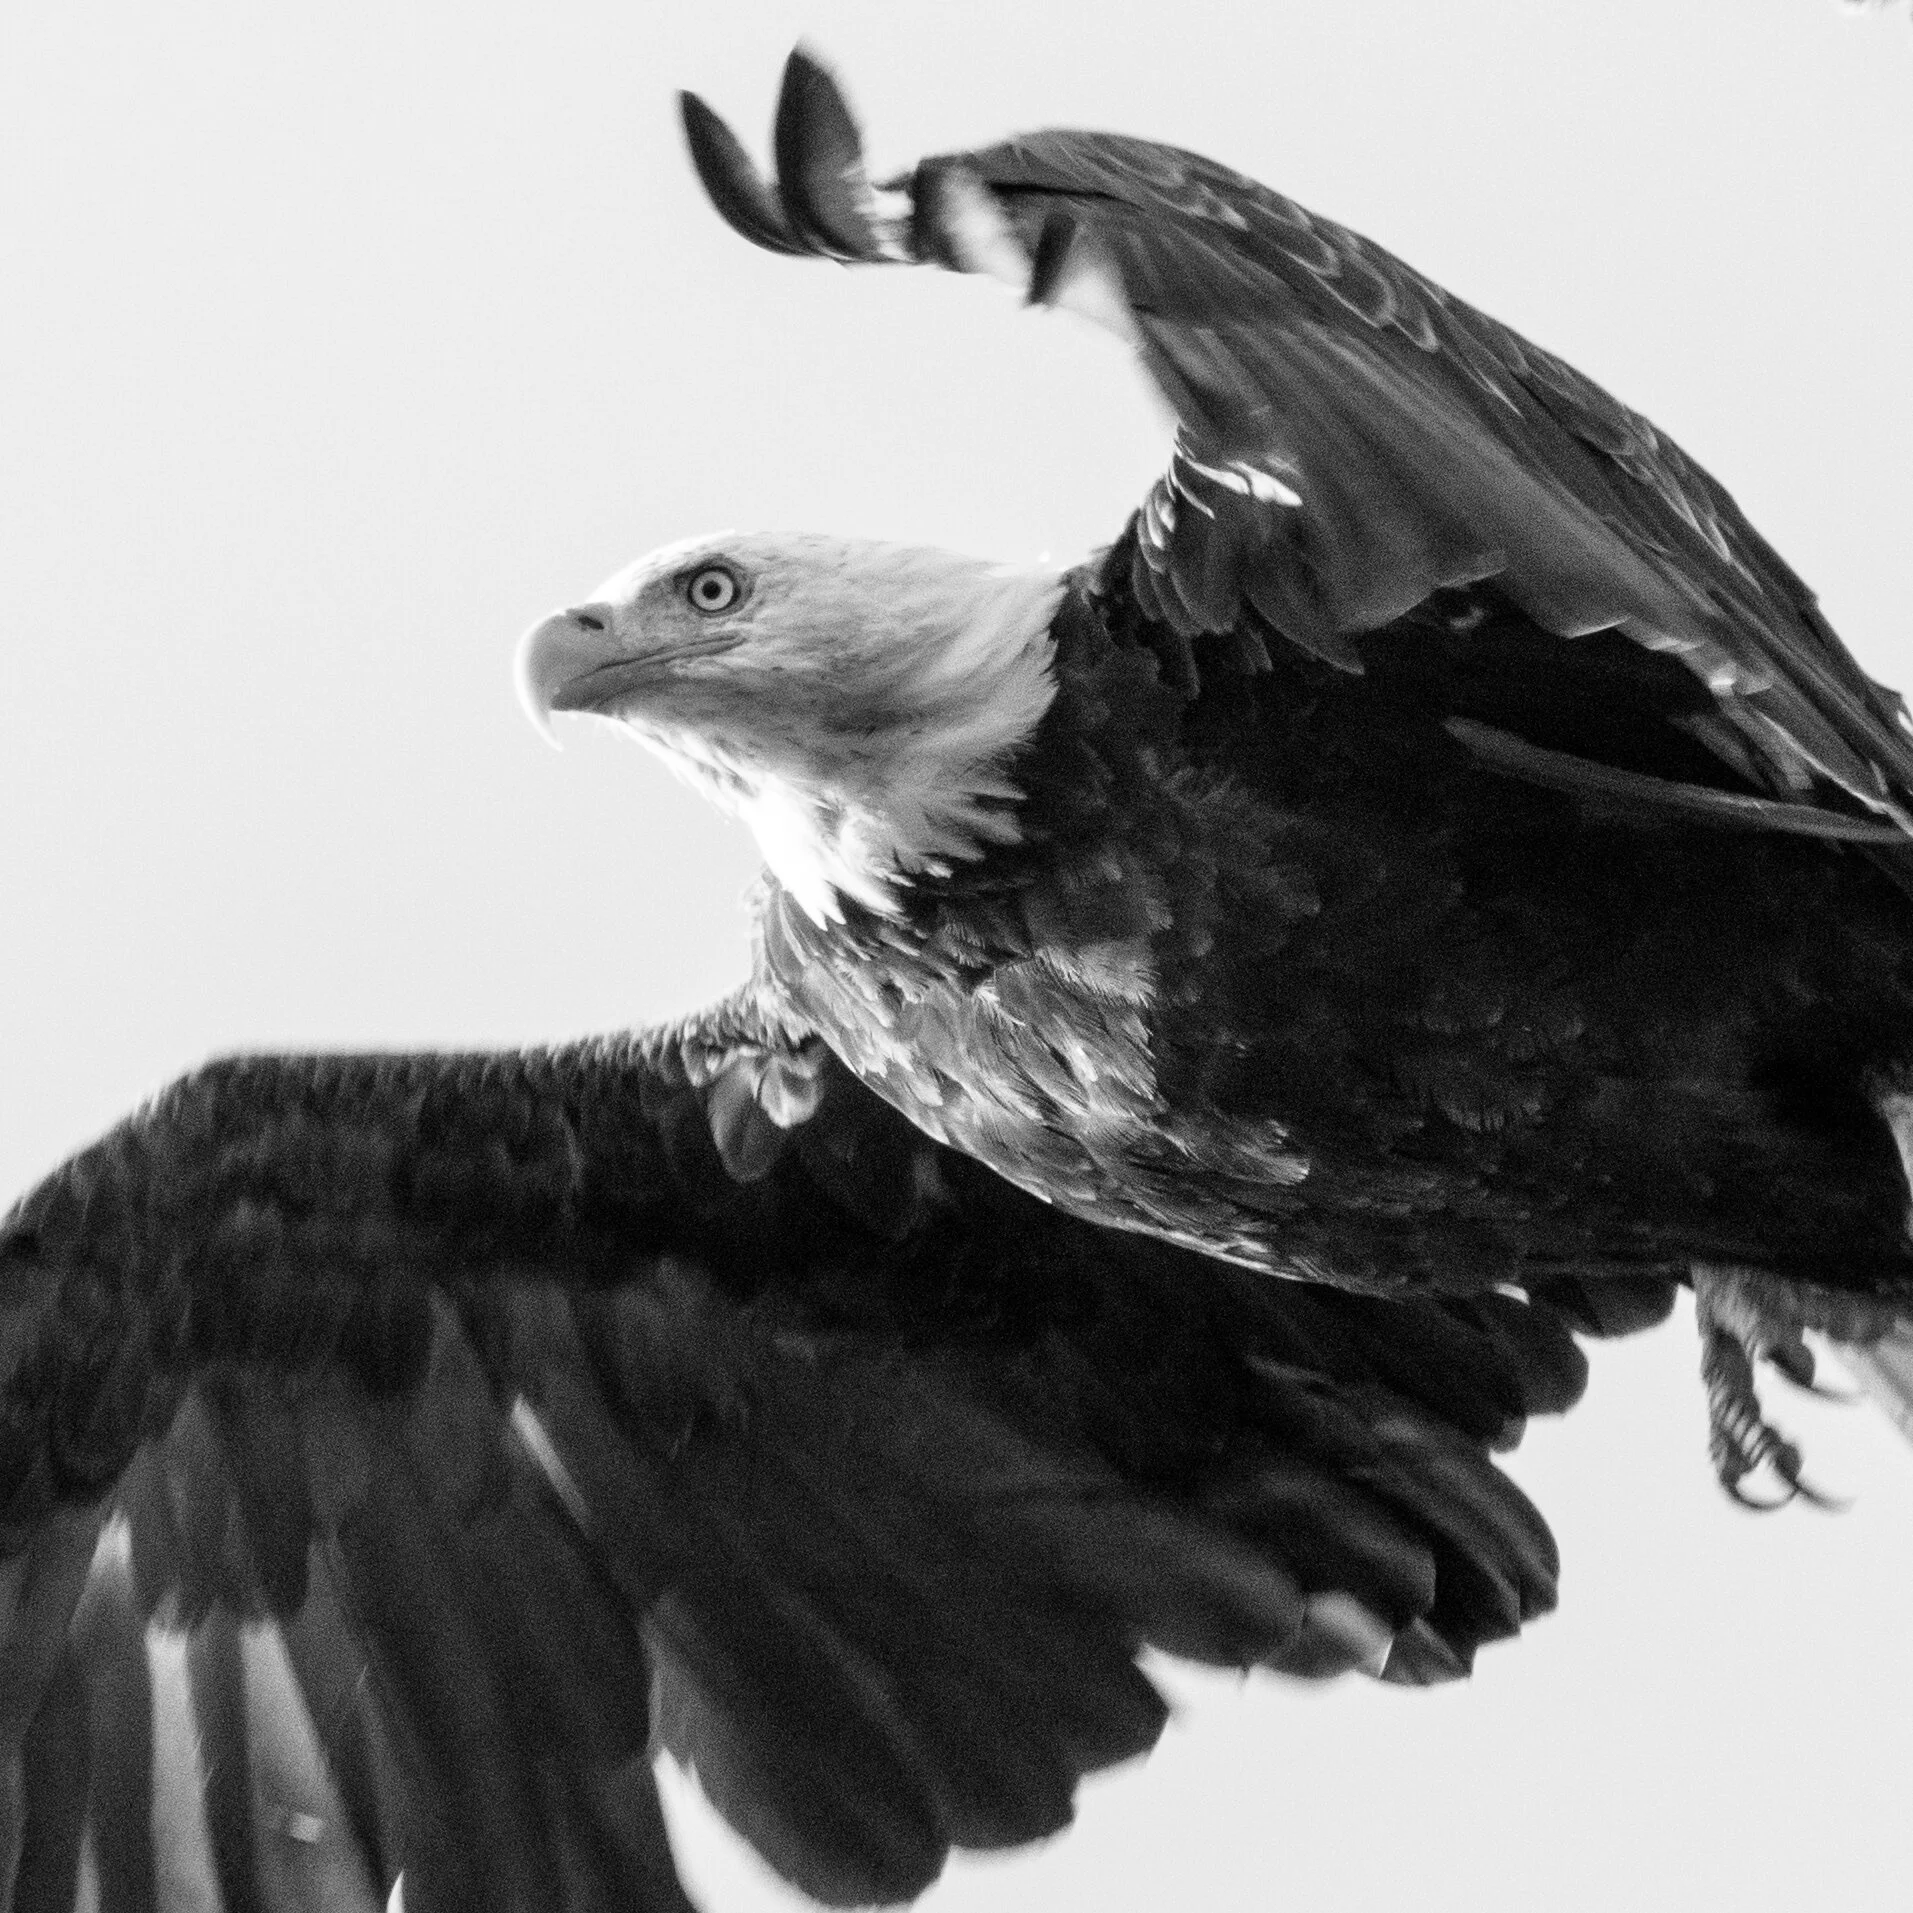
Close up with a Bald Eagle that was perched on the evergreens right outside the cottage we stayed at.

Beautiful reflections as the tide starts to come back in on Malcolm Island looking out towards Vancouver Island.
The east side of the island has some spectacular hiking through the rainforest as well as along the coastline. There was a rather special location where Orca are known to come in close to shore, but we were not lucky enough this time to have that experience….another excuse to go back.

30 seconds with the milky way from the cottage on Malcolm Island.
Our tour next took us up to the north end of Vancouver Island, past Port Hardy and onto a logging road for another hour and a half to get out to the west coast at Cape Scott Provincial Park and probably our favorite hike of the trip out to San Josef Bay.

The sun peaks through the canopy of the rainforest along the hike into San Josef Bay on North-west coast of Vancouver Island

More Sun stars as we hit the beach at San Josef Bay
This northern part of the coast is definitely one of the most fabulous locations in Canada, the hike into San Josef Bay was through one of the best hikes I have taken. I have heard that the hike along the coast back up to Port Hardy can be one of the most challenging on the island. The bay was a photographers dream, with amazing hoodoo-like rock features on a long sandy beach.

Fabulous features along the coast both for photography and just for looking to see what was left behind by the tides.
We came in near high tide so were not able to travel far up the coastline, this is another place to come back to and camp in this area to be able to get shots at sunrise and sunset and maybe even some astro photography with those amazing features in the foreground. Next time!

Can’t wait to get back to this beach in Cape Scott Provincial Park…definitely want to see this area at dusk and dawn.
After taking our rental back down the logging road we toured our way back down the island, past Victoria and stayed the next night in Sook. A fantastic little B&B with coastal views, a little hobby farm and a black bear that ran through the yard to get the blackberries that were everywhere. That bear had some competition for those berries that day, I haven’t eaten that many blackberries in one sitting, ever.

The weather started closing in on us after a long walk along China beach.
Our last days on Vancouver Island gave us a couple of beach walks north of Sook, a quick tour of Victoria, and a couple of vertical hikes where I got to see a pretty little Barred owl before we headed to our final ferry ride to Vancouver.

This was a bit of a whirlwind trip, plenty of driving and sampling the areas. We managed to enjoy the wedding, get to see some areas that we might want to buy property in a few years and hike and photograph just about everywhere. The gear was certainly not limiting, and really seems to be the perfect combination for what we do on our trips. I was able to carry it all in one single backpack. From landscape to birds in flight, this was a great travel setup that you can take on most flights and still have an amazing focal range from 16mm to 800 with that 1.4 teleconverter in a side pocket. As for location, Vancouver Island is a place that I could stay for years and not capture everything I would like to. The Sunshine Coast is another gem and we barely got a chance to be on the water this time. We will be back, hopefully soon. That dream of a piece of property to start hosting photo tours is still deep in our dreams….it will come true.

Birds in Flight challenges - Autofocus improvements over the years
Learning to use your tracking autofocus is not just a matter of picking up a new camera and point it at a subject.

Learning to use your tracking autofocus is not just a matter of pick up a new camera and point it at a subject. I’ve been using Canon cameras for nature photography for about 15 years and have over time learned how to use what is given to me….starting with the Canon rebel and going to the 5D and 5DII we had a very basic focus system where I had to really learn to just use the middle focus point for most tracking. I picked up a used 1DIV and my life changed….many focus points, quick tracking and relatively little to learn.

Blue Heron in flight at dusk along the St. Lawrence River. Taken with the Canon 5DII and 100-400L
The 5DIII and 5DS had a bit more configurability and for the first time I started using some of the focus groups and changing the configuration for the type of shooting I did. At the time this was great and I didn’t really think it could get much faster or easier…..I was wrong, but it took quite a while to really get used to thinking differently and adjusting to a new camera brand and the way things worked within that system.
With all of these cameras and at the time I had one other major issue with respect to reach. My longest lens was the 100-400 and if I added the 1.4 teleconverter I could get out to 560 mm but at a minimum aperture of f/8 which meant that I could only use the center point for tracking if in that configuration.

Red-tailed Hawk taking off at Cranberry Marsh. Canon 1DIV with 100-400L
Around this time I started exploring mirrorless cameras, starting with the panasonic micro 4/3 which gave some great telephoto range for a small system but was really only suitable for static subjects. I then got a hold of the Sony A7R….fantastic image quality but the same issue for autofocus. This all changed when the A6000 came out, an inexpensive apsc camera with some pretty fantastic autofocus tracking capabilities. It wasn’t perfect but it was very fast and let you track across a much bigger proportion of the image than almost anything else at the time. This system was pretty easily fooled by complex backgrounds and would sometimes back focus and lose the subject when you left it to do all the work by itself. The one thing I did find was that it could get a subject and follow it significantly faster than anything else I had used at that time.

Brown pelican flying over my kayak in the everglades. Sony A6000 with 70-200 F4.
Things have only gotten better. While all the camera companies have made improvements in autofocus over the last 10 years or so, none have made the quantum leaps that Sony has. To be fair, they did have a long way to go at first to just catch up to Canon and Nikon but once they did they have continued to improve with each new camera in pretty substantial ways.
At this time I have the A7RII and the A7III. The former was pretty close in capabilities with the A6000 I mentioned above, with a few software improvements but it will still lose the subject at inconvenient times and does not work as well in lower light. The A7III however is just another level again.

Ring billed gull with breaking waves. A7III and 100-400GM.
When this camera came out it was shortly after the A9 which I have never had a chance to really work with in the field but is a technical marvel. The A7III was kind of the poor persons A9 but for two grand it really is much more camera than I have ever bought anywhere near this price point. When it came out, I found it had really improved on the software to the point that just leaving it in all points focus I almost never lost a subject. At that time choosing a subject to track was ok, but not great. Sony came out with the latest firmware update which now makes it so that picking a bird out of a small flock and tracking that one bird is now pretty easy.
This now comes back to my learning curve. Every improvement and change in these focus systems means I need to learn new techniques and adjust the way I think about getting the image. It takes time to get good at using any of these new capabilities just as it did when I first started using aiServo with a center point on my original 5D or rebel.

Osprey landing in Sparkleberry Swamp, taken from kayak with Sony A7RII and 100-400 with 1.4 teleconverter.
That was a rather long winded way of getting to the point which is that as good as these cameras have gotten, in all cases you still need to spend the time to learn the camera you have to get the best out of tracking focus for nature photography. I love the new features and things are much easier now, but to capture that swallow diving for a bug on the surface you have to know your camera and lens. It needs to become second nature, even if you switch between brands as I do. To do this I spend a lot of time shooting birds that I will likely never print or show anyone else. I try to capture gulls and terns outside our house diving and twisting to see if I can anticipate a moment….and often miss over and over again until I finally get the feel for the birds movement and how to keep my lens on it throughout.

On Hunting Island beach with the Canon 5DS and 500mm f/4 II. Shooting tri-colored heron and snowy egret fishing as the tide goes out.
The most humbling lesson I have learned in that last few years was just after I had made a huge purchase. I had been looking to buy a big telephoto for many years and had finally saved up to get the Canon 500 f/4 II. I was so eager to show how great of shots I was going to get. The first month or so was frustrating. I could get great static shots, amazing details. I found that my in flight shots were very inconsistent and that I was having a lot of trouble keeping a steady view on the subject. It turns out it wasn’t the weight….I was used to using a sigma 120-300 f2.8 at the time which might have been a bit heavier. Turns out it was the length. It took me a good month to get used to keeping that lens on subject and keeping it smooth while tracking. I had to learn it all again when I added the teleconverter to that combo.

Tri-colored Heron fishing as the tide roles out on Hunting Island, SC. Canon 5DS and 500 f/4 II with 1.4 teleconverter
Along with that lesson, I have also learned that before I make a decision about how good a camera or lens is for tracking subjects and getting the shot I want I need to remember that it may not be better or as good as what I am used to immediately. I need to remember to not fully discount it until I have really used it for usually a few thousand shots.

Osprey taking off along the Niagara River. Sony A7III with 200-600G
Latest Gear - Sometimes you can get what you wish for.
Technology moves ever forward, and the improvements that I have seen in capabilities of cameras for photography and more specifically for nature photography just in the last few years are pretty amazing.
If you were to ask me what improvements I would like to see in the gear I have, I would likely tell you that I want a native super-telephoto lens that is reasonably affordable and a little sharper at the long end than the Sigma and Tamron equivalents. To go with this lens I would like to have a bit more resolution but still with the ability to shoot at a burst rate that beats my Canon 5DS and my Sony A7RII. Really, I’m pretty happy with what I have but that would be the icing on the cake at least until I win the lottery. I would also say I’m pretty lucky to be able to afford to enjoy my hobby to a level that I have gear that I wouldn’t have thought was possible back 20 years ago. But technology moves ever forward, and the improvements that I have seen in capabilities of cameras for photography and more specifically for nature photography just in the last few years are pretty amazing.
So it looks like I can now get just what I’m asking for at a price that, although not cheap, is within the realm of an active hobbyist.
First to come out is the new Sony 200-600 f5.6 - 6.3. This is a pretty interesting lens. The relatively small aperture is a consequence of building a 600mm lens that can be both hand-held and affordable to people who could never justify more than $12,000 on a f/4 prime. The big surprise to me was the internal zoom, something I have seen in the very expensive canon 200-400 f4 with the internal teleconverter and the 120-300 f2.8 Sigma which I did own and used almost exclusively with a 2x teleconverter for a number of years. This is a feature I’m very fond of even if it makes the lens a little more challenging as carry on luggage.
I have not yet tried this lens since I’m not on anyones radar as someone who influences other photographers….at least not so far. If the reviews of this lens continue to be positive I will likely pick one up before my next trip out to Vancouver Island this fall. I will obviously do some comparisons to the 100-400 Sony and Canon lenses that I use regularly as well as my 500 F/4. We shall see if it becomes my go to hiking lens.
The latest announcement from Sony is the second part of the equation for what I picture as the best combination I can get for the money for nature photography (at least until the competition manages to catch up/or push past). If you are not aware of the latest news, this would be the Sony A7RIV. This looks to be a camera to match or beat the resolution of my 5DS but also have 10 frames per second and I’m hoping autofocus tracking as good as the Sony A7III.
This may not be the camera for everyone, but I currently love the resolution of my A7RII and would like it to have the autofocus capabilities of my A7III and that lovely 10 fps and a buffer big enough for the types of bursts that I tend to do. That would be 5 or 6 shot bursts as the action happens….usually not more than a couple of those bursts in a row so this camera should be more than sufficient for me.

If you have read any of my previous blog posts you will know that high resolution is something that I really like to have. I won’t go into all the reasons it is important to me, but it really is. I’ve relied on the Canon 5DS for this resolution for a number of years now.
The biggest question is not whether or not I will buy this camera, the question is will I replace just the A7RII or will the A7III also end up sitting on a shelf most of the time. I’m not going to get rid of my Canon gear….still waiting for Canon to come out with something that makes me want to upgrade the 5DS.
The only complaints I have seen about the new Sony A7RIV is the lack of improvements in the video department, the poor touch screen implementation, and the menu system. For me none of these are reasons to avoid this camera. I do most of my video on a Canon m50 on a Ronin S. I will use the Sony A7III as well and maybe more so if this new camera becomes my main photo shooter. It certainly would have been a bonus if the A7RIV would have 10 bit recording, 60p 4k recording and higher bit rates but I’m still pretty happy with the current capabilities.
The touch screen is something that I actually don’t use much even when reasonably well implemented like on the Canon m50. I really do prefer buttons most of the time, but I would imagine that I’ll change my mind as the implementations improve. I really do like the way the Sony A7III currently works as I can change almost anything I need to with my eye to the viewfinder….at least now that I have put a few features on the programmable buttons. This is a good segue to the menus. I’ve gotten used to both Canon and Sony menus now and if I had to go into either of them in between shots I would hate them both. In reality I almost never go into the menu systems while out on a shoot on either system….both Canon and Sony, although very different are pretty good once you have used them enough to register some muscle memory. I know this is not the case for many other photographers since I see this complaint ‘ad nauseam’ on the camera forums.
It will be interesting to see in a couple of months if both Canon and Nikon introduce new competition to both this camera and lens. Until then I’ll hopefully be happy shooting on some new gear as the fall migration hits and the owls come back.
ps: ordered and confirmed delivery of the 200-600 for August 9th. I will be able to get some practice with this lens before my trip out to Vancouver Island. Big thanks to our Camera Guy - Patrick.
Things they are changing
It has been a few months since I have written anything. Between looking for a new job, moving back to Canada and experiencing probably the worst spring weather wise I have seen in years, time and motivation to do any photography has been at a minimum.

Beaver swimming around Dufferin Islands in the early morning light near Niagara Falls, Ontario.
It has been a few months since I have written anything. Between looking for a new job, moving back to Canada and experiencing probably the worst spring weather wise I have seen in years, time and motivation to do any photography has been at a minimum. Since nature photography is what I do for enjoyment and the fact that I find it reduces stress in my life, not getting out as much as I would like is a bit depressing.
So, now that I’m working again and we are kind of settled we are starting to get some time on the weekends to get out and explore the area. As we are living on the shores of Lake Erie, at the mouth of the Niagara River there are some interesting new places to explore.

Muskrat on a cold and foggy morning along Black Creek
One of the things I have had to do over the last few months is change my expectations on what we can do. We are no longer an hour from being in the Blueridge Mountains, or two from the Smoky’s. We cannot spend the weekend easily on the coast or in the cypress swamps. We had a plethora of wildlife to photograph in almost any direction from our base in South Carolina.

Sunset along Black Creek outside the cottage we had on a short term rental.
So we have started to explore this region. Road trips along the north coast of Lake Erie. Hiking on the Niagara escarpment. Our latest was a trip to Letchworth State Park in western New York. This area has its own beauty, but because it seems so much like what I have lived in most of my life I tend to overlook things.

A very wet spring means tonnes of water flowing over the falls at Letchworth State Park.
To get back into the swing of things, I started just getting out on the Fort Erie shoreline after work. The skies were grey but there were some shore birds and plenty of swallows and purple Martins nesting. This gave me a chance to “perfect” my in- flight shots. I Started practicing with my Canon 500mm lens and 1.4 teleconverter. That long and heavy lens takes some practice to follow a barn swallow in flight. My Sony A7III also got a firmware update this spring and it was a good chance to get used to the way the tracking autofocus has changed.

A still but foggy day on Lake Erie and the swallows are everywhere grabbing bugs in the air and off the surface of the water.
It was nice to watch the progression of a family of killdeer, from eggs to little hatchlings on the pebbly shoreline just outside the house. Good practice for getting down low to eye level to get a good perspective, and even a shot or two of chicks under Mom’s wings.

One chick coming out from under wing while the other looks out from beneath momma killdeers wing.
Bird of prey have been less frequent than I had expected in this region. There are a few Osprey along the Niagara River, but I have not been lucky enough to get to see them hunt so far this year. We Kayaked past two Bald Eagles and got a few quick shots but again would like to be able to watch them regularly to capture more of their interactions.

Osprey taking off from a perch overlooking the Niagara River.
The one thing that I haven’t had any luck with yet is finding my favorite subject….owls. We live in a farming area, with large fields along straight dirt roads. I have spent a number of evenings driving along these areas just around dusk hoping for a sign of short-eared owls, and there have been barn owl sightings in these areas over the years. Once I find some habitats and can observe them I’ll hopefully be back to learning more about my favorite raptors.

Bald Eagle shot from our Kayaks off the Lake Erie Shoreline.
I have learned over these last few months to enjoy what is around and try not to focus on what I don’t get to see. I still get to relax and enjoy being with nature which is what makes me happy.

Tern hovering over some still water on the Niagara River shoreline just under the Peace Bridge.
High Resolution cameras and nature photography
I was often cropping my 16 MegaPixel pictures down to a point that they were ok on the internet but as soon as I tried printing them the details started falling apart.

Northern Cardinal - Canon 5DS with Canon EF500mm f/4L IS II USM +1.4x III. 700mm, f/5.6, 1/1250s, iso1600.
I used the Canon 1D mark IV for almost 5 years, it was a great camera and I loved the ability to get 10 frames per second to get a better chance of capturing interesting moments but I did very often find that I did not have enough reach. I was often cropping my 16 MegaPixel pictures down to a point that they were ok on the internet but as soon as I tried printing them the details started falling apart. As technology has been improving on all fronts in photography we started seeing higher resolution cameras that also had some reasonable tracking capabilities, although they were definitely much slower in terms of frames per second and how big the buffer was.
Moving to a higher resolution camera, I bought the Canon 5DS originally for landscape and detail shots. This camera with a 50 MegaPixel sensor was then as is still now the highest resolution full-frame camera on the market. It had the pretty much the same autofocus system as the 5D III which at the time was pretty top tier, and really only the 1DX and Nikon equivalent were significantly better/faster at that time. I started using it for high detail bird and nature shots and soon found myself using it for action shots. I really got hooked on the detail more than the ability to get more shots per second. This meant going back to what I used to do with older slower cameras trying to time my shots to ensure I got the precise moment in a action sequence….of course I missed moments that I might have gotten with the 5D IV but when I did get it, I often had a shot that was able to be printed much larger.

Red-shouldered hawk taking off. Canon 5DS with Canon EF500mm f/4L IS II USM +1.4x III. 700mm, 1/1250s, ISO 800. Original 8688x5792 cropped to 4178x4178. Printable at 300DPI to nearly 14 inches. Image posted at 2000x2000.
The ability to crop in on action is liberating since you can’t always get perfect composition while things are moving fast. This allows you to keep action close to the center for good autofocus tracking while shooting and crop the composition that fits the shot afterwards while still keeping enough detail for a good size print. This is starting to become less important with new mirrorless cameras that can focus just about anywhere on the sensor allowing easier composition while tracking, reducing the amount of cropping you need to do. It is nice to have both resolution and full sensor tracking, and nice to have the choices after the shot.

Highly cropped image of a red-headed woodpecker. Taken with Sony A7RII using Canon EF 100-400 F4.5-5.6 IS II and Metabones adapter. 400mm, f/5.6, 1/1000s, ISO 400. Original shot 42 MegaPixels cropped to 1543x1543.
To get a sharp image, you always need to think about technique while shooting. I shoot mostly hand held, even with the 500 and 1.4 teleconverter. You need to be close to or even faster than the reciprocal rule (see explanation below) but the image stabilizers do give you a bit more leeway. The other big bonus of this high resolution is in landscape photography and nature environmental shots. People have asked me why I didn’t go with the 5DSR and the answer is pretty simple….I saw a refurbished 5DS on the Canon web site for nearly $1000 off the list price at the time I was looking for a new camera. The difference to me was not worth another grand.

Osprey landing in Sparkleberry Swamp. Taken with Sony A7RII from a kayak. Sony FE 100-400mm F4.5-5.6 GM OSS + 1.4X Teleconverter. 560mm, f/8, 1/2500s, ISO 1600. Cropped from original shot below.
Once I became hooked on the resolution, I started seeing that I could get both high resolution and better tracking/faster shooting. I love the fact that technology is quickly improving to a point that I can do many things I thought were just not possible a few years ago. As new cameras come out, you no longer need to choose between high resolution or high number of frames per second. Sony A7RIII and Nikon D850 are already there, and I’m pretty sure that the technology in the Sony A9 will make it into higher resolution cameras within the next 3-5 years. So far Canon doesn’t have anything in this space but I would imagine it is just a matter of time now that they have the EOS R. They really just need to be able to process the data coming from the sensor a bit faster…..they have everything else in one camera or another.
Since getting the Canon 5DS I have also gone high resolution on the Sony side. Sony A7RII has also become critical for me, with the Sony 100-400 and 1.4 teleconverter I have reach and detail and can do tracking focus across nearly the whole sensor even at f8.
I do still keep a lower (funny how 24 MegaPixel can be considered low resolution to me now) resolution Sony A7III to get that 10 frames per second and great low light shooting when I do need it. That is a pretty great cheap way to get those capabilities.

Osprey landing in Sparkleberry Swamp. Taken with Sony A7RII from a kayak. Sony FE 100-400mm F4.5-5.6 GM OSS + 1.4X Teleconverter. 560mm, f/8, 1/2500s, ISO 1600. Original 42 MexaPixel image.
Technique
Reciprocal rule: Even with good image stabilization this is very important especially as you get to longer glass handheld. Even though there may not be any difference in the amount of movement you have, you will be able to detect that movement more as your resolution increases. Remember that if your subject is moving, you may still need a higher shutter speed to ensure that you stop the motion.

Cactus Wren taking off. Cropped image from Sony A7RII. FE 100-400mm F4.5-5.6 GM OSS. 400mm, f/6.3, 1/2500s, ISO 800.
Explanation: skip over this if old news to you.
In general for full-frame cameras the reciprocal rule is a good guideline for capturing subjects without ending up with some blur due to the cameras movement while the shutter is open. To ensure sharp images of moving subjects you may need faster shutter speeds still.
With no stabilization and reasonably good technique handheld you should be able to get sharp images with a shutter speed that is the reciprocal of the focal length of the lens. This is definitely a guideline to start with and it is a good starting point. So if you have a full-frame camera and a 400mm lens, a 1/400 shutter speed would be a good starting point for a subject that is not moving quickly. If you are using a camera with a smaller sensor then multiply this by the crop factor for the starting point.
Now with the latest lenses and cameras that have image stabilization you can get sharp images at shutter speeds that are much slower (longer duration of the sensor being exposed). I have found that on static objects I can get about 5 times (more than 2 stops improvement) on the Canon and closer to 10 times (more than 3 stops) on the Sony where there is both camera and lens stabilization. Both companies will advertise that you can get more than that but this is what I have experienced handheld in most conditions.

Great Horned Owl from a perch high in a White Pine, far enough that I had to crop in significantly. Shot handheld with Canon 5DS with EF500mm f/4L IS II USM +1.4x III. 700mm, f/7.1, 1/125s, ISO 1600.
Subject movement: In these cases we are not taking into consideration subject movement or camera movement while shooting.
For moving subjects I will try to never get below 1/1000s and for small birds in flight I will normal double that again. I do this not because they are smaller, but because they move very quickly and I have to be closer to them. This will often mean higher ISO than I would prefer but a little noise is something you can work with, a blurry subject is most often (unless you are specifically going for that) going to mean a lost shot.

Female Mallard taking wing. Using fast shutter to stop wing motion….still a little visible at wing tips. Canon 5DS with EF500mm f/4L IS II USM +1.4x III. 700mm, f/5.6, 1/4000s, ISO 1600.
Hand held technique: The longer and heavier the lens the more you will see the effects of your good or bad technique. Holding your breath as you focus and as you hit the shutter can reduce some shake and I have found to be a good way for me to concentrate on being steady. Find a way to stabilize your arms, elbows in to your body if standing. If you can stabilize your body or the camera against a tree, fencepost even better.

Young black bear in the fields in Cades Cove. I would often use fence posts to help steady my shots as I waited for action from these bear. Taken with Canon 5DS using EF500mm f/4L IS II USM +1.4x III. 700mm, f/5.6, 1/640s, ISO 1600.
Smooth motion while tracking: This gets more difficult as the lens gets longer and heavier. When I first got the Canon 500mm it took quite a few weeks of shooting to get used to keeping a subject tracked even though I had been using a 100-400 with the 1.4 teleconverter regularly. The length of the lens was a new challenge to keep steady as was the different weight distribution. Every lens and camera combination has a different center of mass, and you hold them at slightly different points. I have found that the only real way to adjust to this is more time practicing. Panning is a difficult technique to perfect and it only gets more difficult as your resolution increases. Smooth movements and smooth action on the shutter button will give you the best chance to get a sharp subject.

Barred Owl hunting for Vole. Canon 5DS with EF500mm f/4L IS II USM. 500mm, f/4, 1/2500s, ISO 1600
What I’m hoping for in the Future and what I think is coming.
There are still times that having 10 or even 20 frames per second is useful, I have missed what I think was the best moment in a string of shots. However, I have learned to work on the timing and when I get the shot I can do more with it than before. I keep a Sony A7III with a 100-400 within reach for those moments that look like they will turn into faster action.
What I would love to see in the next few years is a combination of what I already see either coming down from high end cameras or just putting a number of existing bits in one camera.
The Sony A9 and the Nikon D850 as well as the Sony A99II that has been mostly forgotten have a good deal of the technology that I think will be common in a couple of years. Currently and with the coming firmware updates the Sony A9 has most of the autofocus capabilities that I can currently imagine needing. I’m sure the first implementations of animal eye autofocus will not be perfect but that will be fantastic as it improves to a point that all I really need to do is choose the animal/eye I want and then I can purely concentrate on the composition and action.

White Tailed buck in the fields near Whitby, Ontario. Canon 5DS with EF500mm f/4L IS II USM +1.4x III. 700mm, f/5.6, 1/200s, ISO 1600.
I do think that the electronic shutter on the A9 is what I would like to see on a high resolution sensor the most. I realize that is also the most difficult and likely expensive thing to want. Silent shutter would be amazing for nature, however the implementation in any camera other than the A9 means that it is only really useful for static subjects. This is due to the amount of time it takes to access and push to memory all the the data from the sensor and currently means that you will notice motion artifacts in your shots on anything other that the A9.
Buffer is the next issue when looking at high resolution and high frame rates. The ability to get >100 raw images before the buffer slows you down may seem like a lot but when action happens in nature I often will take 3-5 shot bursts and may need to do many of these until the action stops. Examples might be bull elk fighting or herons chasing each other. The solution to this will come in faster memory cards and larger memory buffers…both of these will increase cost of camera and not everyone will want to pay for it.
Really what I’m hoping for is a combination of the Sony A9 and the Nikon D850 and I know if it comes out I’m going to not like the price. I do think a camera like this is coming, I just don’t know who is going to come out with one first. Sony has already shown most of the capabilities and the A9 shows they are willing to put something out there. Canon and Nikon both are likely to first try to come out with a fast 20-30 MegaPixel fast mirrorless camera for the upcoming Olympics and are unlikely to bother with a higher resolution one that also has high frame rates at this time since there are likely not that many sport shooters that are currently asking for that.
Beach Boneyards of South Carolina
The coast changes rapidly along the eastern seaboard. Weather makes new sand bars and takes them away over time and sometimes within one storm. One interesting part of this change are the beach boneyards…

Salwa shooting through the roots on the beach at Botany Bay Plantation
Growing up in the snow belt of Ontario we all dreamed of March break on the beaches of the South East coast. You thought of the sandy beaches, the warm water (or at least not frozen solid), golf courses and beach houses. Interestingly, now that I can get to those beaches in a few hours I look for things that are a bit different in my beach vacations.
The coast changes rapidly along the eastern seaboard. Weather makes new sand bars and takes them away over time and sometimes within one storm. One interesting part of this change are the beach boneyards, locations that don’t look like they have changed in years with dead trees on the beach that are exposed every 6 hours or so with the tide.
There are two locations in South Carolina that are fairly easy to get to wander along and are fantastic for landscape photography. Hunting Island State Park is a good starting point. You can camp on the Island or stay in the nearby town of Beaufort. The other location is Botany Bay Plantation close to Edisto Beach. Edisto Island also has camping or beach houses that can be rented.
Both of these locations have been hit hard by hurricanes in the last couple of years, changing the landscape and often making it a challenge to get out to these locations.

So many textures and details on the beach at Hunting Island state park
Hunting Island
Camping at Hunting Island State park will allow you access to the beach boneyard as well as the salt ponds and marsh areas at all times of day or night. You are going to want to walk this beach at sunrise, during the day, through sunset and even get night shots with long exposures.
Shore birds are plentiful wandering around the dead trees as the tide goes out, with plenty of herons and egrets looking for fish caught in tidal pools. Bald eagles and Osprey can be found along the salt marsh and in the big pond. Pelicans will be feeding just off shore and black skimmers flocks will fly by. In the woods there are plenty of small birds including the painted bunting….or at least that is what I have been told….still don’t have a good picture of one.

Snowy egrets playing and preening after the tide went out in the salt marsh on Hunting Island.
Late spring and early summer is a good time to chance upon nesting loggerhead turtles. Take a look at the website for when it is best to see the turtles nesting and the babies hatching.
One thing to be prepared for is the no-see-ums. These little bugs live up to there name and can be active to the point of frustration on the beach just at dusk. If you can make it through, they do disappear again leaving you to enjoy the night sky.

Sunrise on the beach at Hunting Island State park. Get out early, it is worth it.
For dusk and dawn definitely bring a good tripod, long exposures of the water swirling around the trees can look amazing. Astrophotography can be excellent as well, especially if you use some of the trees in the foreground.
As the tide goes out take out your telephoto lens and start looking for birds. Ibis, tri-colored herons, little blue herons, wood storks and plenty of egrets can be found looking for what didn’t make it back to the ocean. This is a great place to get down low and shoot these birds feeding and fighting at eye level.

Tri-colored heron hunting on hunting island
Botany Bay Plantation - Edisto Beach
Edisto Beach State park has camping on the beach and a second area that is more protected on the other side of the salt marsh. Both locations make for a great place to relax. The beach is a “no light zone” or certain times of the year when the loggerhead turtles nest on this beach. There are organized night walks if you are there in June or July. If you want to take pictures you will need to do so without flashes, so high ISO capabilities will be important.

Sunset on the beach bone yard at Botany Bay Plantation
The beach itself is great for morning and evening walks with tonnes of seashells to pick through. The boneyard beach is a few miles away on Botany Bay Plantation which is accessible from dawn to dusk but check the schedule as it closes for hunters a few times a week. The drive in through the plantation is beautiful as the live oaks make a canopy over the road and the sun tries to make it through the leaves.
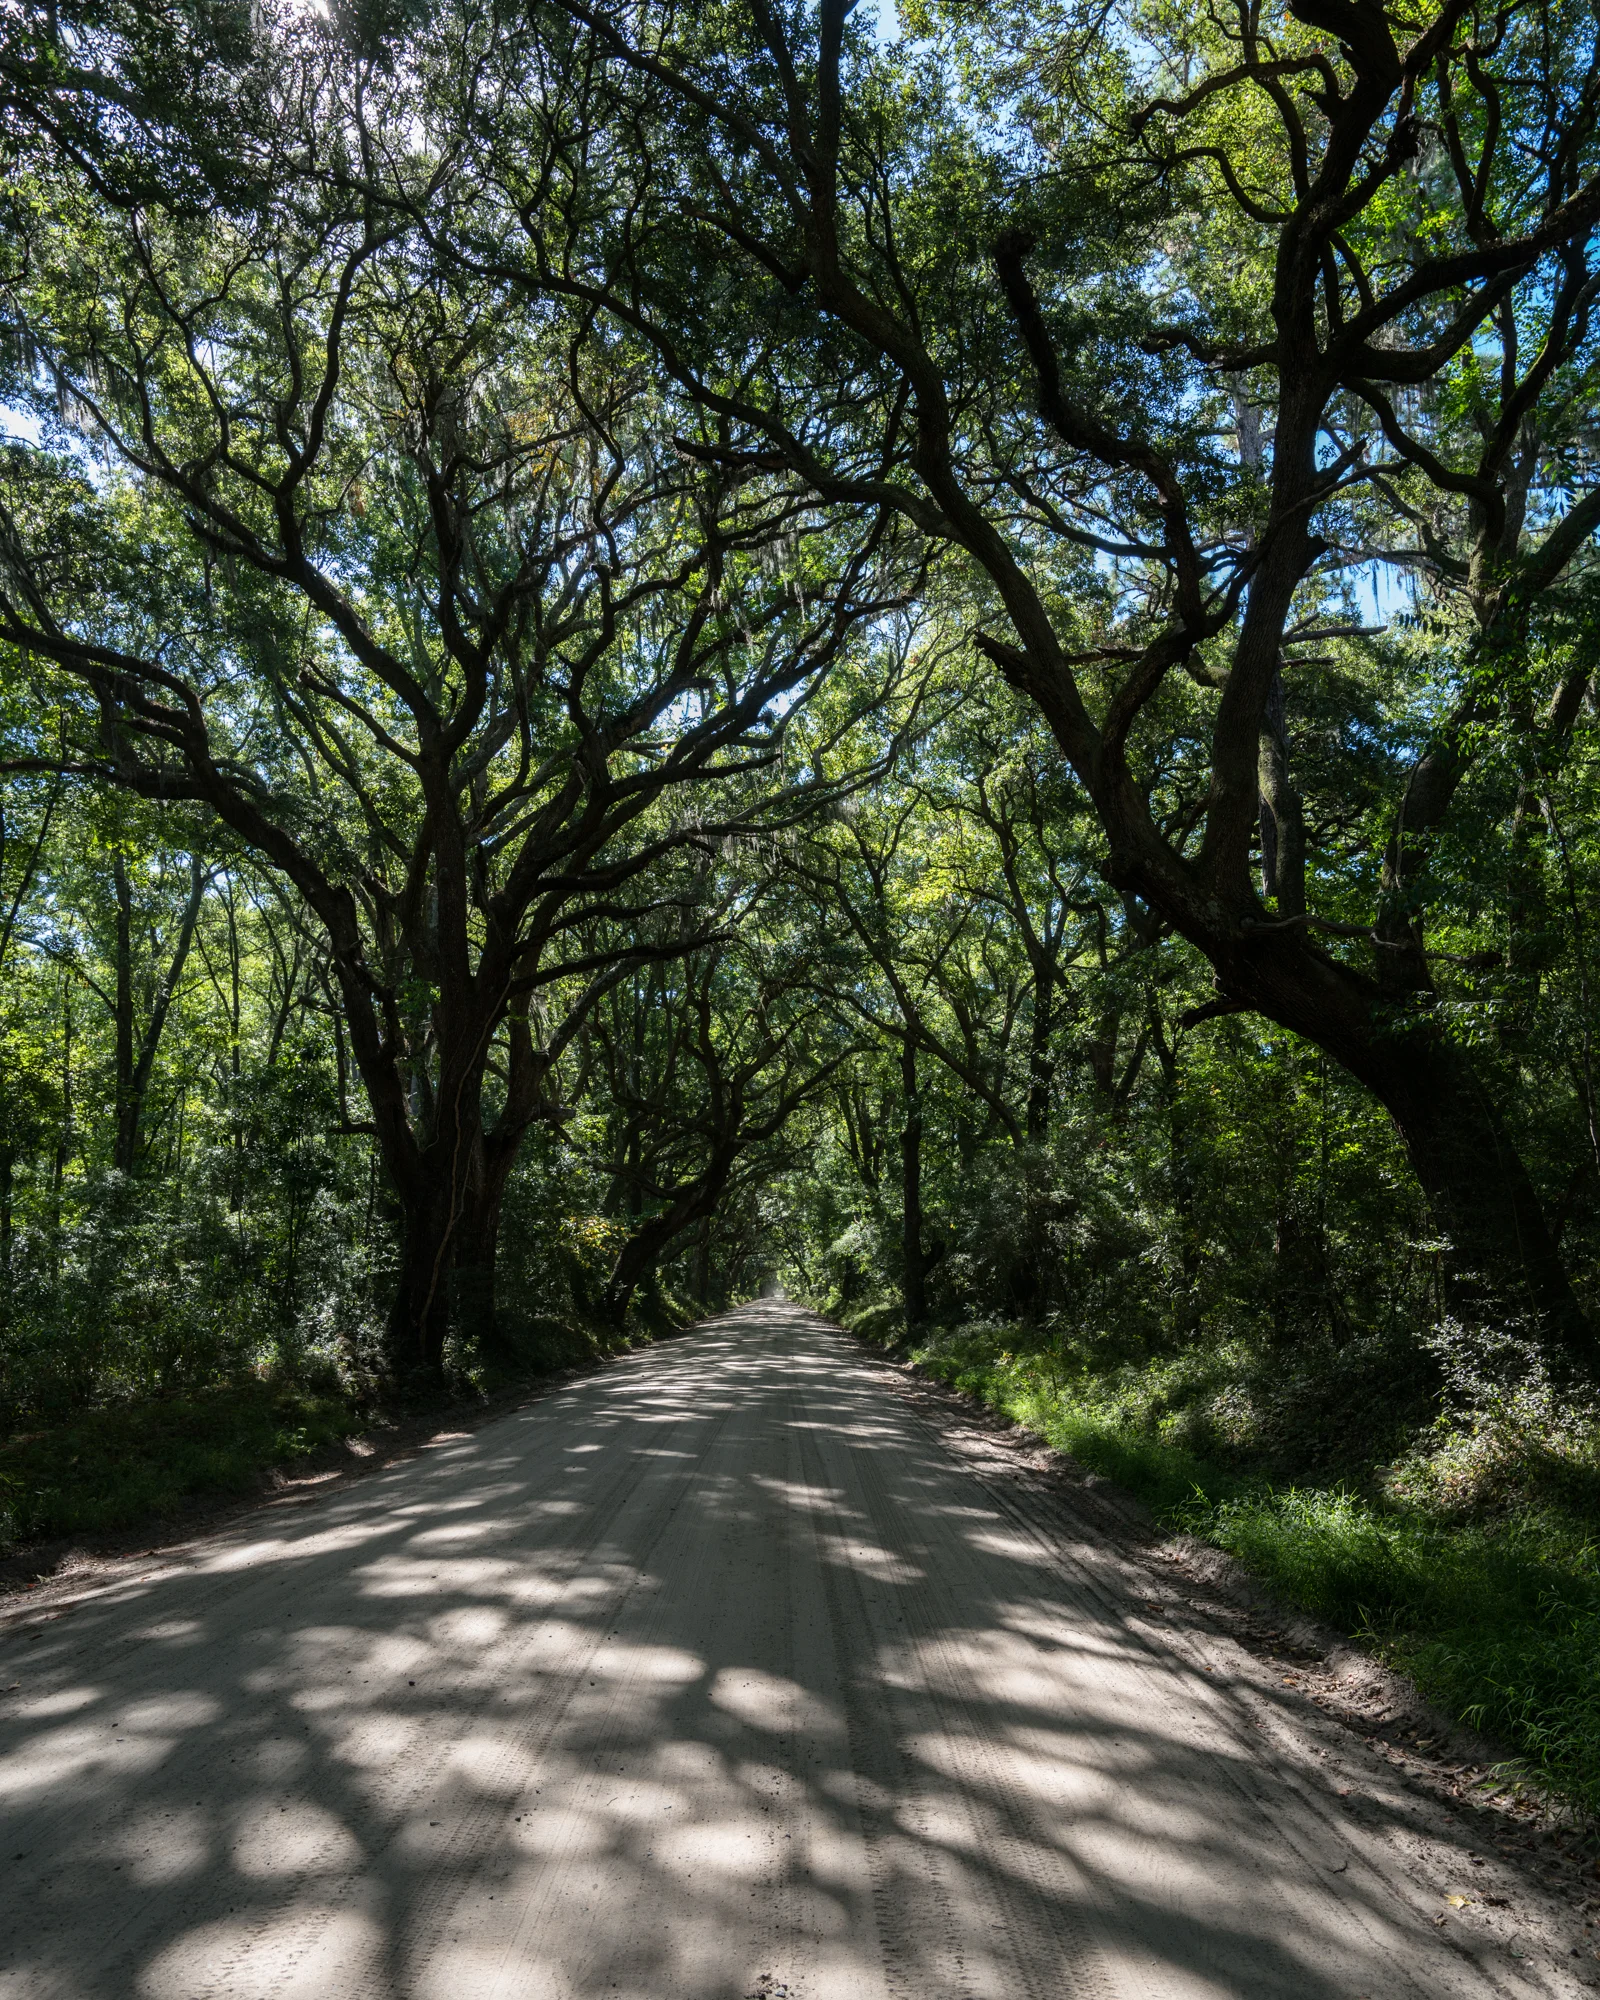
Live Oak canopy drive into Botany Bay Plantation.
To get to the beach itself you need to walk across the salt marsh and through a couple of hammocks (tiny islands with many small birds). As you walk over the last sand bank you come directly into the middle of a boneyard of trees in all directions. The best time to go is about an hour after high tide and up again until about an hour before the next high tide. Sea shells are everywhere as it is illegal to remove anything from the beach. This can make for some amazing foreground elements in your landscape shots. Each time we go we find new compositions based on the height of the tide and what the weather has brought in or moved around.

Shadows and silhouettes at sunset on Edisto Beach
During the high sun we look for details in the scene and wait for the sun to head down for some great shadows and less harsh scenes. If the tide is right, definitely stay for the sunset and have a couple of compositions picked out. The tide moves so quickly that you might need to change up even as the sun starts to set.

Getting down low with ruddy turnstones
There is definitely more to see on the Plantation, a number of places to hike along trails, tidal creeks with plenty of birds and even dolphins fishing along the creeks herding fish up onto the banks and almost beaching themselves to feed. Nearby there is Ernest F. Hollings Ace Basin National Wildlife Refuge with hikes along manmade channels and beautiful old live oaks surrounding an old plantation house.
There is always more to explore on the south east coast, and hopefully soon we will get a chance to tell you about the Georgia and North Carolina coastlines.
Sparkleberry Landing - Entry to a Cypress Swamp
From a nature lovers point of view, there is a hidden gem in central South Carolina that I kind of happened upon accidentally.
From a nature lovers point of view, there is a hidden gem in central South Carolina that I kind of happened upon accidentally. My first month in the south was on my own, and with a rental car and not much to do on the weekends, I began scouting for interesting locations to go to once Salwa joined me. On one of those day trips, I went looking for good locations for shooting birds along some of the larger interior lakes. I wasn’t inspired until near the end of the route on the way back towards Greenville when I noticed a boat launch sign on the north shore of Lake Marion. On the map, it didn’t look like there was much lake at that point for a launch, but I drove down a dusty dirt road lined with dilapidated single wides and rundown pickups until I saw a bunch of empty boat trailers and a concrete boat launch that lead to the water.

Paddling past bald cypress trees as we take off from Sparkleberry landing on the North-West end of Lake Marion, SC.
Getting out of the car, I wandered over to a guy pulling his little flat bottom fishing boat out and asked a few questions to make sure I was actually in a public spot. This is when I got my first real view of what might be the best little kayaking location in all of South Carolina. It would take another couple of months before the movers brought our kayaks, but once we put in here we were hooked and have gone back several times, each time presenting new and different sights and experiences.

Salwa in her Current Designs Suka Kayak with a backdrop of spanish moss
The landing looks out onto a small opening surrounded by beautiful cypress trees with a path at the end that heads out into the greater swamp. Depending on the time of year, you can follow that route out, or in the wetter seasons, you can just head straight into the trees and explore the maze (at least in a kayak or canoe).
The locals all seem to know the routes through the trees, and there are markers along the way, but if you do come down here I would suggest you have a GPS to plot where you start so that you can retrace your path if needed. We’ve gotten turned around a few times looking for alternate routes back to the launch without much luck.

It is so easy to wander off path, so many things to see
Although we love the kayaking, the real reason we keep coming back is the photography. The birds are abundant, and sometimes really noisy. There are turtles everywhere, and while nowhere near as numerous as the Okefenokee Swamp, we’ve also seen alligators. But it is the landscape, or should I say waterscape, that makes this an amazing location for photographers. It doesn’t matter the time of day or season, there is always something different to see. Shadows play across the water and the sun beams through the moss-covered trees creating some amazing moody scenes.
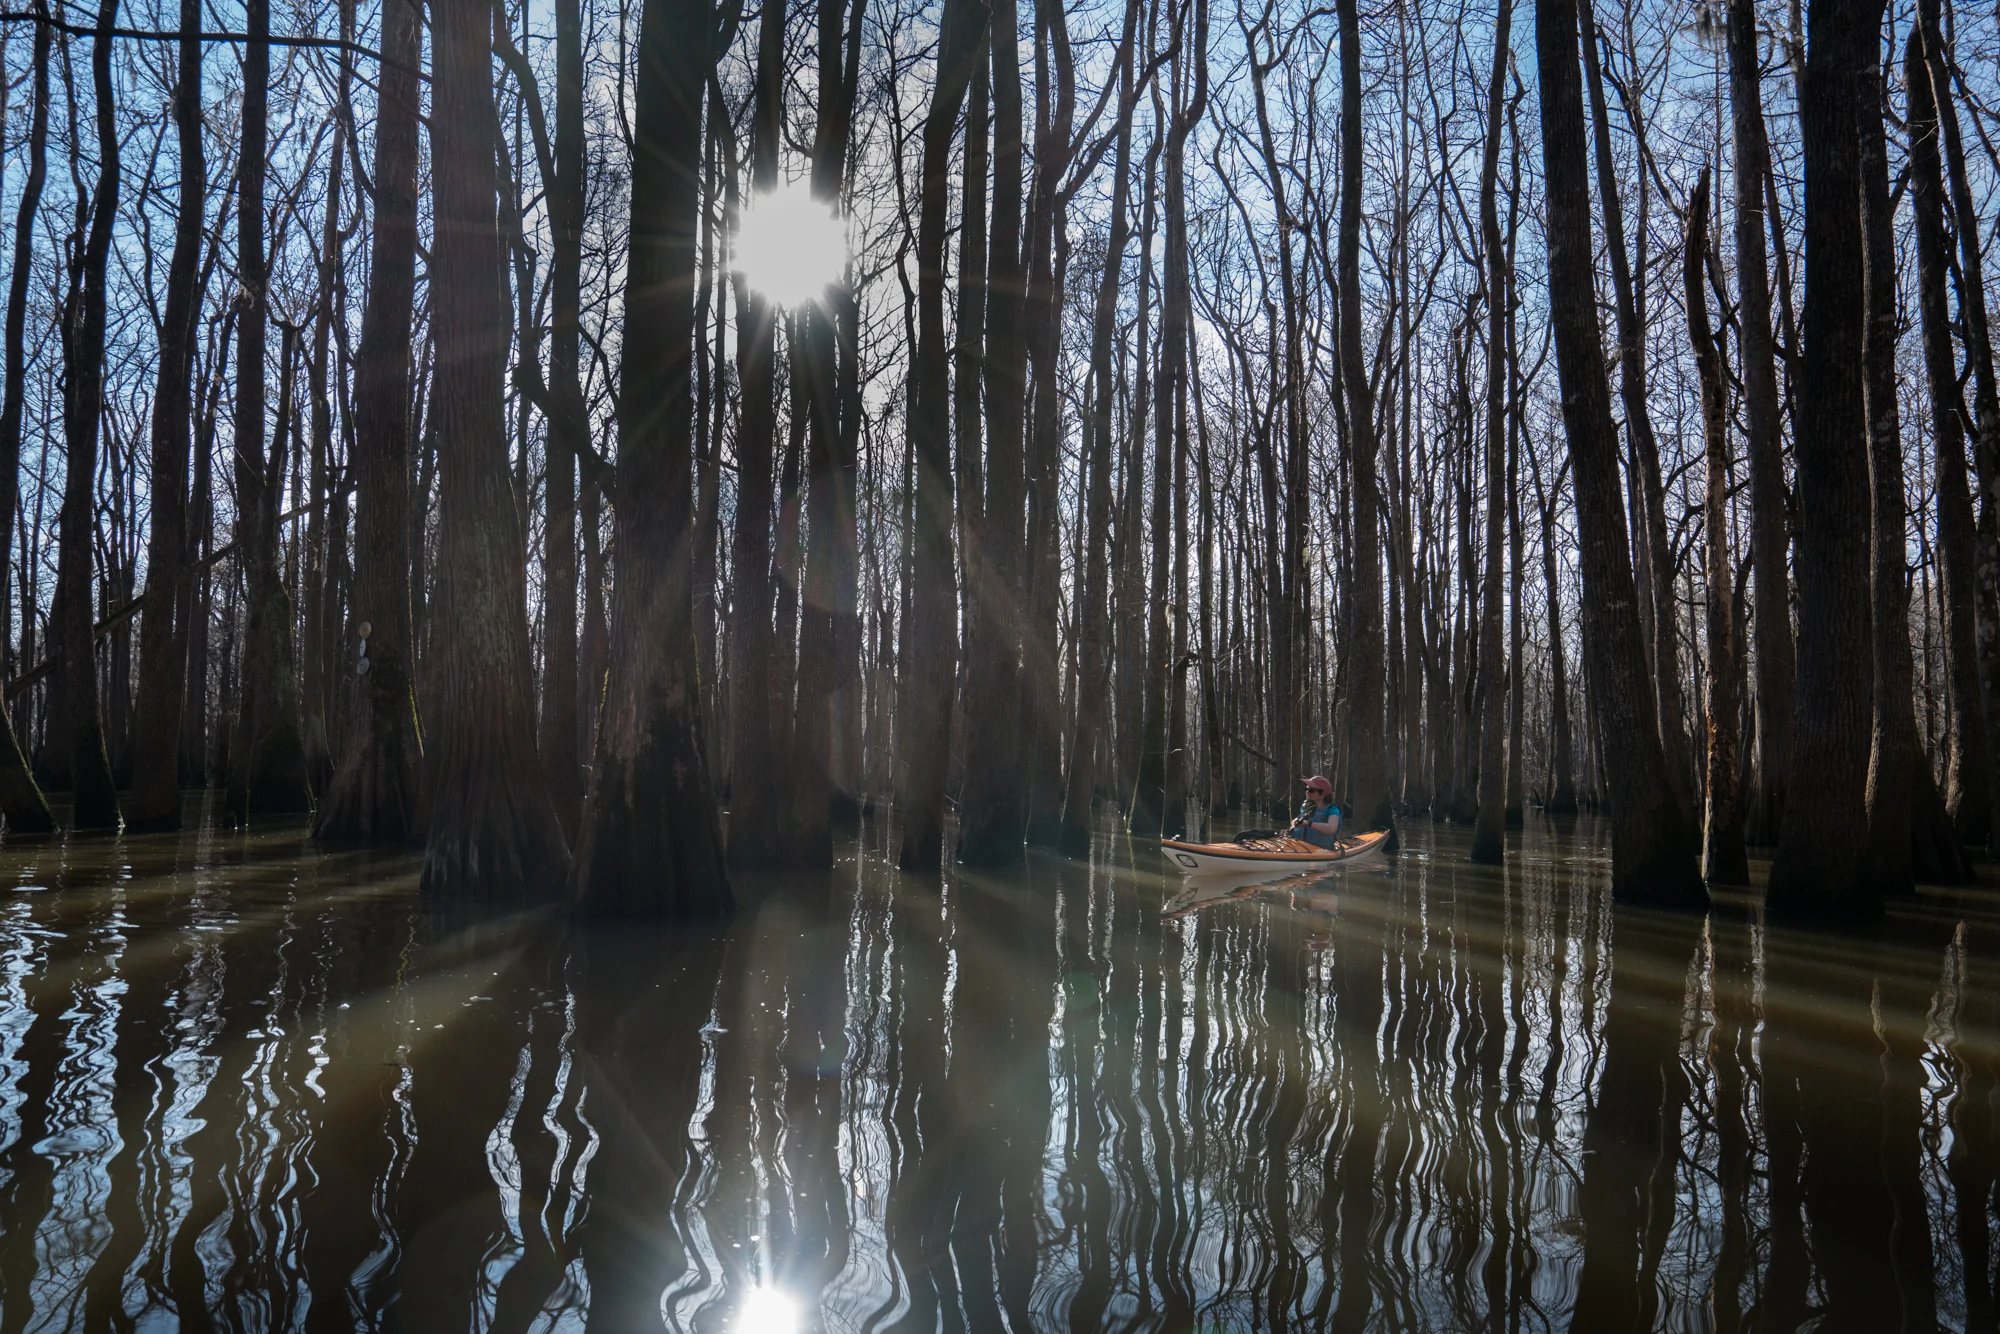
Getting near the end of the day and the shadows were getting longer as we paddled through the cypress trees in Sparkleberry swamp on the north-west end of Lake Marion, SC.
Sparkleberry Swamp is a jewel and for photographers and nature lovers, is definitely worth a wander and a paddle or two.
What To bring:
This is a location that you can quickly lose sight of time and lose yourself in the trees. It’s definitely better to be prepared with plenty of water, snacks, bug spray, sun block, and then more water. It can get surprisingly hot, even in February as we discovered on our most recent trek. Definitely bring a hat, and if you don’t want a goofy burn on the exposed parts of your legs, don’t wear shorts.
I typically bring two cameras, one with a 16-35 and the other with 100-400 and 1.4 teleconverter. A GoPro or similar video camera is a great thing to have attached to the kayaks if you have one (or a couple). I bring a towel that sits between my legs that I keep the telephoto ready to shoot and the wide angle sits in a deck bag just in front of me. One thing I would love to figure out is a tripod-like device that could sit on the rim and fold easily back down for paddling. If there is anything like that out there, please let me know, I would love to test it out.

What you might see:
You are very likely to see most of the usual water birds: ibis, egret, herons, and anhinga. Last year we were lucky enough to see two Limpkin in the trees, a pretty rare sighting in this part of South Carolina.

Limpkin - rather rare to find in this area but hard to miss as its call was definitely unique.
When you pull in to the parking lot you are likely to hear red-shouldered hawks, barred owls, and osprey before you even get on the water. The Osprey nest in the trees and are pretty easy to locate, and they always announce their presence when you get near them.

Pair of Osprey doing what they do in their nest
The beauty of the marsh itself is one of the main things to shoot. Cypress trees, reflections, mist, sun, Spanish moss….there is so much and so many combinations from sunrise to sunset we could go back a dozen times and not scratch the surface of all the potential shots.

Where to stay, what else is nearby:
Sparkleberry landing is approximately 1 hour from Columbia or 1.5 hours from Charleston. Both great places to stay as a base. Congaree National Park is a half hour back towards Columbia and a little closer is Poinsett State Park. The launch itself isn’t much and there are no facilities near by. Of course there are great opportunities for coastal nature photography all down the coast from Myrtle beach down to the Georgia border with Edisto Beach and Hunting Island as two other great locations that I will be writing about soon.
Quick tips:
Being in a kayak gives you a great low angle for shooting a new perspective, take advantage of this and get your camera down low.
Bring filters as the light changes greatly as you move through the different parts of the swamp. A circular polarizer can help reduce glare and help keep the sky blue.
Remember that you are on a moving platform, keep your shutter speeds high enough as you may not notice the boat moving. A gimbal (dji ronin-s is the one I use) can really help with video as you won’t notice the boat rocking until you get back and start editing.
Keep a towel and some micro fiber cloths since it’s inevitable that you will get water on the camera and lenses at some point.
Pay attention to small details as well as the larger scenes, there is so much to see sometimes you can totally miss the proverbial forest for the trees.
Bring a good GPS. It is easy to get turned around in the miles of cypress trees, sometimes even the marked trails the fisher people use can be confusing with ribbons marking favorite spots as opposed to a return route.
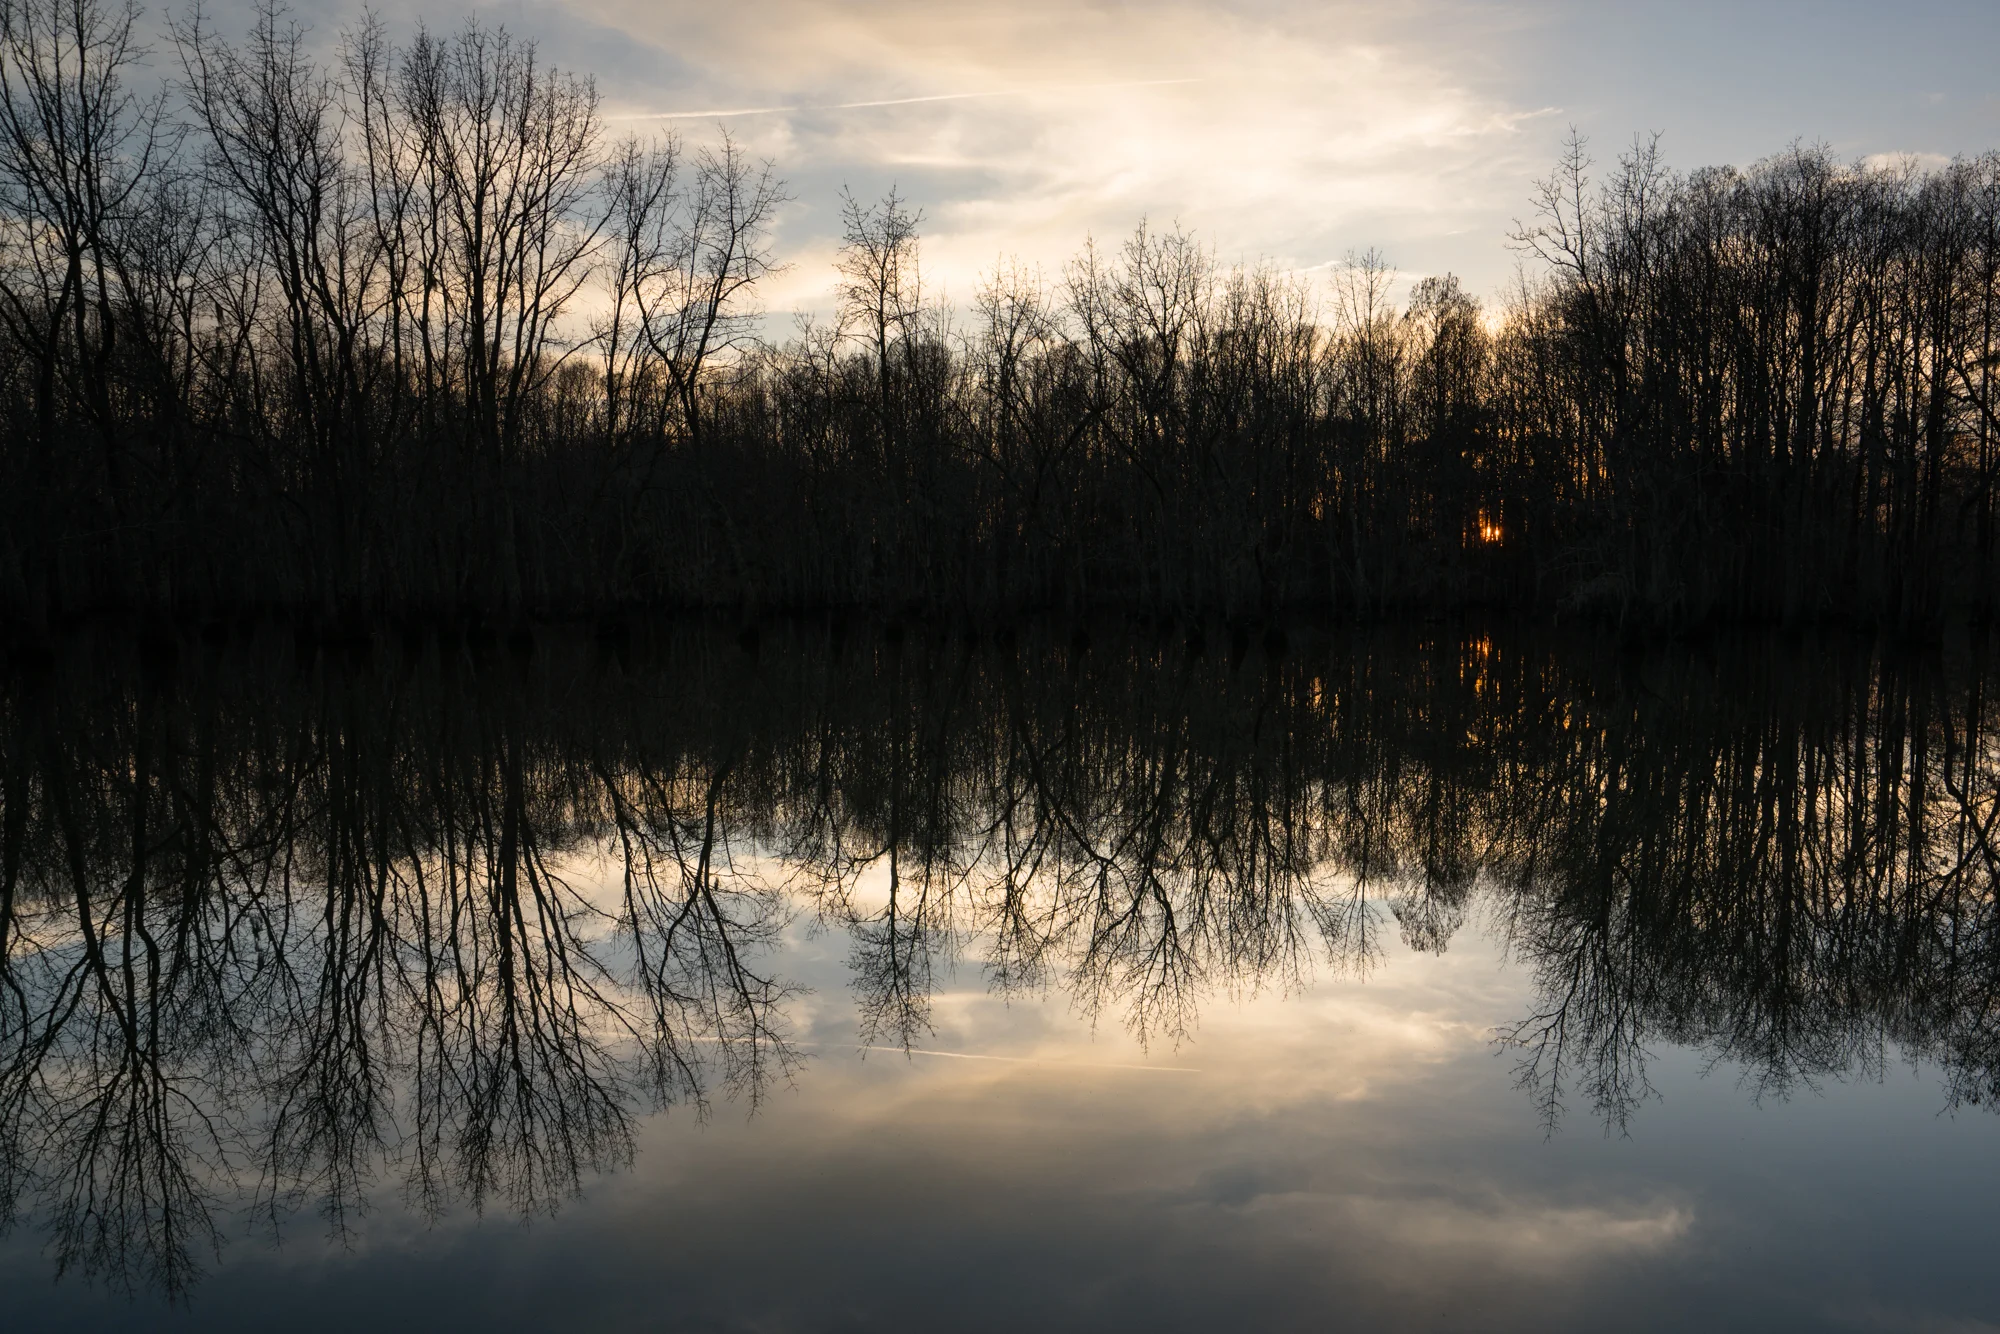
Sunset back at Sparkleberry landing, time to pack up the kayaks and head back upstate.